Keen:AI Bots: Difference between revisions
CptTwinkie (talk | contribs) mNo edit summary Tag: SEO |
CptTwinkie (talk | contribs) m (CptTwinkie moved page Official Content/AI Bots to Keen:AI Bots) |
||
(No difference)
| |||
Revision as of 10:48, 29 June 2018
This item became obsolete in version 0.3. It was removed, or will be removed, in version 0.3.
| Version: | 0.4 |
Creating behavior
Introduction
This tutorial presents how to create simple behavior for barbarian step by step. The only requirement for this tutorial is to get Medieval Engineers mod SDK which can be found in Steam library under Tool section. For curious readers, tutorial about behavior trees and the behavior tree tool can be found under this address.
Jumping barbarian behavior
In order to create a new behavior, we will need to open the behavior tree tool. It can be accessed from ME mod SDK which you can find in the Tool section on Steam.
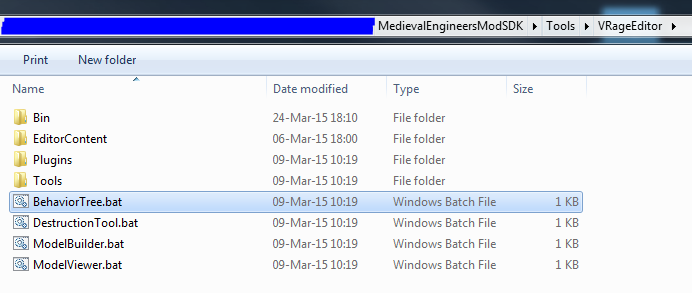
When you double click Medieval Engineers - Mod SDK, it will open the root folder with tools. In order to open behavior tree tool you need to go to Tools folder and then to VRageEditor folder. In VRageEditor folder, start BehaviorTree.bat which will open the behavior tree tool.
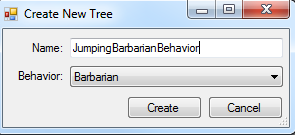
The first step is to create a new behavior tree. To do this, click the "New tree" button in the upper left corner of the application. A new window with two fields will pop up in which you can specify the name and the kind of behavior you want to create. In this tutorial we are going to make jumping barbarian behavior, so let's call our new behavior JumpingBarbarianBehavior and set the Behavior field to Barbarian.
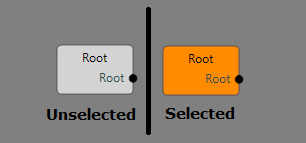
When you click the "Create" button, the window will be closed and the behavior tree graph area control with the grey background will appear in the behavior tree tool. In this control we will add new nodes and create our AI. On the creation, the control automatically adds the Root node which is the main node of a behavior tree. The orange color of the node signalizes that the node is selected. You can select node by clicking on it with the left mouse button.
Our first and only child of the root node will be selector node. To do it, let's select the root node and click on the "Add node" button in the upper menu. From the pop-up menu pick Selector value and click the Ok button. If you did the steps correctly, a selector node should be added next to the root node. There should be also connection (a black arrow) between two nodes. If it is not a case, you can create a new connection between nodes by clicking and dragging a mouse cursor from a node's black dot to the another node's black dot. If you want to remove a connection between two nodes, you can double click the arrow.
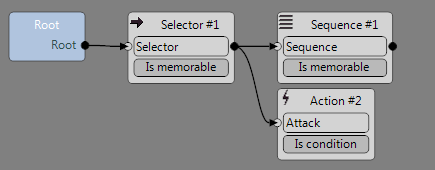
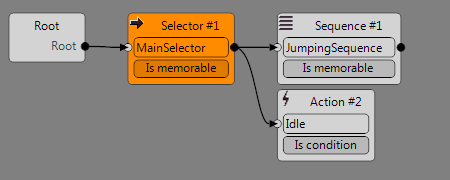
The root node can only have one child node (in our case selector node). A selector node can have any number of child nodes. We decided to pick selector as the first node because of its property of finishing the run on the first child which returns SUCCESS or RUNNING states. You can find more about it in the tutorial mentioned at the beginning of this tutorial. Let's add two new nodes to the selector node. The first one will be a sequence node and the latter will be an action node. You can tell the application to automatically reorganize the layout of the nodes by clicking the "Refresh layout" button in the upper menu.
Let's change the action of our newly added action node. Double click the first value field in the action node (by default, in barbarian behavior, it has "Attack" value set), and in the pop-up window change the value of the field to "Idle". At this point it would be great to change names of selector and sequence nodes to more meaningful ones. Let's call them MainSelector and JumpingSequence respectively. You can change the name of these nodes by double clicking their value fields (by default they have values Selector and Sequence). Changing names of selectors and sequences does not affect how a behavior works. It is simply a cosmetic change that increases the readability of a behavior.
The next step is to design our jumping sequence. What we want our bot to achieve is to find a player character in some radius, get to the found character and jump next to him. Barbarian behavior exposes a set of actions that can help us with making it happen. The very first action that we are going to add to the jumping sequence is going to be "FindCharacterInRadius". It has two parameters:
- radius - which specifies in what radius the action should look for a player character,
- output player character - in this field you can specify under what name the found player character will be stored in the memory. This name can be used in different actions as an input parameter (if type is supported of course).
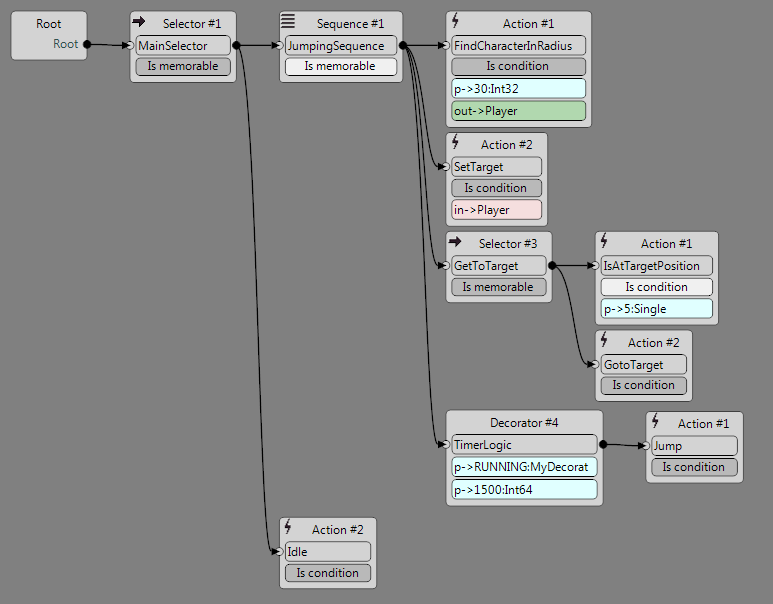
In our case we want to look for a player in radius of 30 meters and we will save it under "Player" name in the memory. The second node in the jumping sequence is going to be "SetTarget" action node. "SetTarget" has input parameter which is the name of some target stored in the memory. In our case it is found character from "FindCharacterInRadius" action. Therefore, provide it with the "Player" value.
After setting the target, we have to get to the character. To do this, we will add a selector node with two child action nodes to the jumping sequence. Let's name the selector node GetToTarget. The first action of the GetToTarge selector should be "IsAtTargetPosition" action that takes as a parameter the tolerable area radius around the target. The second action is "GotoTarget" which makes the character move towards the target. GetToTarget selector ensures that we will get to our target.
The last child node of the jumping sequence is a decorator node. There can be two types of decorators: a timer decorator (it activates after the specified amount of time passes) and a counter decorator (it activates after the specified call count has been reached). We are going to pick the timer decorator node by changing first value of a decorator node to "TimerLogic". In the second value, let's choose RUNNING which stands for the default value that decorator returns. The last one specifies value dependent on the decorator type. In the case of a timer decorator, it is time in milliseconds after which the decorator will run its child node. Let's provide it with the value of 1500 ms. You can find more about decorators and related concepts under this link. As a decorator can only have one child, we are going attach "Jump" action node to it.
As the final modification to our behavior tree, let's mark the JumpingSequence node as a memorable (by clicking on the "Is memorable" box). It means that while doing the jumping sequence we want to focus only on the node that was processed last time. Below you can see the final state of the behavior tree:
Now you can safely export the behavior tree to a file. Click the "Export tree" button in the upper menu and select which behavior you want to export. The next step is to specify a file to which you want to save selected behaviors. In the next tutorial I will present you how to create a mod with our jumping barbarian!
Creating bot
Introduction
In the previous tutorial we have created jumping barbarian behavior. Now we are going add it to the game. The bot will appear in the g-screen menu under Bots tab, so you will be able to spawn him at any location.
Creating definition
In order to make our bot available in the game, we have to define a bot definition. Let's create a new file MyBots.sbc in which we will define our previously created behavior.
<?xml version="1.0"?>
<Definitions xmlns:xsi="http://www.w3.org/2001/XMLSchema-instance" xmlns:xsd="http://www.w3.org/2001/XMLSchema">
  <Bots>
    <Bot xsi:type="MyObjectBuilder_HumanoidBotDefinition">
      <Id>
        <TypeId>MyObjectBuilder_HumanoidBot</TypeId>
        <SubtypeId>JumpingBarbarian</SubtypeId>
      </Id>
      <DisplayName>Jumping Barbarian</DisplayName>
      <Icon>Textures\GUI\Icons\SpawnBarbarian.dds</Icon>
      <BotModel>Medieval_barbarian</BotModel>
      <BotBehaviorTree Subtype="JumpingBarbarianBehavior" />
      <BehaviorType>Barbarian</BehaviorType>
      <TargetType>Humanoid</TargetType>
      <StartingItem Subtype="Mace" />
      <Public>true</Public>
      <AvailableInSurvival>false</AvailableInSurvival>
      <InventoryContentGenerated>true</InventoryContentGenerated>
      <InventoryContainerTypeId>
        <TypeId>ContainerTypeDefinition</TypeId>
        <SubtypeId>BarbarianBagContent</SubtypeId>
      </InventoryContainerTypeId>
      <FactionTag>BARB</FactionTag>
    </Bot>
  </Bots>
</Definitions>
The definition above will tell the game what kind of bot we want to create. The bot is going to use jumping behavior. The next step is to a create toolbar item for the g-screen menu.
<?xml version="1.0"  encoding="utf-8"?>
<Definitions xmlns:xsi="http://www.w3.org/2001/XMLSchema-instance" xmlns:xsd="http://www.w3.org/2001/XMLSchema">
  <CategoryClasses>
    <Category>
      <Id>
        <TypeId>GuiBlockCategoryDefinition</TypeId>
        <SubtypeId/>
      </Id>
      <DisplayName>DisplayName_Category_Bots</DisplayName>
      <Name>Bots</Name>
      <Public>true</Public>
      <ItemIds>
        <string>BotDefinition/JumpingBarbarian</string>
      </ItemIds>
    </Category>
  </CategoryClasses>
</Definitions>
Now let's create a new folder JumpingBehavior and create Data subfolder inside of it. Then, move all three files (JumpingBehavior.sbc, MyBots.sbc and Categories.sbc) to Data folder. Another step is to copy our JumpingBehavior folder to Roaming/MedievalEngineers/Mods folder. Now you can open the game and add our mod. As stated before, you will find the jumping barbarian under Bots tab in g-screen menu. Enjoy!
Link: http://steamcommunity.com/sharedfiles/filedetails/?id=413831474

