Large Stone: Difference between revisions

From Medieval Engineers Wiki
Jump to navigation Jump to search
mNo edit summary
Tag: SEO
mNo edit summary
 
(2 intermediate revisions by the same user not shown)
Line 1: Line 1:
{{SEO|image_url=http://www.medievalengineerswiki.com/images/5/5c/StoneLarge.png|description=Large stones can be mined from the ground. They can only be produced from rocky ground.}}
{{SEO|image_url=https://mec-wiki-media.storage.googleapis.com/images/5/5c/StoneLarge.png|description=Large stones can be mined from the ground. They can only be produced from rocky ground.}}
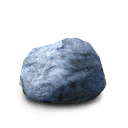
{{Thumbnail|StoneLarge.png|Large Stone}}
{{Version <!-- Do not change the version until the entire page is up-to-date -->
|release=0|major=6}}
|release=0|major=7|minor=X}}
{{HistoryId|0.5|10423}}
{{HistoryId|0.6.4|16643|0.6|14997|0.5|10423}}


<!-- 0.5 Description: '''Large Stone''' is an early-game resource used to build most of Medieval Engineers' blocks. It can be mined from the ground using an appropriate tool. -->
<i>"Large stones can be mined from the ground.
<i>"Large stones can be mined from the ground.<br/>
They can only be produced from rocky ground."</i>


Line 20: Line 19:
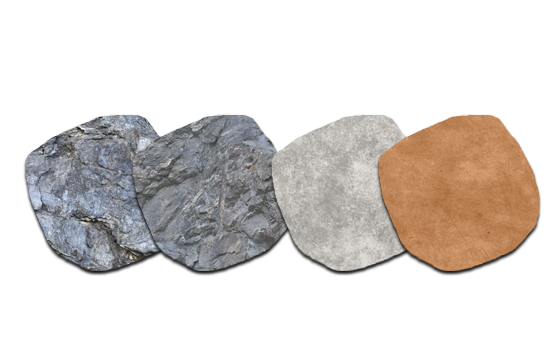
[[File:Stones.png|450x450px|frameless]]
[[File:Stones.png|450x450px|frameless]]
<!-- Start exported template data. Please do not edit this section -->
{{Resource
{{Resource
|usedtobuild=
|usedtobuild=
{{Table-Start}}
{{Table-Start}}
{{Table-ImageCell|BattlementStoneStraight.png|Battlement}}
{{Table-ImageCell|StoneBattlementRoundSmall.png|Small Round Battlement}}
{{Table-ImageCell|StoneBattlementSideDiagonal.png|Diagonal Battlement}}
{{Table-AddRow}}
{{Table-ImageCell|StoneBattlementRoundLargeSide.png|Large Round Battlement}}
{{Table-ImageCell|LedgePlatform.png|Ledge Platform}}
{{Table-ImageCell|SmallRoundLedgePlatform.png|Small Round Ledge Platform}}
{{Table-AddRow}}
{{Table-ImageCell|DiagonalLedgePlatform.png|Diagonal Ledge Platform}}
{{Table-ImageCell|LargeRoundLedgePlatform.png|Large Round Ledge Platform}}
{{Table-ImageCell|KingStatue.png|King Statue}}
{{Table-AddRow}}
{{Table-Cell|}}
{{Table-ImageCell|StoneCube.png|Stone Cube}}
{{Table-Cell|}}
{{Table-ImageCell|SmallSlope.png|Small Slope}}
{{Table-ImageCell|StoneRoundedFull.png|Small Round Corner}}
{{Table-AddRow}}
{{Table-ImageCell|StoneStairsSimple.png|Stairs}}
{{Table-ImageCell|AngledStairsSlopeCorner.png|Angled Stairs Slope-Corner}}
{{Table-ImageCell|StoneArchFull.png|Small Arch}}
{{Table-AddRow}}
{{Table-ImageCell|HouseStoneRoundIn.png|Round Interior}}
{{Table-ImageCell|StoneRoundInDoorLeft.png|Round Interior Entrance, Left}}
{{Table-ImageCell|SpiralStairs.png|Stairs, Right Spiral}}
{{Table-AddRow}}
{{Table-ImageCell|StairsSharp.png|Angle Stairs, Right Spiral}}
{{Table-ImageCell|StoneCeilingStraight.png|Arch}}
{{Table-ImageCell|LargeSlope.png|Large Slope}}
{{Table-AddRow}}
{{Table-ImageCell|StoneBlockSlopeCorner.png|Angled Slope-Corner}}
{{Table-ImageCell|StonePillarSquare.png|Square Pillar}}
{{Table-ImageCell|StoneRoundLargeFull.png|Large Round Corner}}
{{Table-AddRow}}
{{Table-ImageCell|StoneWall.png|Wall}}
{{Table-ImageCell|StoneWindow.png|Wall With Window}}
{{Table-ImageCell|StoneDoor.png|Wall With Entrance}}
{{Table-AddRow}}
{{Table-ImageCell|StoneArchFullWall.png|Wall With Arch}}
{{Table-ImageCell|StoneRoundedWall.png|Small Round Wall}}
{{Table-ImageCell|StoneRoundedWindow.png|Round Wall With Window}}
{{Table-AddRow}}
{{Table-ImageCell|StoneRoundedDoorOfset.png|Round Wall, Left Entrance}}
{{Table-ImageCell|StoneWallArchHalf.png|Wall Arch, Left}}
{{Table-ImageCell|StoneWallDoorCenter.png|Large Wall With Entrance}}
{{Table-AddRow}}
{{Table-ImageCell|StoneWallWindowCenter.png|Large Wall With Window}}
{{Table-ImageCell|WallSlopeLeft.png|Wall Slope, Left}}
{{Table-ImageCell|HouseHalfStoneTriangleOdd.png|Wall Top}}
{{Table-AddRow}}
{{Table-ImageCell|StoneWallRoundLarge.png|Large Round Wall}}
{{Table-ImageCell|LargeRoundWallRightDoor.png|Large Round Wall, Left Entrance}}
{{Table-ImageCell|LargeRoundWallLeftDoor.png|Large Round Wall, Right Entrance}}
{{Table-AddRow}}
{{Table-ImageCell|LargeRoundWallDoubleDoor.png|Large Round Wall, Double Entrance}}
{{Table-ImageCell|LargeRoundWallRightWindow.png|Large Round Wall, Left Window}}
{{Table-ImageCell|StoneWallRoundLargeWindow.png|Large Round Wall, Right Window}}
{{Table-AddRow}}
{{Table-ImageCell|LargeRoundWallDoubleWindow.png|Large Round Wall, Double Windows}}
{{Table-ImageCell|BattlementRoofTriangle.png|Roof Battlement, Right}}
{{Table-ImageCell|MachicolationRoundLarge.png|Large Round Machicolation}}
{{Table-AddRow}}
{{Table-ImageCell|MachicolationRound.png|Small Round Machicolation}}
{{Table-ImageCell|MachicolationStraight.png|Machicolation}}
{{Table-ImageCell|DrawBridge.png|Wooden Drawbridge}}
{{Table-AddRow}}
{{Table-ImageCell|Portcullis.png|Wooden Portcullis}}
{{Table-ImageCell|WoodenGate.png|Wooden Gate}}
{{Table-ImageCell|ClaimBlock.png|Claim Block}}
{{Table-AddRow}}
{{Table-ImageCell|BattlementStoneStraightCenter.png|Ledge Battlement}}
{{Table-ImageCell|LedgeBattlementOutsideCorner.png|Ledge Battlement, Outer Corner}}
{{Table-ImageCell|LedgeBattlementInsideCorner.png|Ledge Battlement, Inner Corner}}
{{Table-AddRow}}
{{Table-ImageCell|BattlementStoneCorner.png|Corner Battlement}}
{{Table-ImageCell|StoneBattlement1Round.png|Small Round Ledge Battlement}}
{{Table-ImageCell|StoneBattlementCenterDiagonal.png|Diagonal Ledge Battlement}}
{{Table-AddRow}}
{{Table-ImageCell|StoneBattlementRoundLargeCenter.png|Large Round Ledge Battlement}}
{{Table-ImageCell|LedgePlatformOutsideCorner.png|Ledge Platform, Outer Corner}}
{{Table-ImageCell|LedgePlatformInsideCorner.png|Ledge Platform, Inner Corner}}
{{Table-AddRow}}
{{Table-ImageCell|SmallSlopeRBattlement.png|Small Slope, Right Battlement}}
{{Table-ImageCell|StoneSlope.png|Small Slope, Left Battlement}}
{{Table-ImageCell|SmallSlopeBattlements.png|Small Slope, Double Battlement}}
{{Table-AddRow}}
{{Table-ImageCell|DiagonalStairsSlopeCorner.png|Diagonal Stairs Slope-Corner}}
{{Table-ImageCell|StoneBlockStairsCorner.png|Round Stairs Slope-Corner}}
{{Table-ImageCell|RoundInteriorWithDoorRight.png|Round Interior Entrance, Right}}
{{Table-AddRow}}
{{Table-ImageCell|StairsLeftSpiral.png|Stairs, Left Spiral}}
{{Table-ImageCell|AngleStairsLeftSpiral.png|Angle Stairs, Left Spiral}}
{{Table-ImageCell|ArchOuterCorner.png|Arch Outer Corner}}
{{Table-AddRow}}
{{Table-ImageCell|ArchInnerCorner.png|Arch Inner Corner}}
{{Table-ImageCell|ArchInnerCornerAngled.png|Arch Inner Corner Angled}}
{{Table-ImageCell|StoneSlopeLong.png|Large Slope, Left Battlement}}
{{Table-AddRow}}
{{Table-ImageCell|LargeSlopeRBattlement.png|Large Slope, Right Battlement}}
{{Table-ImageCell|LargeSlopeBattlements.png|Large Slope, Double Battlement}}
{{Table-ImageCell|LargeSlopeVertical.png|Large Vertical Slope}}
{{Table-AddRow}}
{{Table-ImageCell|RoundSlopeCorner.png|Round Slope-Corner}}
{{Table-ImageCell|DiagonalSlopeCorner.png|Diagonal Slope-Corner}}
{{Table-ImageCell|StoneBlockSlopeDiagonal.png|Small Slope Diagonal}}
{{Table-AddRow}}
{{Table-ImageCell|SmallStoneCeiling.png|Small Slope Ceiling}}
{{Table-ImageCell|StoneRoundedDoor.png|Round Wall, Entrance}}
{{Table-ImageCell|RoundWallRightDoor.png|Round Wall, Right Entrance}}
{{Table-AddRow}}
{{Table-ImageCell|WallArchRight.png|Wall Arch, Right}}
{{Table-ImageCell|HouseHalfStoneTriangle.png|Wall Slope, Right}}
{{Table-ImageCell|LargeRoundWallRoundRightDoor.png|Large Round Wall, Right Door}}
{{Table-AddRow}}
{{Table-ImageCell|LargeRoundWallRoundLeftDoor.png|Large Round Wall, Left Door}}
{{Table-ImageCell|LargeRoundWallRoundDoubleDoor.png|Large Round Wall, Double Doors}}
{{Table-ImageCell|LargeRoundWallRightDoorOffset.png|Large Round Wall, Left Entrance Offset}}
{{Table-AddRow}}
{{Table-ImageCell|LargeRoundWallRoundLeftDoorOffset.png|Large Round Wall, Left Door Offset}}
{{Table-ImageCell|LargeRoundWallLeftDoorOffset.png|Large Round Wall, Right Entrance Offset}}
{{Table-ImageCell|LargeRoundWallRoundRightDoorOffset.png|Large Round Wall, Right Door Offset}}
{{Table-AddRow}}
{{Table-ImageCell|LargeRoundWallDoubleDoorOffset.png|Large Round Wall, Double Entrance Offset}}
{{Table-ImageCell|LargeRoundWallRoundDoubleDoorOffset.png|Large Round Wall, Double Door Offset}}
{{Table-ImageCell|StoneWallRoundLargeWindow.png|Large Round Wall, Right Shutters}}
{{Table-AddRow}}
{{Table-ImageCell|LargeRoundWallRightWindow.png|Large Round Wall, Left Shutters}}
{{Table-ImageCell|LargeRoundWallDoubleWindow.png|Large Round Wall, Double Shutters}}
{{Table-ImageCell|RoofBattlementLeft.png|Roof Battlement, Left}}
{{Table-AddRow}}
{{Table-ImageCell|MachicolationCornerIn.png|Machicolation Outer Corner}}
{{Table-ImageCell|MachicolationCornerOut.png|Machicolation Inner Corner}}
{{Table-ImageCell|RoundWallInLeftDoor.png|Round Interior With Door, Left}}
{{Table-AddRow}}
{{Table-ImageCell|RoundWallInRightDoor.png|Round Interior With Door, Right}}
{{Table-ImageCell|StoneWallRoundDoorLeft.png|Round Wall, Left Door}}
{{Table-ImageCell|StoneWallRoundDoorRight.png|Round Wall, Right Door}}
{{Table-AddRow}}
{{Table-ImageCell|WoodShutterRound.png|Round Wall With Shutters}}
{{Table-ImageCell|WoodShutter.png|Wall With Shutters}}
{{Table-ImageCell|StoneWallRoundDoor.png|Wall With Door}}
{{Table-AddRow}}
{{Table-ImageCell|HouseHalfStoneWallArrowSlit.png|Wall With Arrow Slit}}
{{Table-ImageCell|StoneWallArrowSlitCenter.png|Large Wall With Arrow Slit}}
{{Table-ImageCell|HouseStoneRoundedArrowSlit.png|Round Wall With Arrow Slit}}
{{Table-AddRow}}
{{Table-ImageCell|StoneWallRoundLargeArrowSlitRight.png|Large Round Wall, Left Arrow Slit}}
{{Table-ImageCell|StoneWallRoundLargeArrowSlitLeft.png|Large Round Wall, Right Arrow Slit}}
{{Table-ImageCell|StoneWallRoundLargeArrowSlitDoubleWindows.png|Large Round Wall, Double Arrow Slits}}
{{Table-End}}
{{Table-End}}
|usedtocraft=
|usedtocraft=
Line 188: Line 44:
{{Table-AddRow}}
{{Table-AddRow}}
{{Table-ImageCell|PickaxeSteel.png|Steel Pickaxe}}
{{Table-ImageCell|ShovelBronze.png|Bronze Shovel}}
{{Table-Cell|}}
{{Table-ImageCell|ShovelCopper.png|Copper Shovel}}
{{Table-Cell|}}
{{Table-AddRow}}
{{Table-ImageCell|ShovelIron.png|Iron Shovel}}
{{Table-ImageCell|ShovelSteel.png|Steel Shovel}}
{{Table-ImageCell|WoodenShovel.png|Wooden Shovel}}
{{Table-End}}
{{Table-End}}
}}
}}


{{Inventory_Item
{{Inventory_Item
|mass=200
|mass=50
|stacksize=5
|stacksize=5
|hitpoints=52
|hitpoints=52
}}
}}
<!-- End exported template data -->

Latest revision as of 14:24, 16 July 2022


Large Stone
Version: 0.7
History:


"Large stones can be mined from the ground. They can only be produced from rocky ground."

Occurrence

Large stones have four variations and are located both on the ground and underground. All of the variations yield the same amount and type of stone.

Regular
Pickaxe: StoneLarge.png 1  Large Stone
per 256 volume

Stones.png

Resource

Used to Craft

StoneSmall.png Small Stone CatapultProjectileMedium.png Small Projectile CatapultProjectileLarge.png Large Projectile
MillStone Small.png Mill Stone MillstoneSubpartCoarse.png Coarse Millstone Toolhead MillstoneSubpartSmooth.png Smooth Millstone Toolhead

Used to Build

KingStatue.png King Statue

Gathered by Tools

PickaxeBronze.png Bronze Pickaxe PickaxeCopper.png Copper Pickaxe PickaxeIron.png Iron Pickaxe
PickaxeSteel.png Steel Pickaxe

Inventory Item

Mass

50 kg

Stack Size

5 item(s)

Hit Points

52 points