Keen:Planet Modding/Voxel Materials: Difference between revisions
No edit summary |
CptTwinkie (talk | contribs) |
||
| Line 11: | Line 11: | ||
Ok, so to start - all voxel materials definitions are stored in the VoxelMaterials.sbc file. Find it and open it in MS Visual Studio or any other advanced text editor. Search for the following line in the code: | Ok, so to start - all voxel materials definitions are stored in the VoxelMaterials.sbc file. Find it and open it in MS Visual Studio or any other advanced text editor. Search for the following line in the code: | ||
< | <source lang="xml"><SubtypeId>Grass</SubtypeId></source> | ||
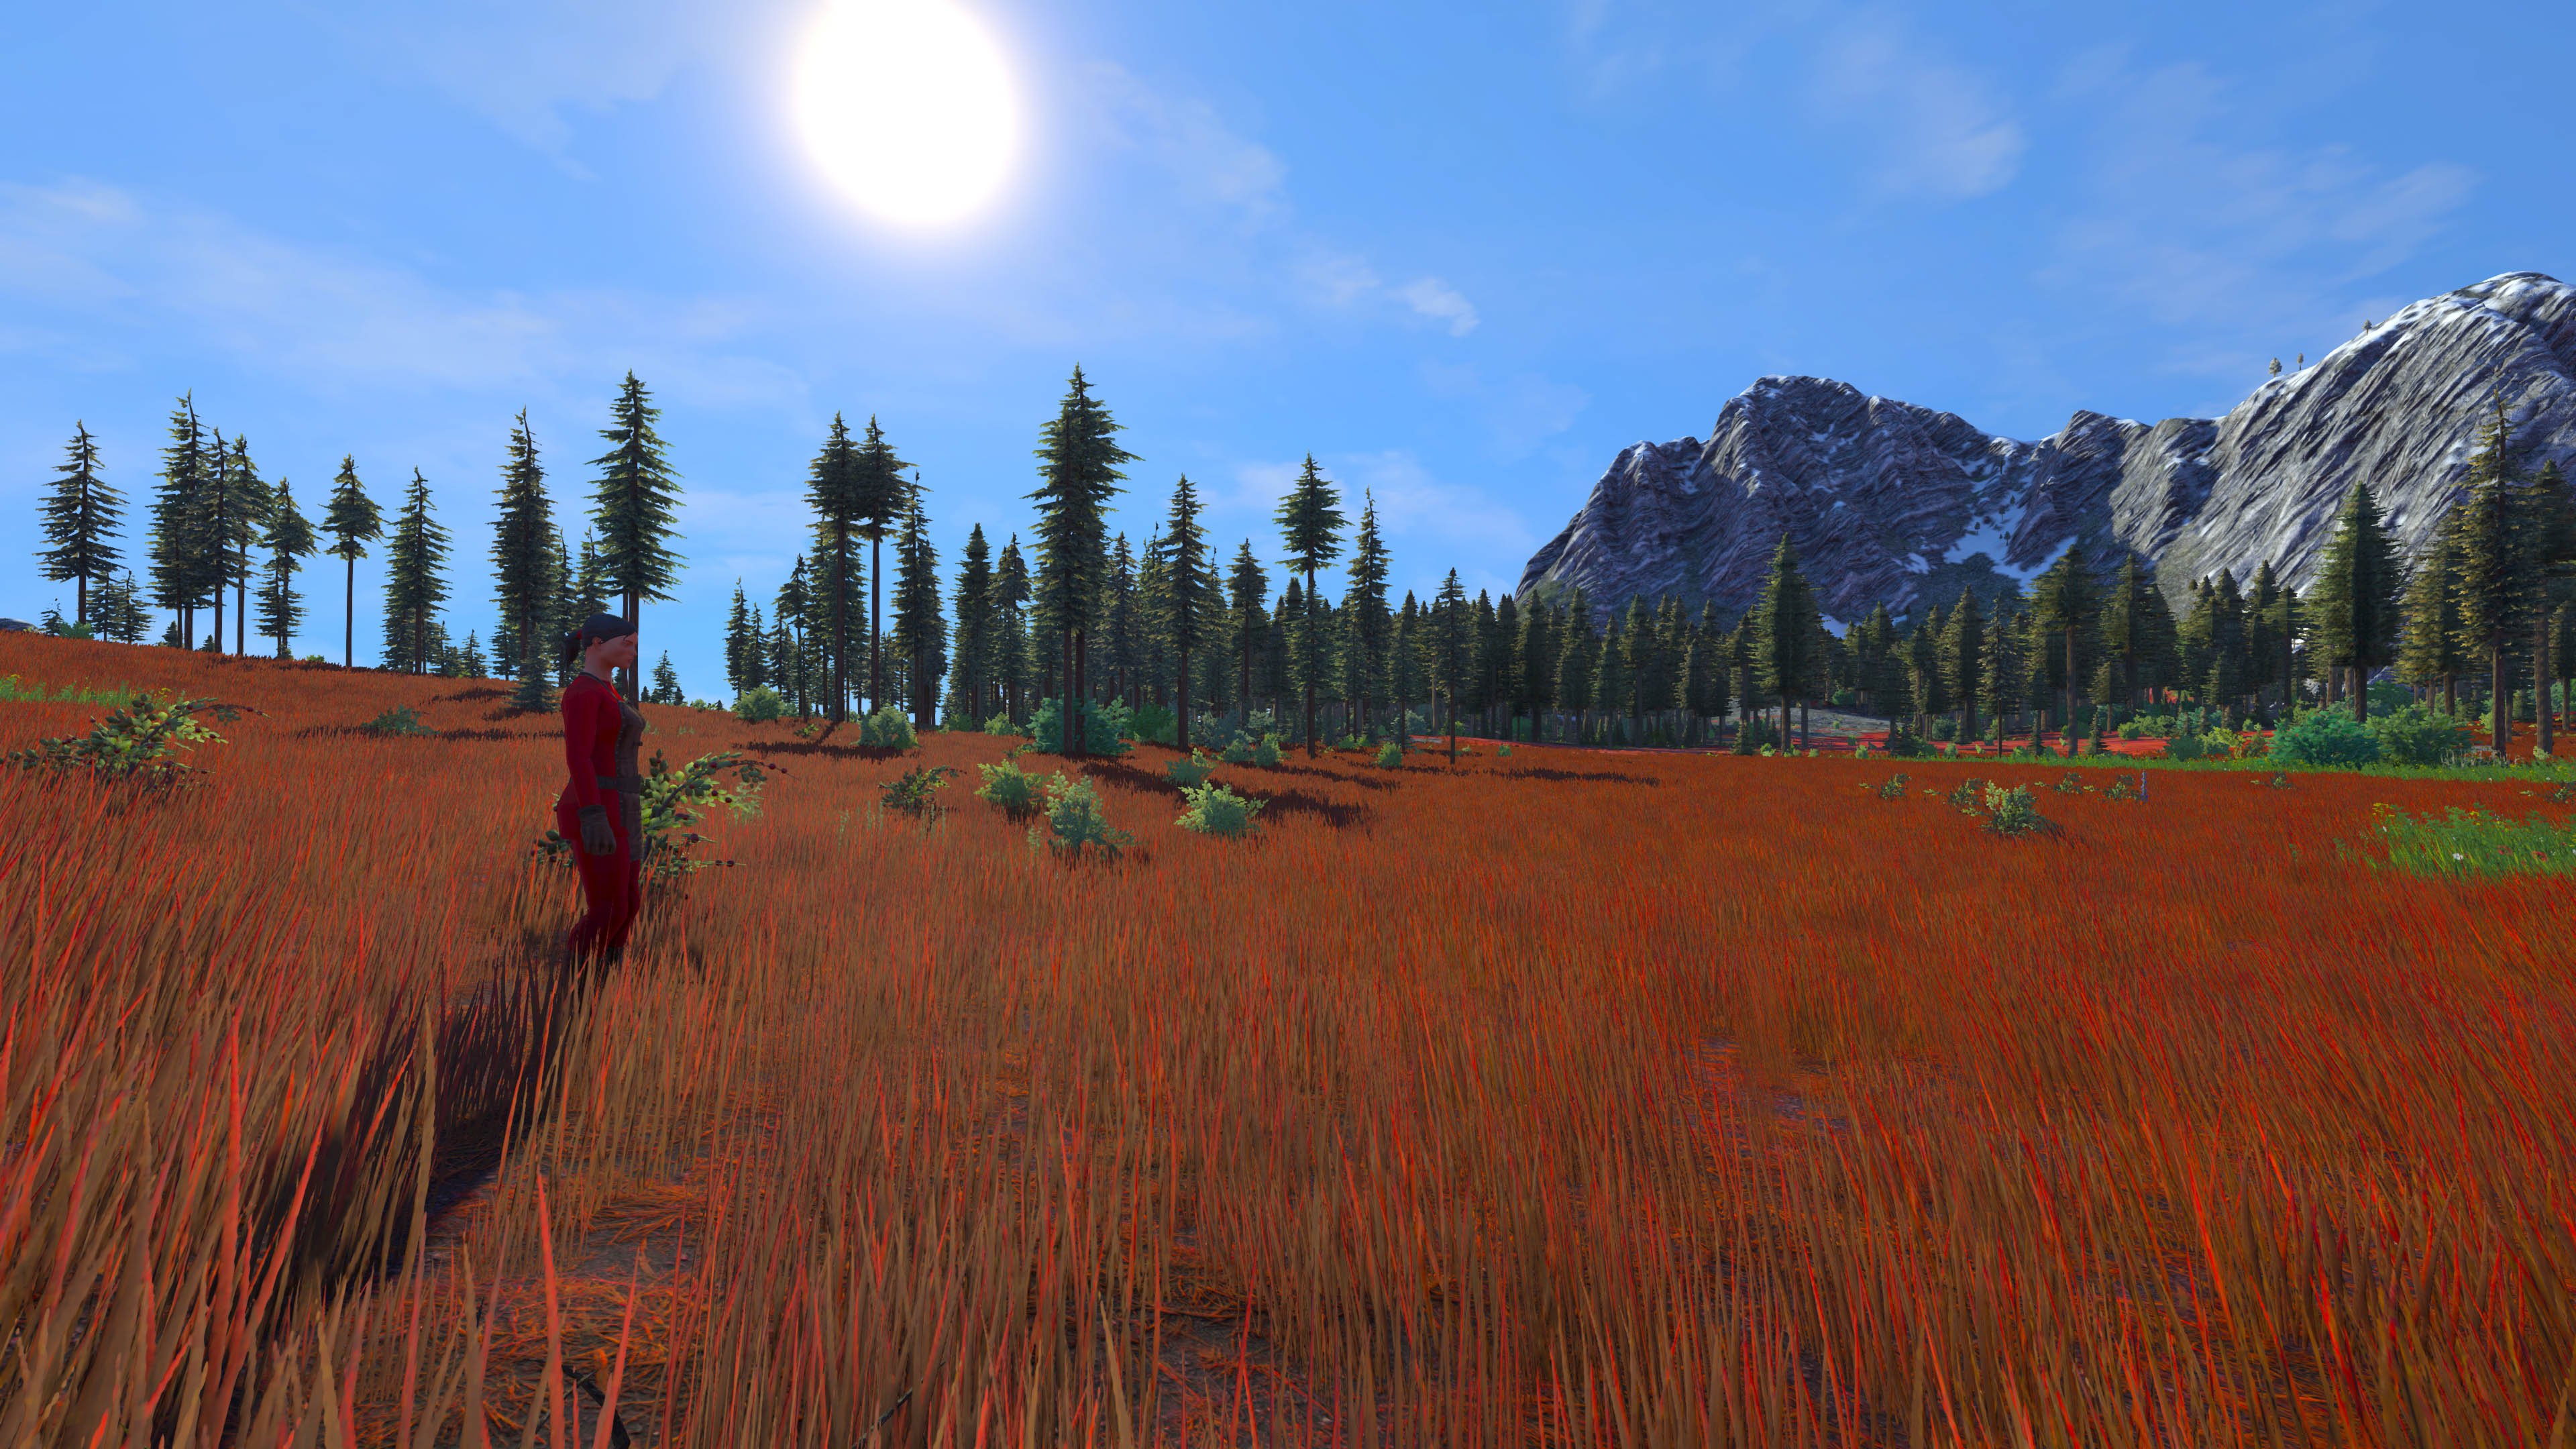
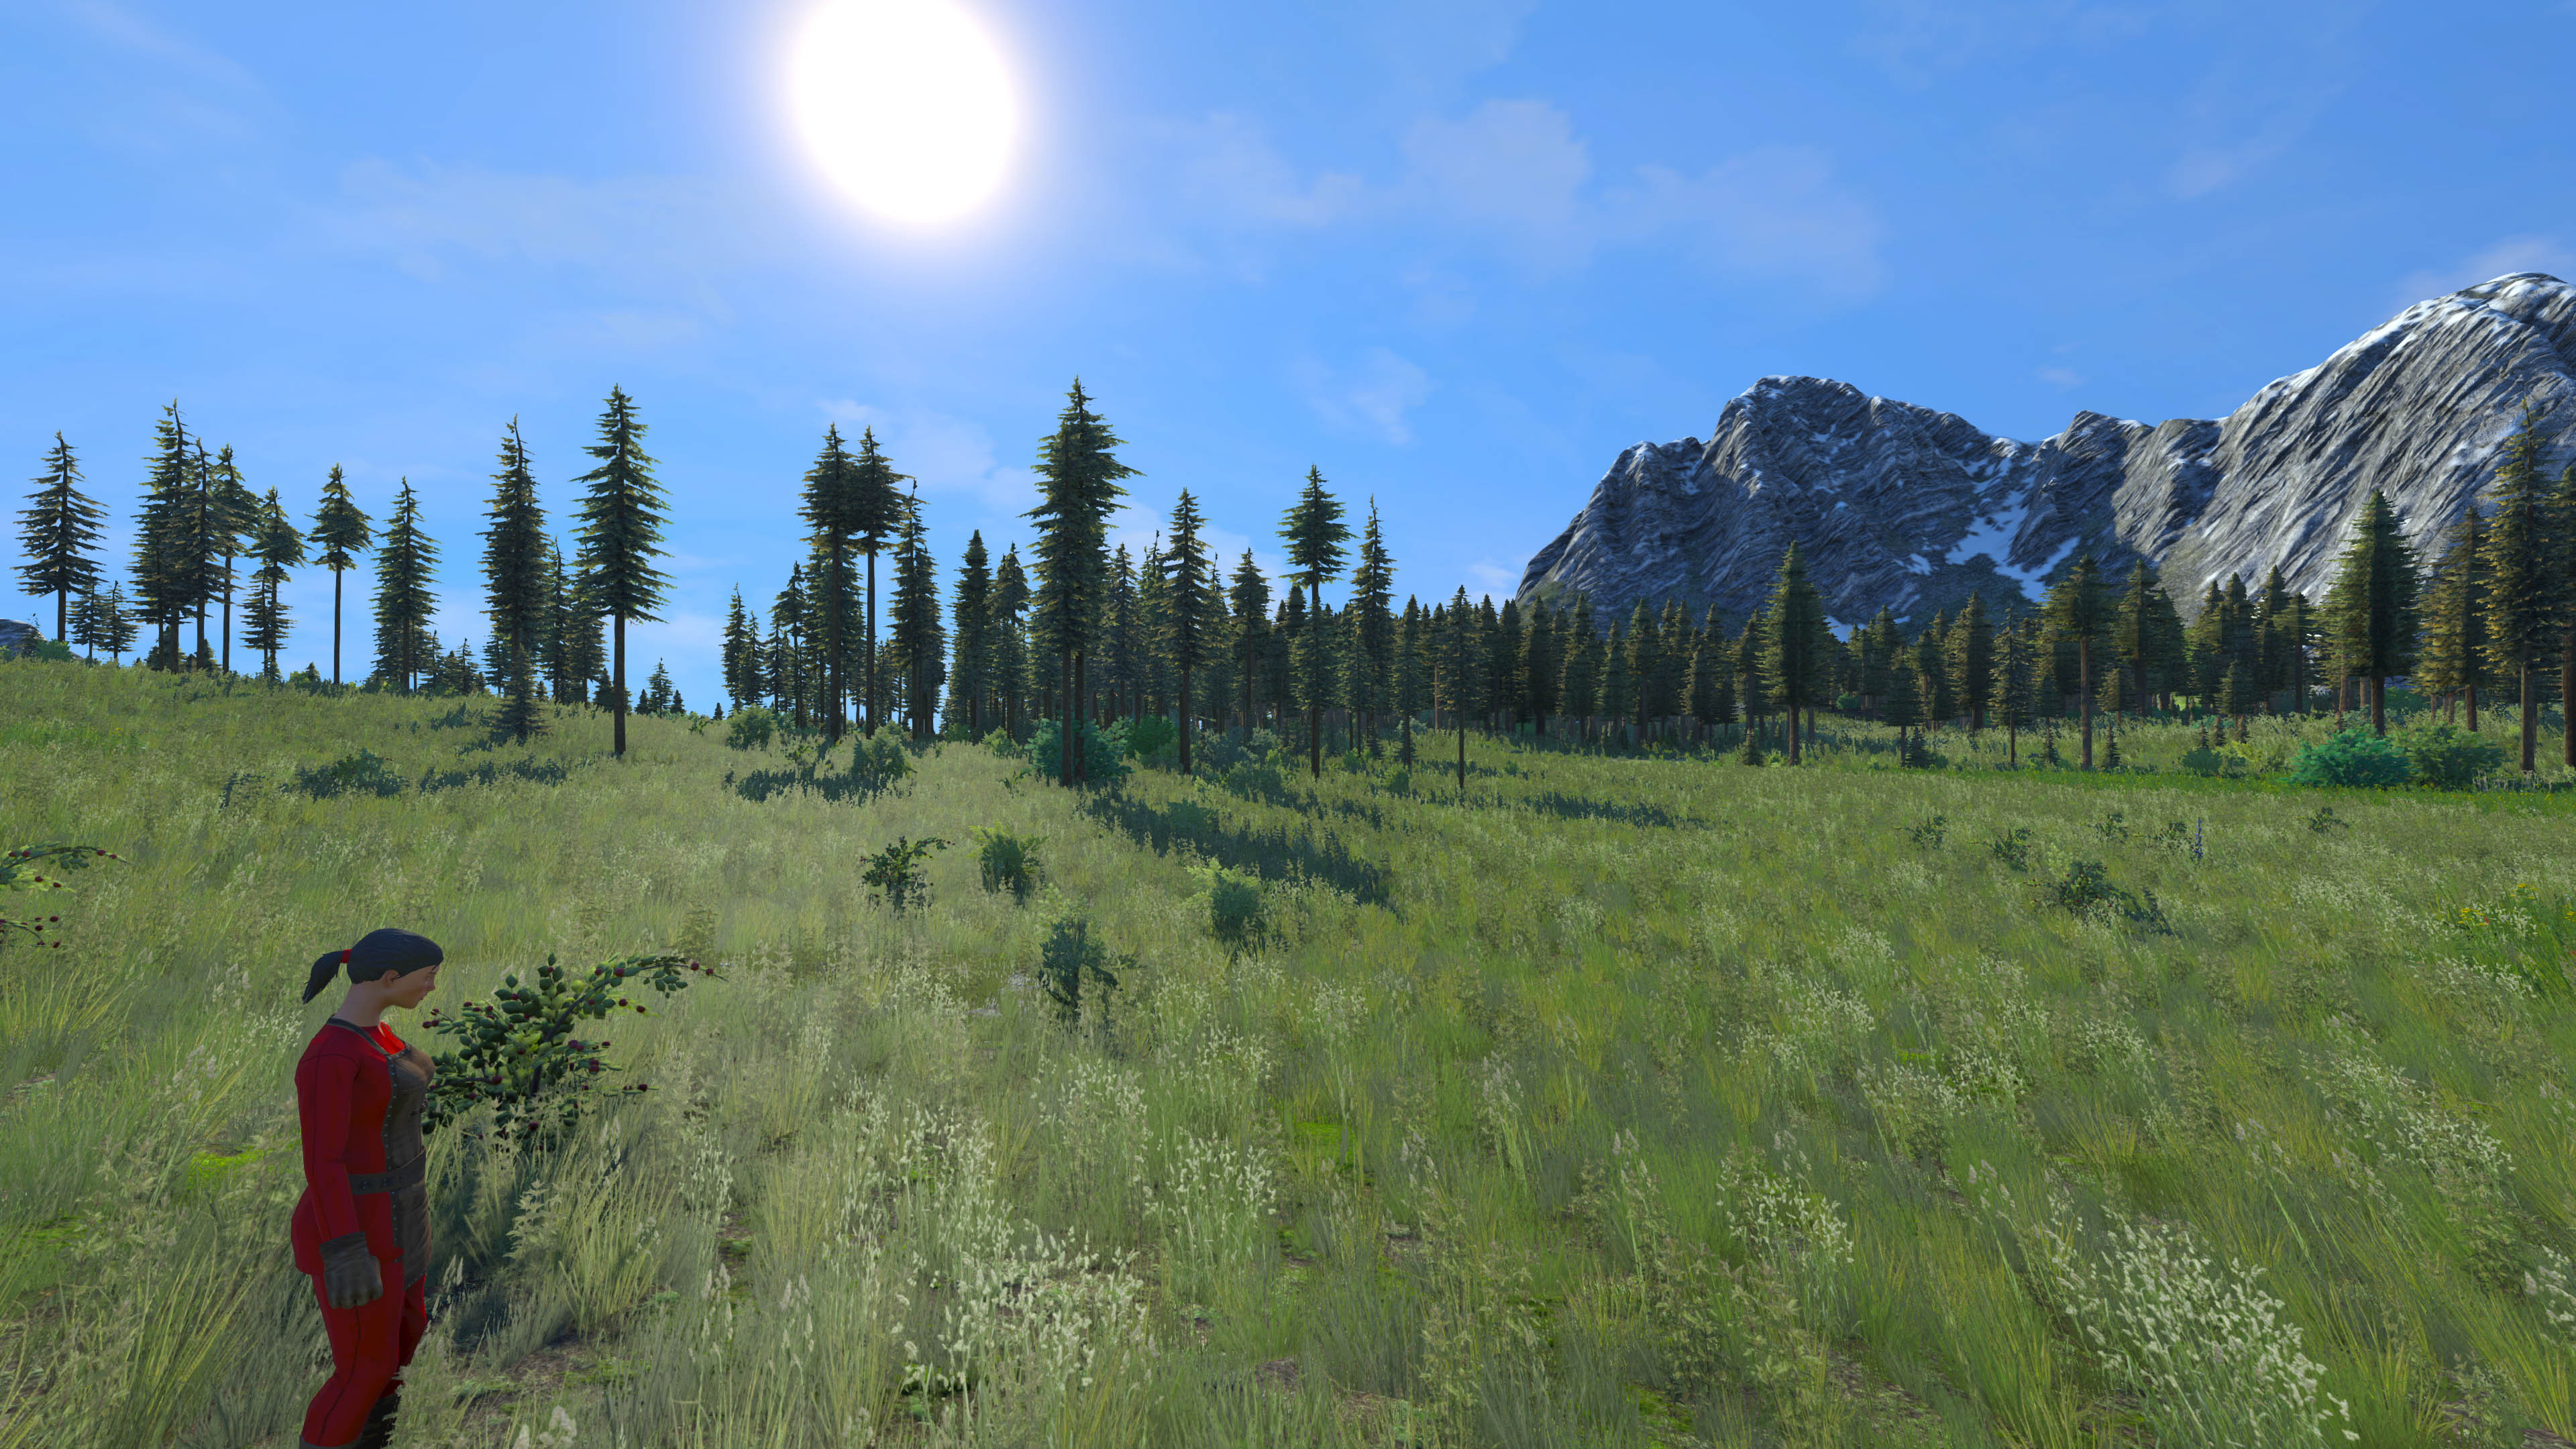
That’s where all the fun begins! So “Grass” is the name of the voxel material we’re looking for. It’s exactly how it is called in the game, and it’s exactly that green grass you see on the screenshot. Now let’s just make a quick overview of those code lines that define how particular voxel materials look and behave so you can brag about your programming skills to your girlfriend. | That’s where all the fun begins! So “Grass” is the name of the voxel material we’re looking for. It’s exactly how it is called in the game, and it’s exactly that green grass you see on the screenshot. Now let’s just make a quick overview of those code lines that define how particular voxel materials look and behave so you can brag about your programming skills to your girlfriend. | ||
| Line 17: | Line 17: | ||
Every voxel material starts with the <VoxelMaterial> tag and ends with </VoxelMaterial> tag. You can refer to the “Understanding voxel material definitions” picture for a brief breakdown of the most important code definitions describing the look of a voxel material. | Every voxel material starts with the <VoxelMaterial> tag and ends with </VoxelMaterial> tag. You can refer to the “Understanding voxel material definitions” picture for a brief breakdown of the most important code definitions describing the look of a voxel material. | ||
<source lang="xml"> | |||
<Definition xsi:type="MyObjectBuilder_Dx11VoxelMaterialDefinition"> | |||
<Id> | |||
<TypeId>VoxelMaterialDefinition</TypeId> | |||
<SubtypeId>Grass</SubtypeId><!-- GLOBAL NAME OF THE VOXEL MATERIAL --> | |||
</Id> | |||
<MaterialTypeName>Grass</MaterialTypeName> | |||
<Hardness>100</Hardness><!-- INFLUENCES HOW MUCH DURABILITY IS LOST WHEN MATERIAL IS MINED --> | |||
<ColorKey Hex="#839154"/><!-- DEFAULT VOXEL COLOR. USED FOR COLOR SHIFT --> | |||
<ColorMetalXZnY>Textures\Voxels\Grass_cm.dds</ColorMetalXZnY><!-- COLOR & METALNESS TEXTURE --> | |||
<ColorMetalY>Textures\Voxels\Grass_cm.dds</ColorMetalY> | |||
<NormalGlossXZnY>Textures\Voxels\Grass_ng.dds</NormalGlossXZnY><!-- NORMALS & GLOSSIBNESS TEXTURE GOES HERE --> | |||
<NormalGlossY>Textures\Voxels\Grass_ng.dds</NormalGlossY> | |||
<SpecularPower>24</SpecularPower> | |||
<SpecularShininess>0.364</SpecularShininess> | |||
<Icon>Textures\GUI\Icons\Voxel\Grass.png</Icon> | |||
<ColorMetalXZnYFar1>Textures\Voxels\Grass_Far1_cm.dds</ColorMetalXZnYFar1><!-- FAR1 TEXTURE --> | |||
<ColorMetalYFar1>Textures\Voxels\Grass_Far1_cm.dds</ColorMetalYFar1><!-- FAR1 TEXTURE --> | |||
<NormalGlossXZnYFar1>Textures\Voxels\Grass_Far1_ng.dds</NormalGlossXZnYFar1><!-- FAR1 TEXTURE --> | |||
<NormalGlossYFar1>Textures\Voxels\Grass_Far1_ng.dds</NormalGlossYFar1><!-- FAR1 TEXTURE --> | |||
<ColorMetalXZnYFar2>Textures\Voxels\Grass_Far1_cm.dds</ColorMetalXZnYFar2><!-- FAR2 TEXTURE --> | |||
<ColorMetalYFar2>Textures\Voxels\Grass_Far1_cm.dds</ColorMetalYFar2><!-- FAR2 TEXTURE --> | |||
<NormalGlossXZnYFar2>Textures\Voxels\Grass_Far1_ng.dds</NormalGlossXZnYFar2><!-- FAR2 TEXTURE --> | |||
<NormalGlossYFar2>Textures\Voxels\Grass_Far1_ng.dds</NormalGlossYFar2><!-- FAR2 TEXTURE --> | |||
<ExtXZnY>Textures\Voxels\Grass_add.dds</ExtXZnY> | |||
<ExtXZnYFar1>Textures\Voxels\Grass_Far1_add.dds</ExtXZnYFar1> | |||
<ExtXZnYFar2>Textures\Voxels\Grass_Far1_add.dds</ExtXZnYFar2> | |||
<!-- Far Distance --> | |||
<Far1Distance>50</Far1Distance><!-- THE DISTANCE (IN METERS) AT WHICH "FAR1" TEXTURE WILL SHOW UP --> | |||
<Far2Distance>500</Far2Distance><!-- THE DISTANCE (IN METERS) AT WHICH "FAR2" TEXTURE WILL SHOW UP --> | |||
<ScaleFar1>500</ScaleFar1><!-- DEFINES HOW BIG THE "FAR1" TEXTURE IS --> | |||
<ScaleFar2>200</ScaleFar2><!-- DEFINES HOW BIG THE "FAR2" TEXTURE IS --> | |||
<FoliageColorTextureArray> | |||
<Color>Textures\Models\Environment\Grass\Grass_01_cm.dds</Color><!-- COLOR & ALPHA TEXTURES OF THE GRASS PLATES GO HERE (_CM). YOU CAN ADD AS MANY DIFFERENT GRASS TEXTURES AS YOU LIKE. THE MORE YOU ADD, THE MORE DIVERSE AND UNIQUE YOUR GRASS WILL BE --> | |||
<Color>Textures\Models\Environment\Grass\Grass_02_cm.dds</Color> | |||
<Color>Textures\Models\Environment\Grass\Grass_03_cm.dds</Color> | |||
<Color>Textures\Models\Environment\Grass\Grass_03_cm.dds</Color> | |||
<Color>Textures\Models\Environment\Grass\Grass_03_cm.dds</Color> | |||
<Color>Textures\Models\Environment\Grass\Grass_04_cm.dds</Color> | |||
... | |||
</FoliageColorTextureArray> | |||
<FoliageNormalTextureArray> | |||
<Normal>Textures\Models\Environment\Grass\Grass_01_ng.dds</Normal><!-- NORMAL & GLOSS TEXTURES OF THE GRASS PLATES GO HERE (_NG) MAKE SURE THAT ALL CM FILES HAVE CORRESPONDING NG FILES NAMED EXACTLY THE SAME --> | |||
<Normal>Textures\Models\Environment\Grass\Grass_02_ng.dds</Normal> | |||
<Normal>Textures\Models\Environment\Grass\Grass_03_ng.dds</Normal> | |||
<Normal>Textures\Models\Environment\Grass\Grass_03_ng.dds</Normal> | |||
<Normal>Textures\Models\Environment\Grass\Grass_03_ng.dds</Normal> | |||
<Normal>Textures\Models\Environment\Grass\Grass_04_ng.dds</Normal> | |||
... | |||
</FoliageNormalTextureArray> | |||
<FoliageDensity>1.5</FoliageDensity><!-- HIGHER VALUES MEAN MORE GRASS PLATES --> | |||
<FoliageScale> | |||
<X>0.7</X><!-- DEFINES HORISONTAL AND VERTICAL SCALE OF THE GRASS PLATES. REMEMBER, IF YOU SCALE IT IN A NON-UNIFORM WAY (LIKE X:1, Y:0.6) YOU WILL BURN IN HELL FOR THIS --> | |||
<Y>0.7</Y> | |||
</FoliageScale> | |||
<FoliageRandomRescaleMult>0.20</FoliageRandomRescaleMult> | |||
<DamagedMaterial>Soil</DamagedMaterial> | |||
</Definition> | |||
</source> | |||
So first things first, you have to know that the grass you see in a screenshot consists of the Grass Voxel Material (Ground) and a set of different Grass Textures “growing” out of it and scattered randomly on it. So you will be creating/tweaking the textures for the both, because normally you don’t want blue grass to grow on a green surface, right? You do? Shut up, marine! You’re in the army now, son. Just do what you’ve been told to do, and we’ll do the thinking! Let’s start with the Surface definitions first and then continue on to the Grass itself. | So first things first, you have to know that the grass you see in a screenshot consists of the Grass Voxel Material (Ground) and a set of different Grass Textures “growing” out of it and scattered randomly on it. So you will be creating/tweaking the textures for the both, because normally you don’t want blue grass to grow on a green surface, right? You do? Shut up, marine! You’re in the army now, son. Just do what you’ve been told to do, and we’ll do the thinking! Let’s start with the Surface definitions first and then continue on to the Grass itself. | ||
==Understanding what Voxel Material (ground) is made of== | ==Understanding what Voxel Material (ground) is made of== | ||
Revision as of 15:30, 29 August 2017
Hello and welcome to the Modding of Voxel Materials guide for young Padawans. Feeling creative about changing the look of voxel materials? You think you’re really good, huh? Well, you’re in the right place then. Be prepared for a great journey saving the world by changing the look of the voxel worlds around you. Let’s just assume that you want to change the color of this beautiful green grass which grows on every EarthLike planet in the SE Universe! And let’s assume you want to change it to a crazy blue color. Why? Because we CAN, and you can too! Call NOW and get your free training program PLUS an amazing set of kitchen knives... wait... I meant something completely different...
Source Files
Various files will be used as examples in this guide.
They can be downloaded here: http://www.medievalengineerswiki.com/uploaded_files/Voxel_material_modding_files.zip
Voxel material definitions
Ok, so to start - all voxel materials definitions are stored in the VoxelMaterials.sbc file. Find it and open it in MS Visual Studio or any other advanced text editor. Search for the following line in the code:
<SubtypeId>Grass</SubtypeId>
That’s where all the fun begins! So “Grass” is the name of the voxel material we’re looking for. It’s exactly how it is called in the game, and it’s exactly that green grass you see on the screenshot. Now let’s just make a quick overview of those code lines that define how particular voxel materials look and behave so you can brag about your programming skills to your girlfriend.
Every voxel material starts with the <VoxelMaterial> tag and ends with </VoxelMaterial> tag. You can refer to the “Understanding voxel material definitions” picture for a brief breakdown of the most important code definitions describing the look of a voxel material.
  <Definition xsi:type="MyObjectBuilder_Dx11VoxelMaterialDefinition">
    <Id>
      <TypeId>VoxelMaterialDefinition</TypeId>
      <SubtypeId>Grass</SubtypeId><!-- GLOBAL NAME OF THE VOXEL MATERIAL -->
    </Id>
    <MaterialTypeName>Grass</MaterialTypeName>
    <Hardness>100</Hardness><!-- INFLUENCES HOW MUCH DURABILITY IS LOST WHEN MATERIAL IS MINED -->
    <ColorKey Hex="#839154"/><!-- DEFAULT VOXEL COLOR. USED FOR COLOR SHIFT -->
    <ColorMetalXZnY>Textures\Voxels\Grass_cm.dds</ColorMetalXZnY><!-- COLOR & METALNESS TEXTURE -->
    <ColorMetalY>Textures\Voxels\Grass_cm.dds</ColorMetalY>
    <NormalGlossXZnY>Textures\Voxels\Grass_ng.dds</NormalGlossXZnY><!-- NORMALS & GLOSSIBNESS TEXTURE GOES HERE -->
    <NormalGlossY>Textures\Voxels\Grass_ng.dds</NormalGlossY>
    <SpecularPower>24</SpecularPower>
    <SpecularShininess>0.364</SpecularShininess>
	<Icon>Textures\GUI\Icons\Voxel\Grass.png</Icon>
    <ColorMetalXZnYFar1>Textures\Voxels\Grass_Far1_cm.dds</ColorMetalXZnYFar1><!-- FAR1 TEXTURE -->
    <ColorMetalYFar1>Textures\Voxels\Grass_Far1_cm.dds</ColorMetalYFar1><!-- FAR1 TEXTURE -->
    <NormalGlossXZnYFar1>Textures\Voxels\Grass_Far1_ng.dds</NormalGlossXZnYFar1><!-- FAR1 TEXTURE -->
    <NormalGlossYFar1>Textures\Voxels\Grass_Far1_ng.dds</NormalGlossYFar1><!-- FAR1 TEXTURE -->
    <ColorMetalXZnYFar2>Textures\Voxels\Grass_Far1_cm.dds</ColorMetalXZnYFar2><!-- FAR2 TEXTURE -->
    <ColorMetalYFar2>Textures\Voxels\Grass_Far1_cm.dds</ColorMetalYFar2><!-- FAR2 TEXTURE -->
    <NormalGlossXZnYFar2>Textures\Voxels\Grass_Far1_ng.dds</NormalGlossXZnYFar2><!-- FAR2 TEXTURE -->
    <NormalGlossYFar2>Textures\Voxels\Grass_Far1_ng.dds</NormalGlossYFar2><!-- FAR2 TEXTURE -->

    <ExtXZnY>Textures\Voxels\Grass_add.dds</ExtXZnY>
    <ExtXZnYFar1>Textures\Voxels\Grass_Far1_add.dds</ExtXZnYFar1>
    <ExtXZnYFar2>Textures\Voxels\Grass_Far1_add.dds</ExtXZnYFar2>

    <!-- Far Distance -->
    <Far1Distance>50</Far1Distance><!-- THE DISTANCE (IN METERS) AT WHICH "FAR1" TEXTURE WILL SHOW UP -->
    <Far2Distance>500</Far2Distance><!-- THE DISTANCE (IN METERS) AT WHICH "FAR2" TEXTURE WILL SHOW UP -->
    <ScaleFar1>500</ScaleFar1><!-- DEFINES HOW BIG THE "FAR1" TEXTURE IS -->
    <ScaleFar2>200</ScaleFar2><!-- DEFINES HOW BIG THE "FAR2" TEXTURE IS -->

    <FoliageColorTextureArray>
      <Color>Textures\Models\Environment\Grass\Grass_01_cm.dds</Color><!-- COLOR & ALPHA TEXTURES OF THE GRASS PLATES GO HERE (_CM). YOU CAN ADD AS MANY DIFFERENT GRASS TEXTURES AS YOU LIKE. THE MORE YOU ADD, THE MORE DIVERSE AND UNIQUE YOUR GRASS WILL BE -->
      <Color>Textures\Models\Environment\Grass\Grass_02_cm.dds</Color>
      <Color>Textures\Models\Environment\Grass\Grass_03_cm.dds</Color>
      <Color>Textures\Models\Environment\Grass\Grass_03_cm.dds</Color>
      <Color>Textures\Models\Environment\Grass\Grass_03_cm.dds</Color>
      <Color>Textures\Models\Environment\Grass\Grass_04_cm.dds</Color>
      ...
    </FoliageColorTextureArray>

    <FoliageNormalTextureArray>
      <Normal>Textures\Models\Environment\Grass\Grass_01_ng.dds</Normal><!-- NORMAL & GLOSS TEXTURES OF THE GRASS PLATES GO HERE (_NG) MAKE SURE THAT ALL CM FILES HAVE CORRESPONDING NG FILES NAMED EXACTLY THE SAME -->
      <Normal>Textures\Models\Environment\Grass\Grass_02_ng.dds</Normal>
      <Normal>Textures\Models\Environment\Grass\Grass_03_ng.dds</Normal>
      <Normal>Textures\Models\Environment\Grass\Grass_03_ng.dds</Normal>
      <Normal>Textures\Models\Environment\Grass\Grass_03_ng.dds</Normal>
      <Normal>Textures\Models\Environment\Grass\Grass_04_ng.dds</Normal>
      ...
    </FoliageNormalTextureArray>

    <FoliageDensity>1.5</FoliageDensity><!-- HIGHER VALUES MEAN MORE GRASS PLATES -->
    <FoliageScale>
      <X>0.7</X><!-- DEFINES HORISONTAL AND VERTICAL SCALE OF THE GRASS PLATES. REMEMBER, IF YOU SCALE IT IN A NON-UNIFORM WAY (LIKE X:1, Y:0.6) YOU WILL BURN IN HELL FOR THIS -->
      <Y>0.7</Y>
    </FoliageScale>
    <FoliageRandomRescaleMult>0.20</FoliageRandomRescaleMult>

    <DamagedMaterial>Soil</DamagedMaterial>
  </Definition>
So first things first, you have to know that the grass you see in a screenshot consists of the Grass Voxel Material (Ground) and a set of different Grass Textures “growing” out of it and scattered randomly on it. So you will be creating/tweaking the textures for the both, because normally you don’t want blue grass to grow on a green surface, right? You do? Shut up, marine! You’re in the army now, son. Just do what you’ve been told to do, and we’ll do the thinking! Let’s start with the Surface definitions first and then continue on to the Grass itself.
Understanding what Voxel Material (ground) is made of
Basically, the following three lines define how our base Voxel Material’s surface will look, or to be more precise - which textures it will use to define this look.
    <ColorMetalXZnY>Textures\Voxels\Grass_cm.dds</ColorMetalXZnY>
    <NormalGlossXZnY>Textures\Voxels\Grass_ng.dds</NormalGlossXZnY>
    <ExtXZnY>Textures\Voxels\Grass_add.dds</ExtXZnY>
Here’s what these code lines do:
<ColorMetalXZnY>Textures\Voxels\Grass_cm.dds</ColorMetalXZnY>
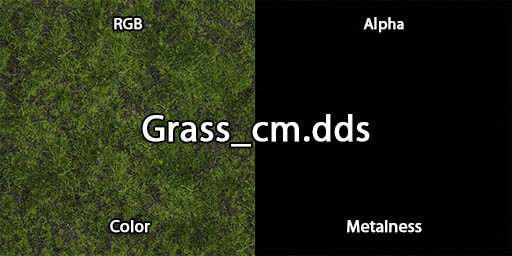
- Your Color+Metalness texture goes here. The letters “cm” in the “Grass_cm.dds” file stand for Color and Metalness. Color (or a diffuse/albedo map) is a standard RGB channel and Metalness is placed in the Alpha channel. You can go completely crazy in RGB colors. Do whatever you want. Metalness is a Black and White map only (normally NO grey halftones) which represents areas that are Metal only. You wouldn’t want to have metalness in your grass, would you? So that’s why it’s empty now (black).
<NormalGlossXZnY>Textures\Voxels\Grass_ng.dds</NormalGlossXZnY>
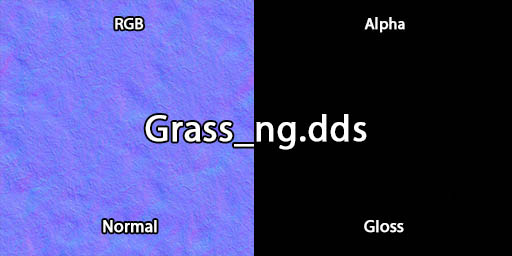
- Your Normals+Glossiness texture goes here. The letters “ng” in the “Grass_ng.dds” file stand for Normal and Glossiness. Normal map is a standard RGB channels and the Glossiness map is placed in Alpha channel. As you can see here, the normal map resides on all RGB channels and we have subtle glossy areas (Black means NO Glossiness. White: 100% glossiness) scattered all around the grass surface.
<ExtXZnY>Textures\Voxels\Green_add.dds</ExtXZnY>
- Your AO+ Emissivity+Dirt texture goes here. The letters “add” in the ”Grass_add.dds” file stand for Ambient Occlusion map, Emissivity map and Dirt map. Everything’s simple: AO goes to the Red channel, Emissivity goes in the Green channel and Dirt map goes to the Blue channel. In this particular example we see that currently we have a very subtle AO map (White areas mean no AO), no emissivity at all - because we don’t want our grass to glow in the dark (Black means no emissivity) and it has no dirt (White means NO Dirt).

Now just open the first “Grass_cm.dds” texture in Photoshop and add a Hue/Saturation adjustment layer on top. Tick Colorize and make the color crazy Blue.
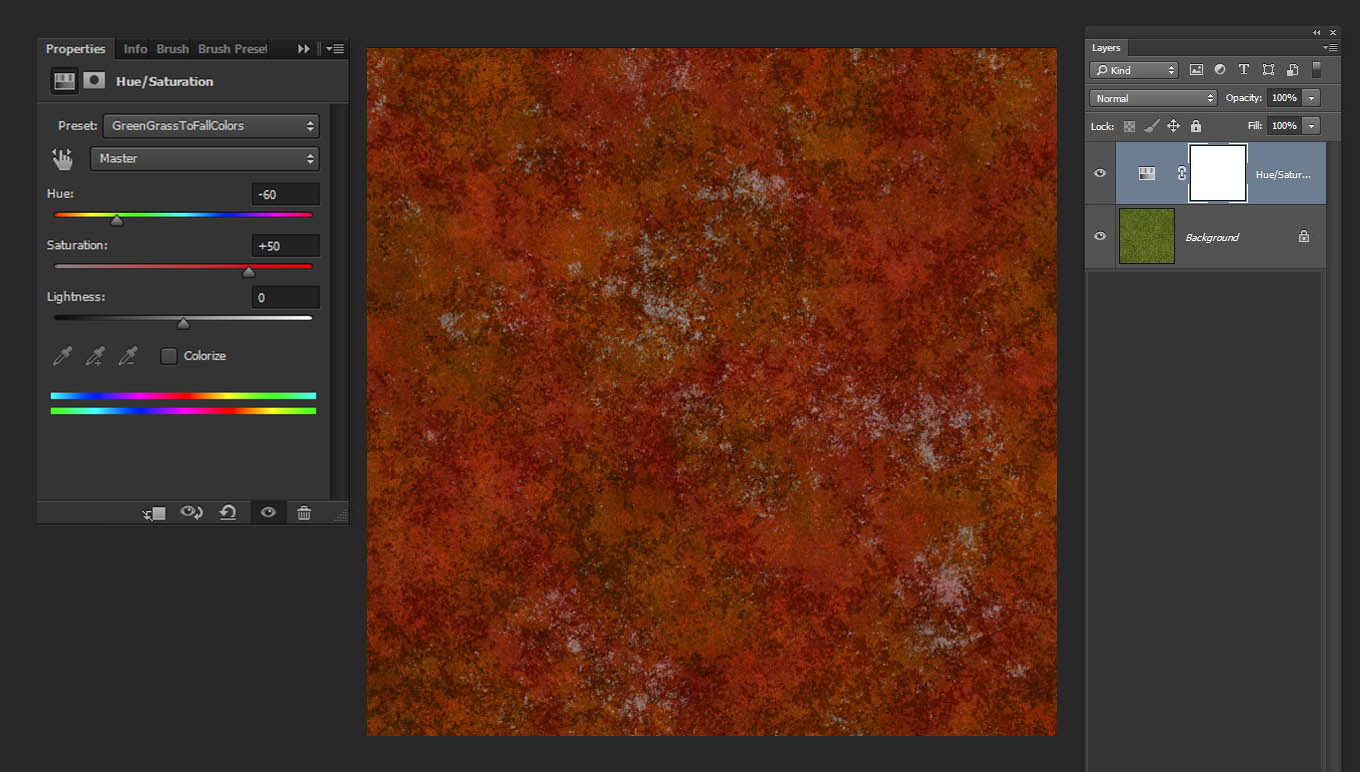
Now just re-save this file as “GrassBlue_cm.dds” in the correct folder: (KeenSWH\Sandbox\Sources\SpaceEngineers\Content\Textures\Voxels). And of course we have to change the name in the VoxelMaterials.sbc file’s definitions, too, so the Engine knows which file to use instead of the old (green) one:
Important note: All textures must be saved in DDS format, DXT5, Interpolated Alpha format with “Generate MIP maps” ON.
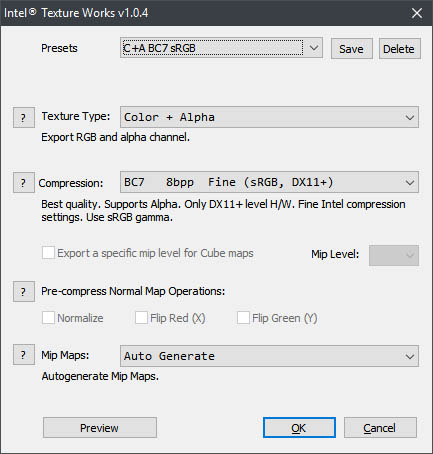
If you load the game now to see what happened to the grass, you will see that we’ve changed the color of the Grass Voxel Material (surface) only, while the Grass Plates which grow on it remain green. What the..?
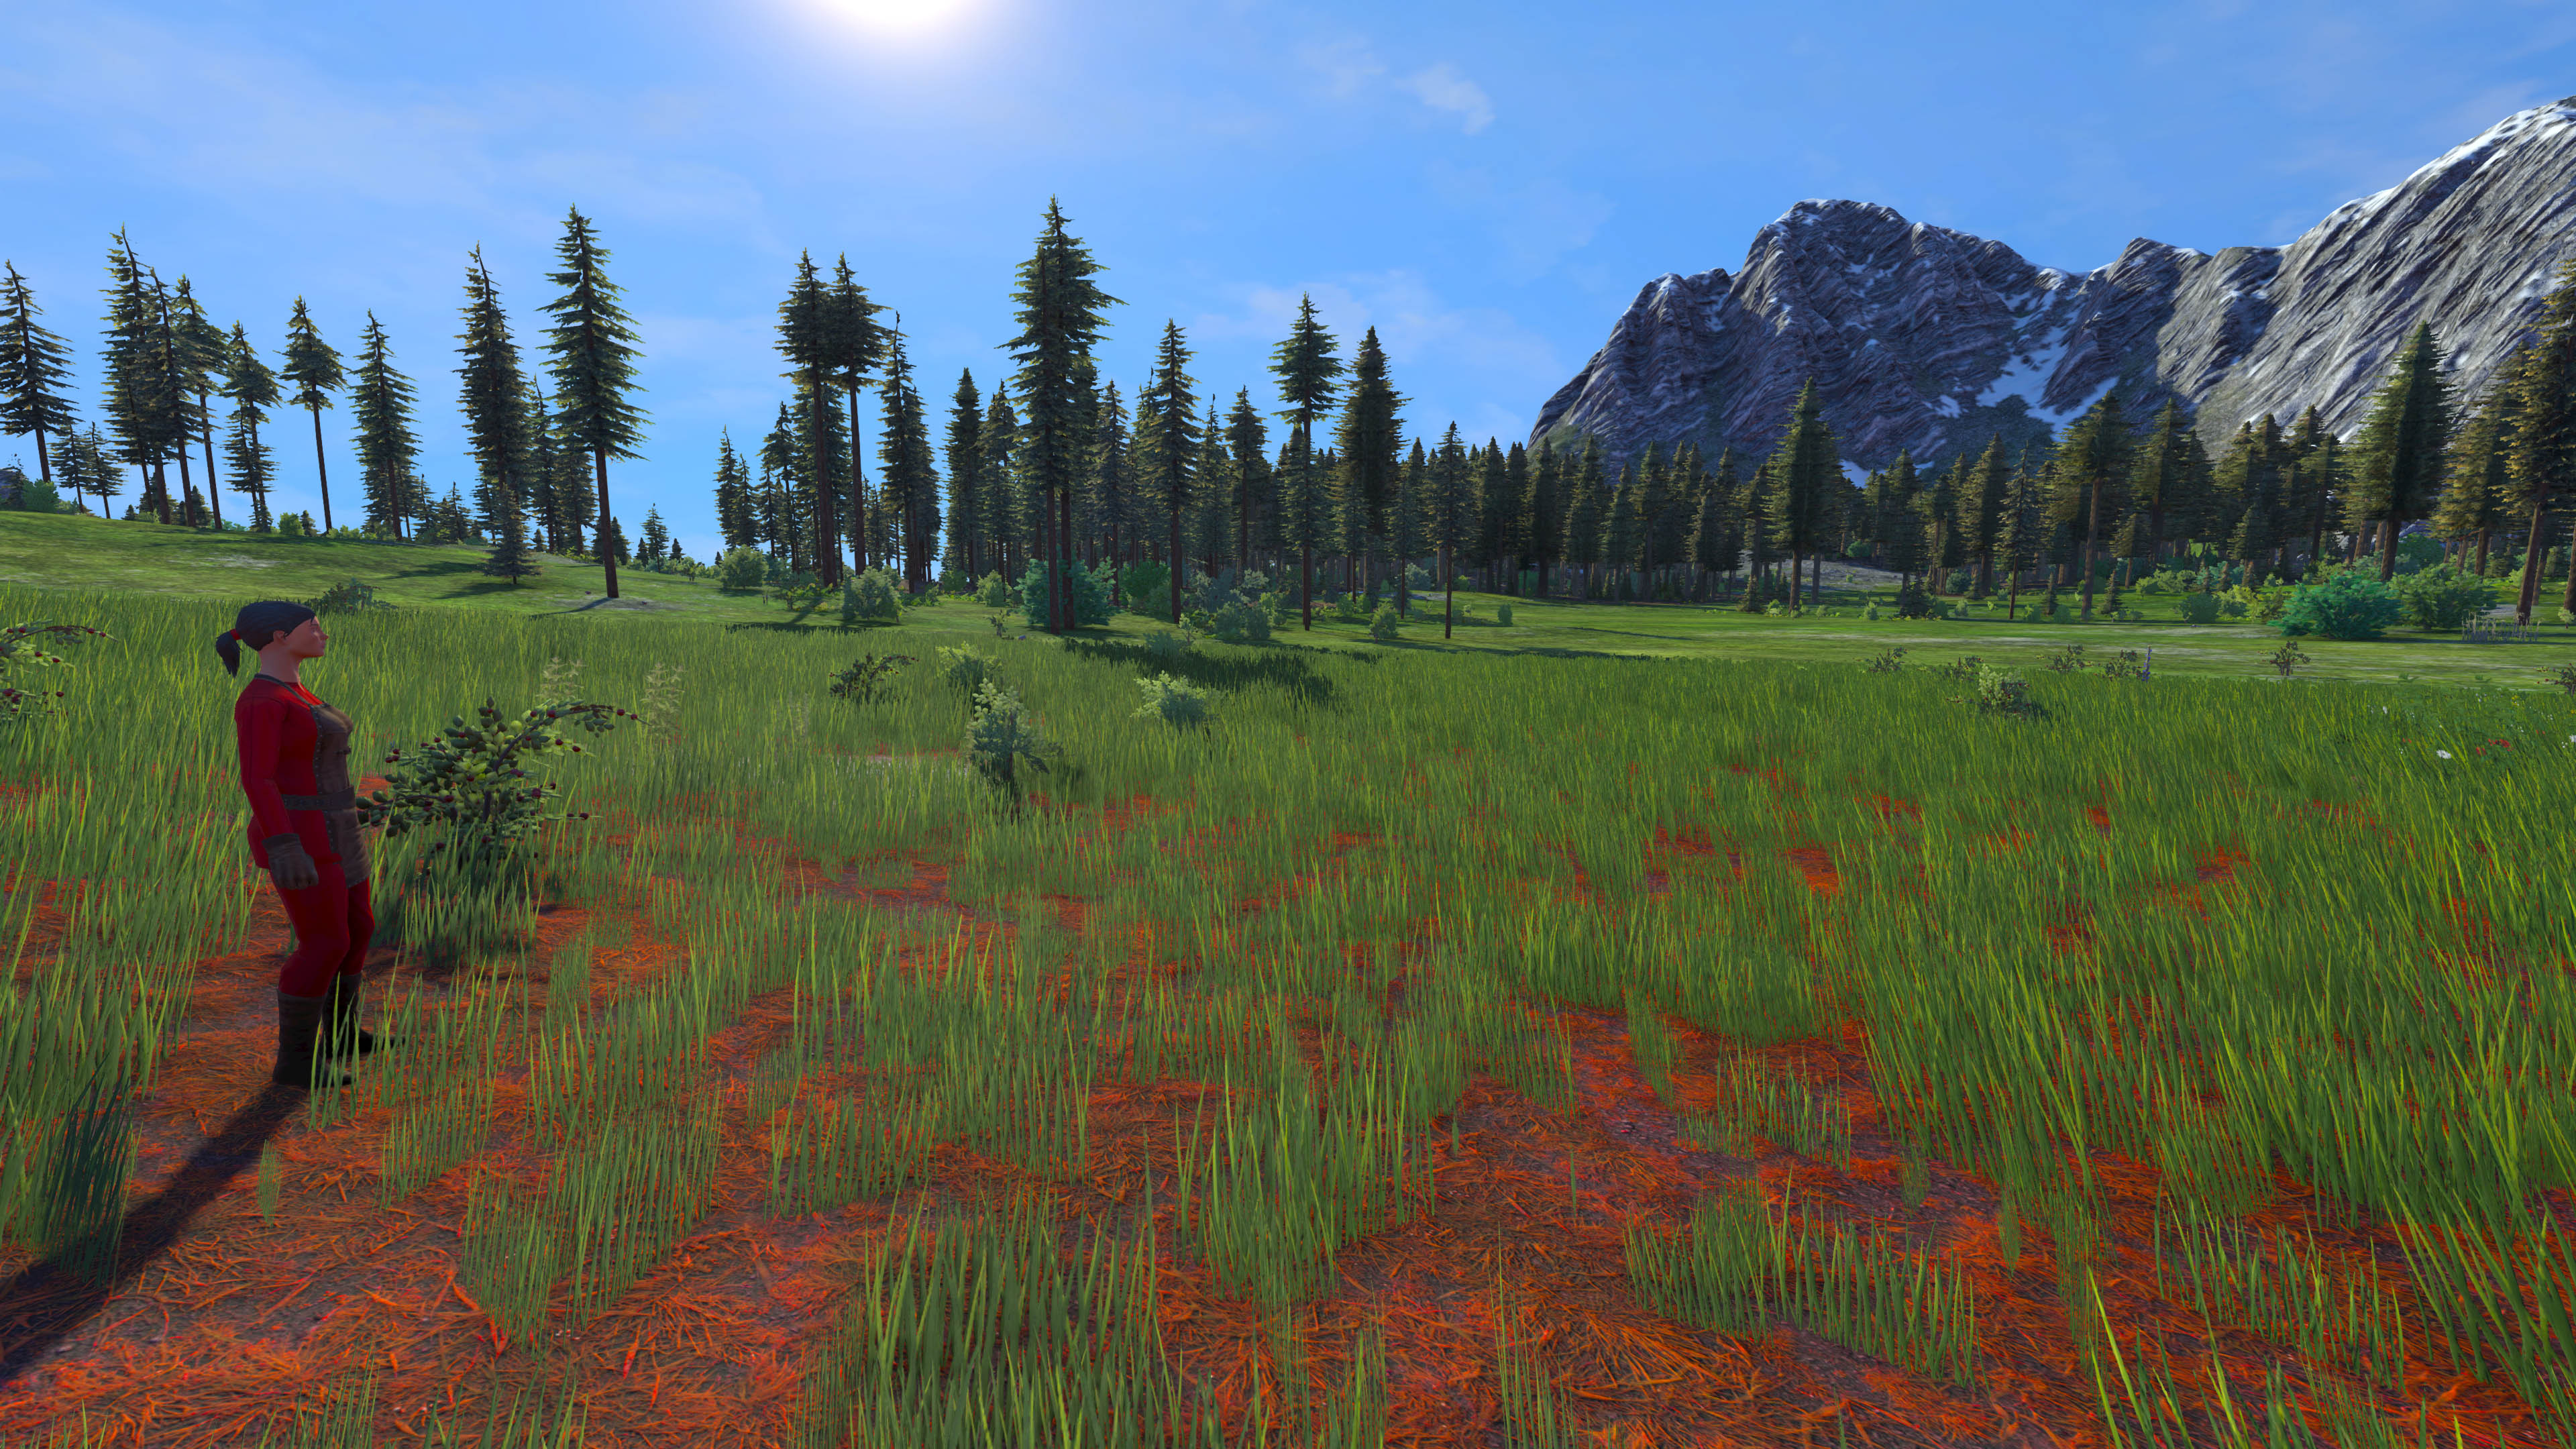
That’s because we didn’t change the Grass textures yet. We’ll do this in a minute, no worries.
Also, you may notice that if you move far enough from the surface, suddenly, instead of blue color – the old green starts to fade in. But didn’t we change it?! Time to panic right?
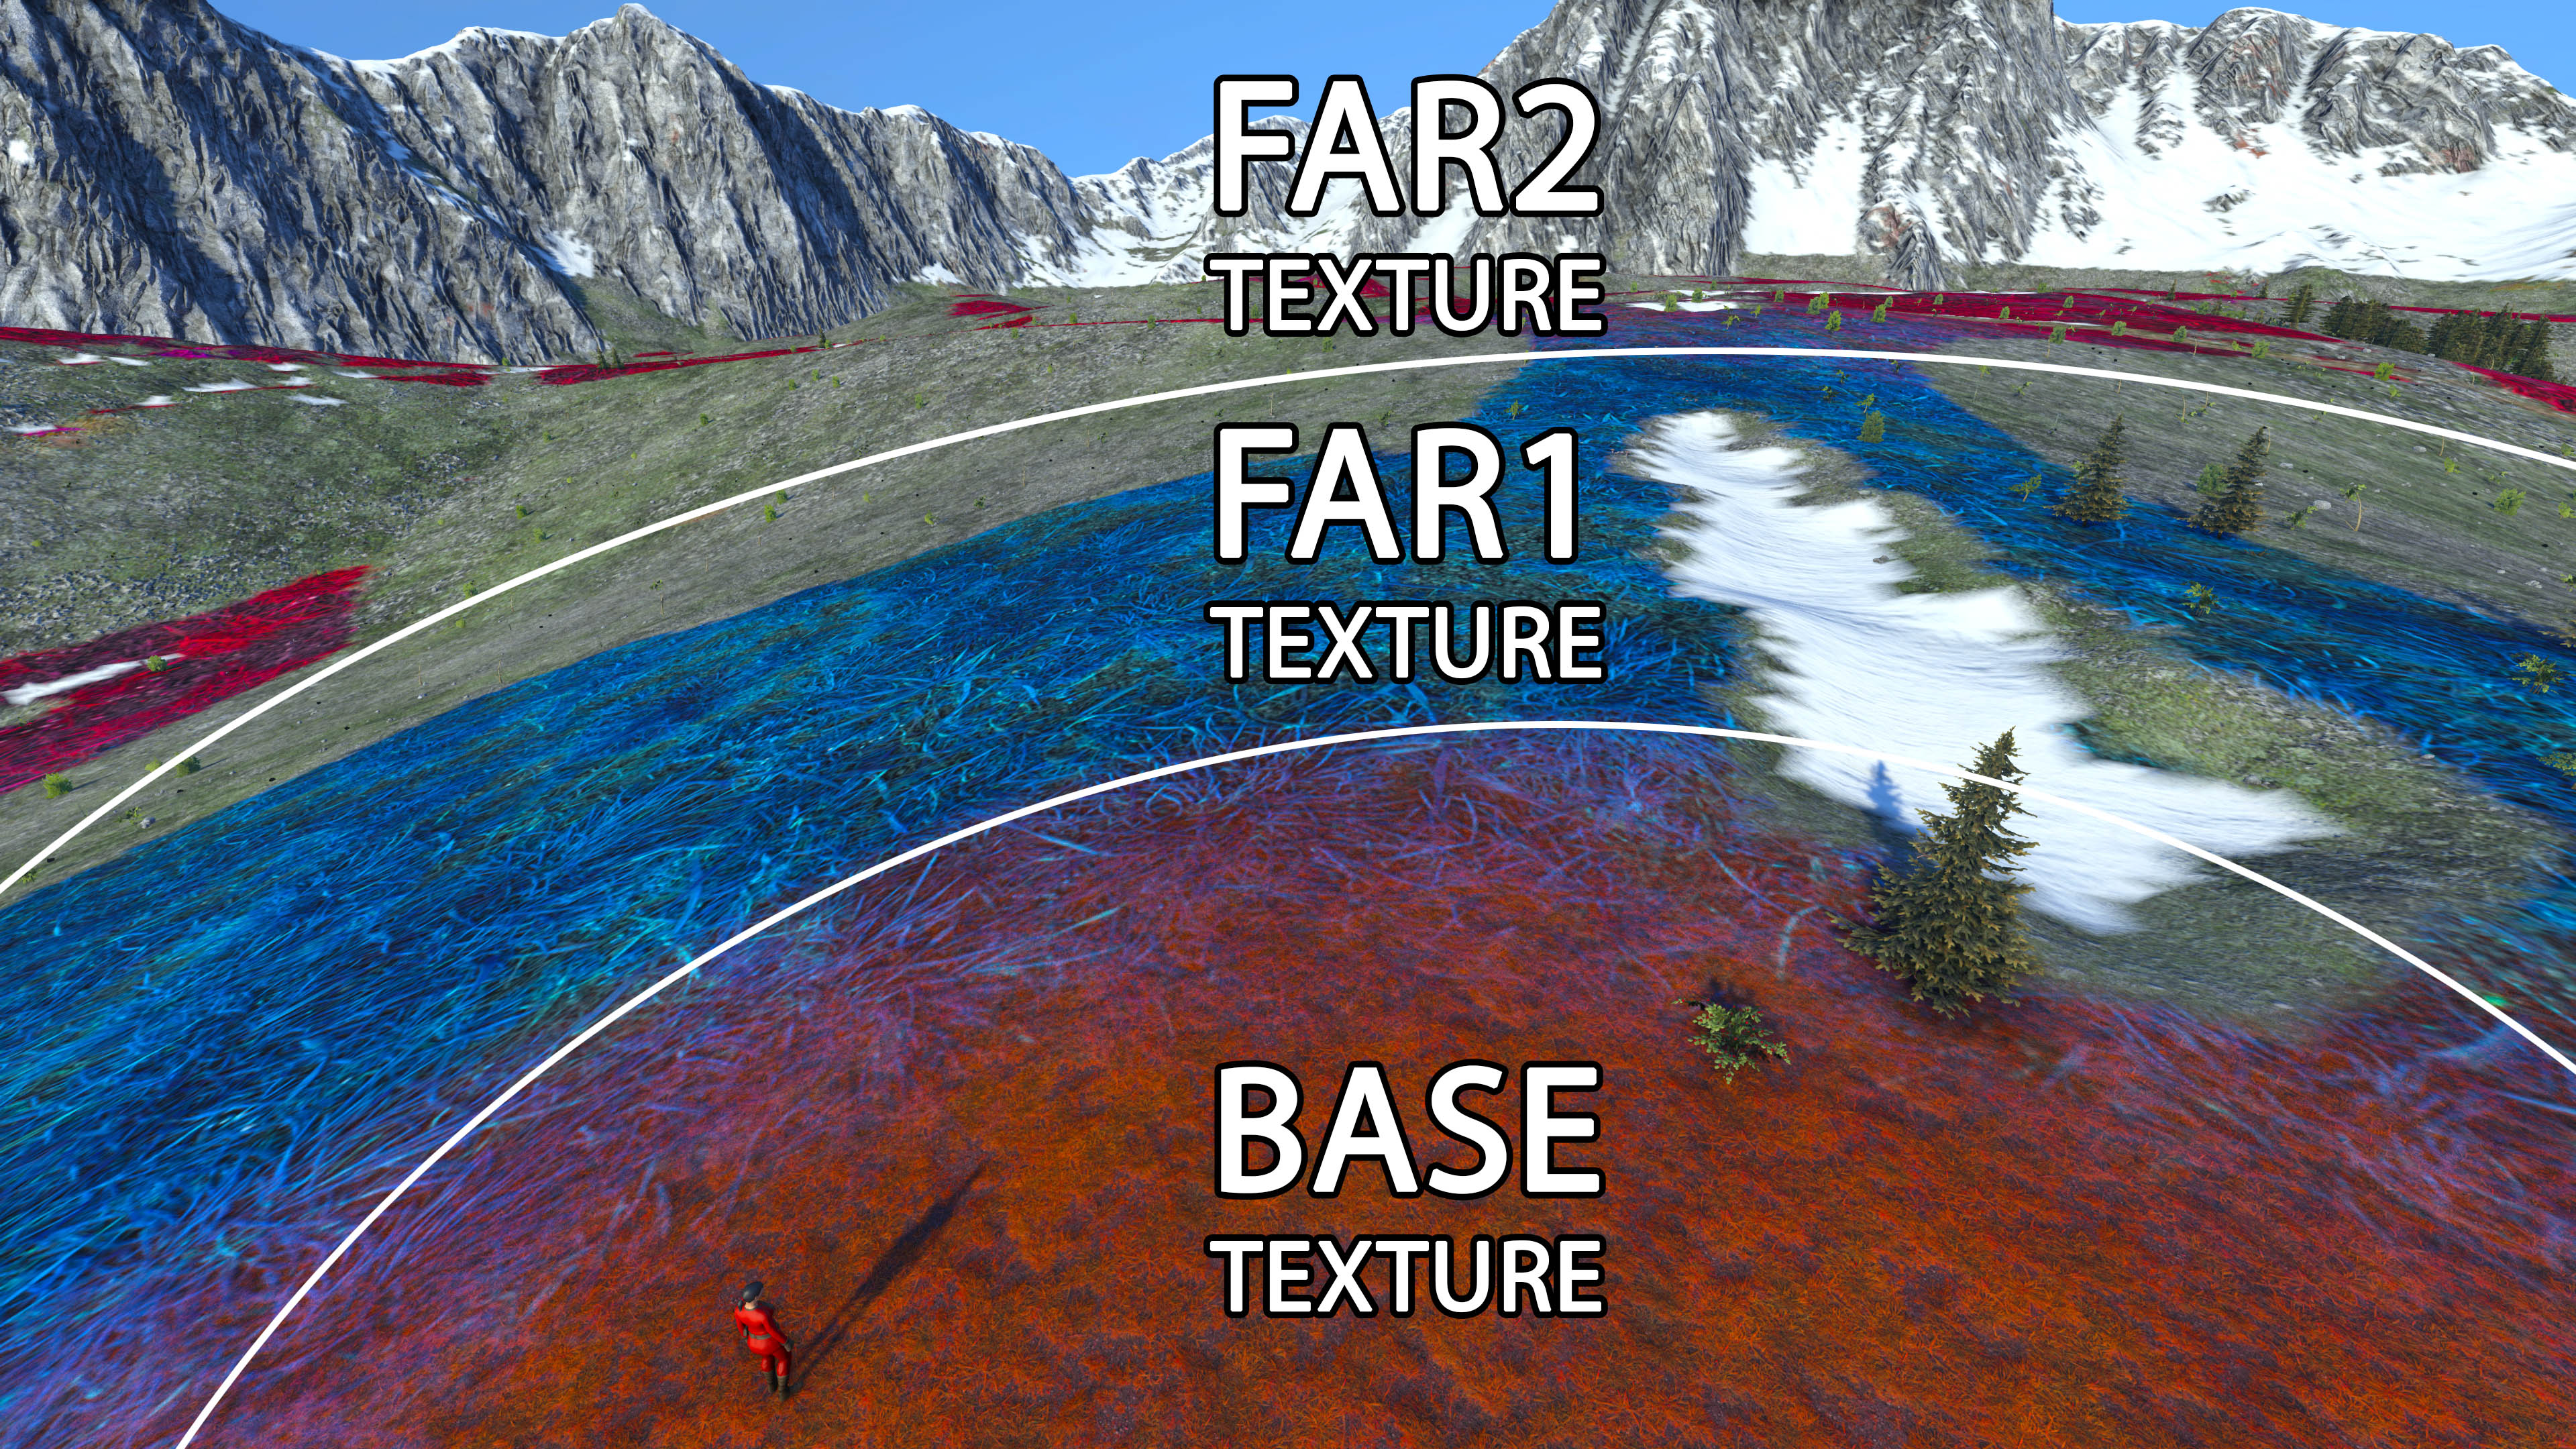
Wrong! Those green textures that you see in the far distance are actually Far1 and Far2 textures, with Far3 Color at its farthest end. I said calm down, son, this is an order! We will talk about it in a minute! Don’t worry, we got you covered!
Far textures
Now that we got acquainted with “cm”, “ng” and “add” files, and know what they’re doing, it is time to speak of Far textures and their meaning in our lives. Briefly - the beautiful green grass field seen from the height of human eyes and the same field seen from the outer space will not look the same, obviously. While standing on it, you’re able to see all the details, even individual grass blades and flowers here and there, but when you’re in outer space and looking down on it from orbit - the base green color will mostly remain, but it’s color pattern and relief will change significantly. So it’s apparent that we have to substitute the base grass material seen from eye-height for one that might look like it's seen from outer space. Also, we have to “tell” the render engine at which particular distances it should load our Far Textures, and how big in scale they should be to represent the desired look. Here’s a picture so you can have an idea of how it currently looks.
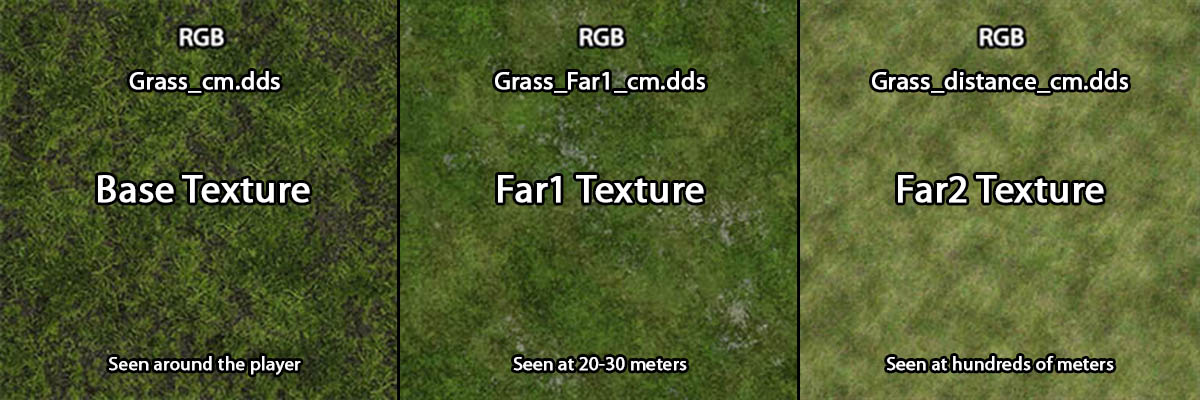
As you can see, Far1 and Far2 textures are represented by the same naming convention - “cm”, “ng” and “add” files. The Far3 Color, as Captain Obvious states, is defined by the RGB Color values only. It’s because when you too far away from the surface - having a simple color is more than enough.
So please open the Far1 color+metalness texture file “EarthGreenGrass_Far1_cm.dds” in Photoshop, and add a simple Hue/Saturation adjustment layer on top. Change the Hue/ Saturation values so it looks bluish enough (or any other color you like). Do the same with Far2 color+metalness texture file “EarthGreenGrass_Far2_cm.dds”. Now you have completely blue Far1 and Farf2 textures. That’s exactly what we want. Finally, it’s time to change the Far3 Color which will be loaded at extremely far distances and which is still green. But we will change it in a sec.
To choose the correct Far3 color to seamlessly blend with the Far2 Texture, you must first get rid of anything like fog or normal map effects that might get in the way and reduce the accuracy of color adjustments. So it’s better to choose your Far3 color with only the Base Color channel turned on (see the picture). To do so, hit F12 -> Render button –> tick the Render Debug checkbox –> tick the Base color in a newly opened Render Debug window.
Then hit F12 and then click the “Game” button. Tick the “Voxel Materials” checkbox and the Voxel Materials debug window will pop up on the right side with the drop down list where you can select any existing voxel materials in your world and adjust them.
Holding “Alt” (you need to keep holding “Alt” while you operate in this window), select “Grass” material from the dropdown list and start adjusting the color with these three RGB sliders. We can get a good result with R-0, G-5 and B-25, as this color blends perfectly with other Far textures. But first we have to convert these RGB values to XYZ values before we paste them into the code.
To find your X,Y and Z values simply divide each of your RGB values by 255. By dividing 0/255, 5/255 and 25/255 you get X-0, Y-0.02 and Z-0.10 respectively. Cool! Now just update the old XYZ values with these new ones in the code and load the game! You should see something similar to this.
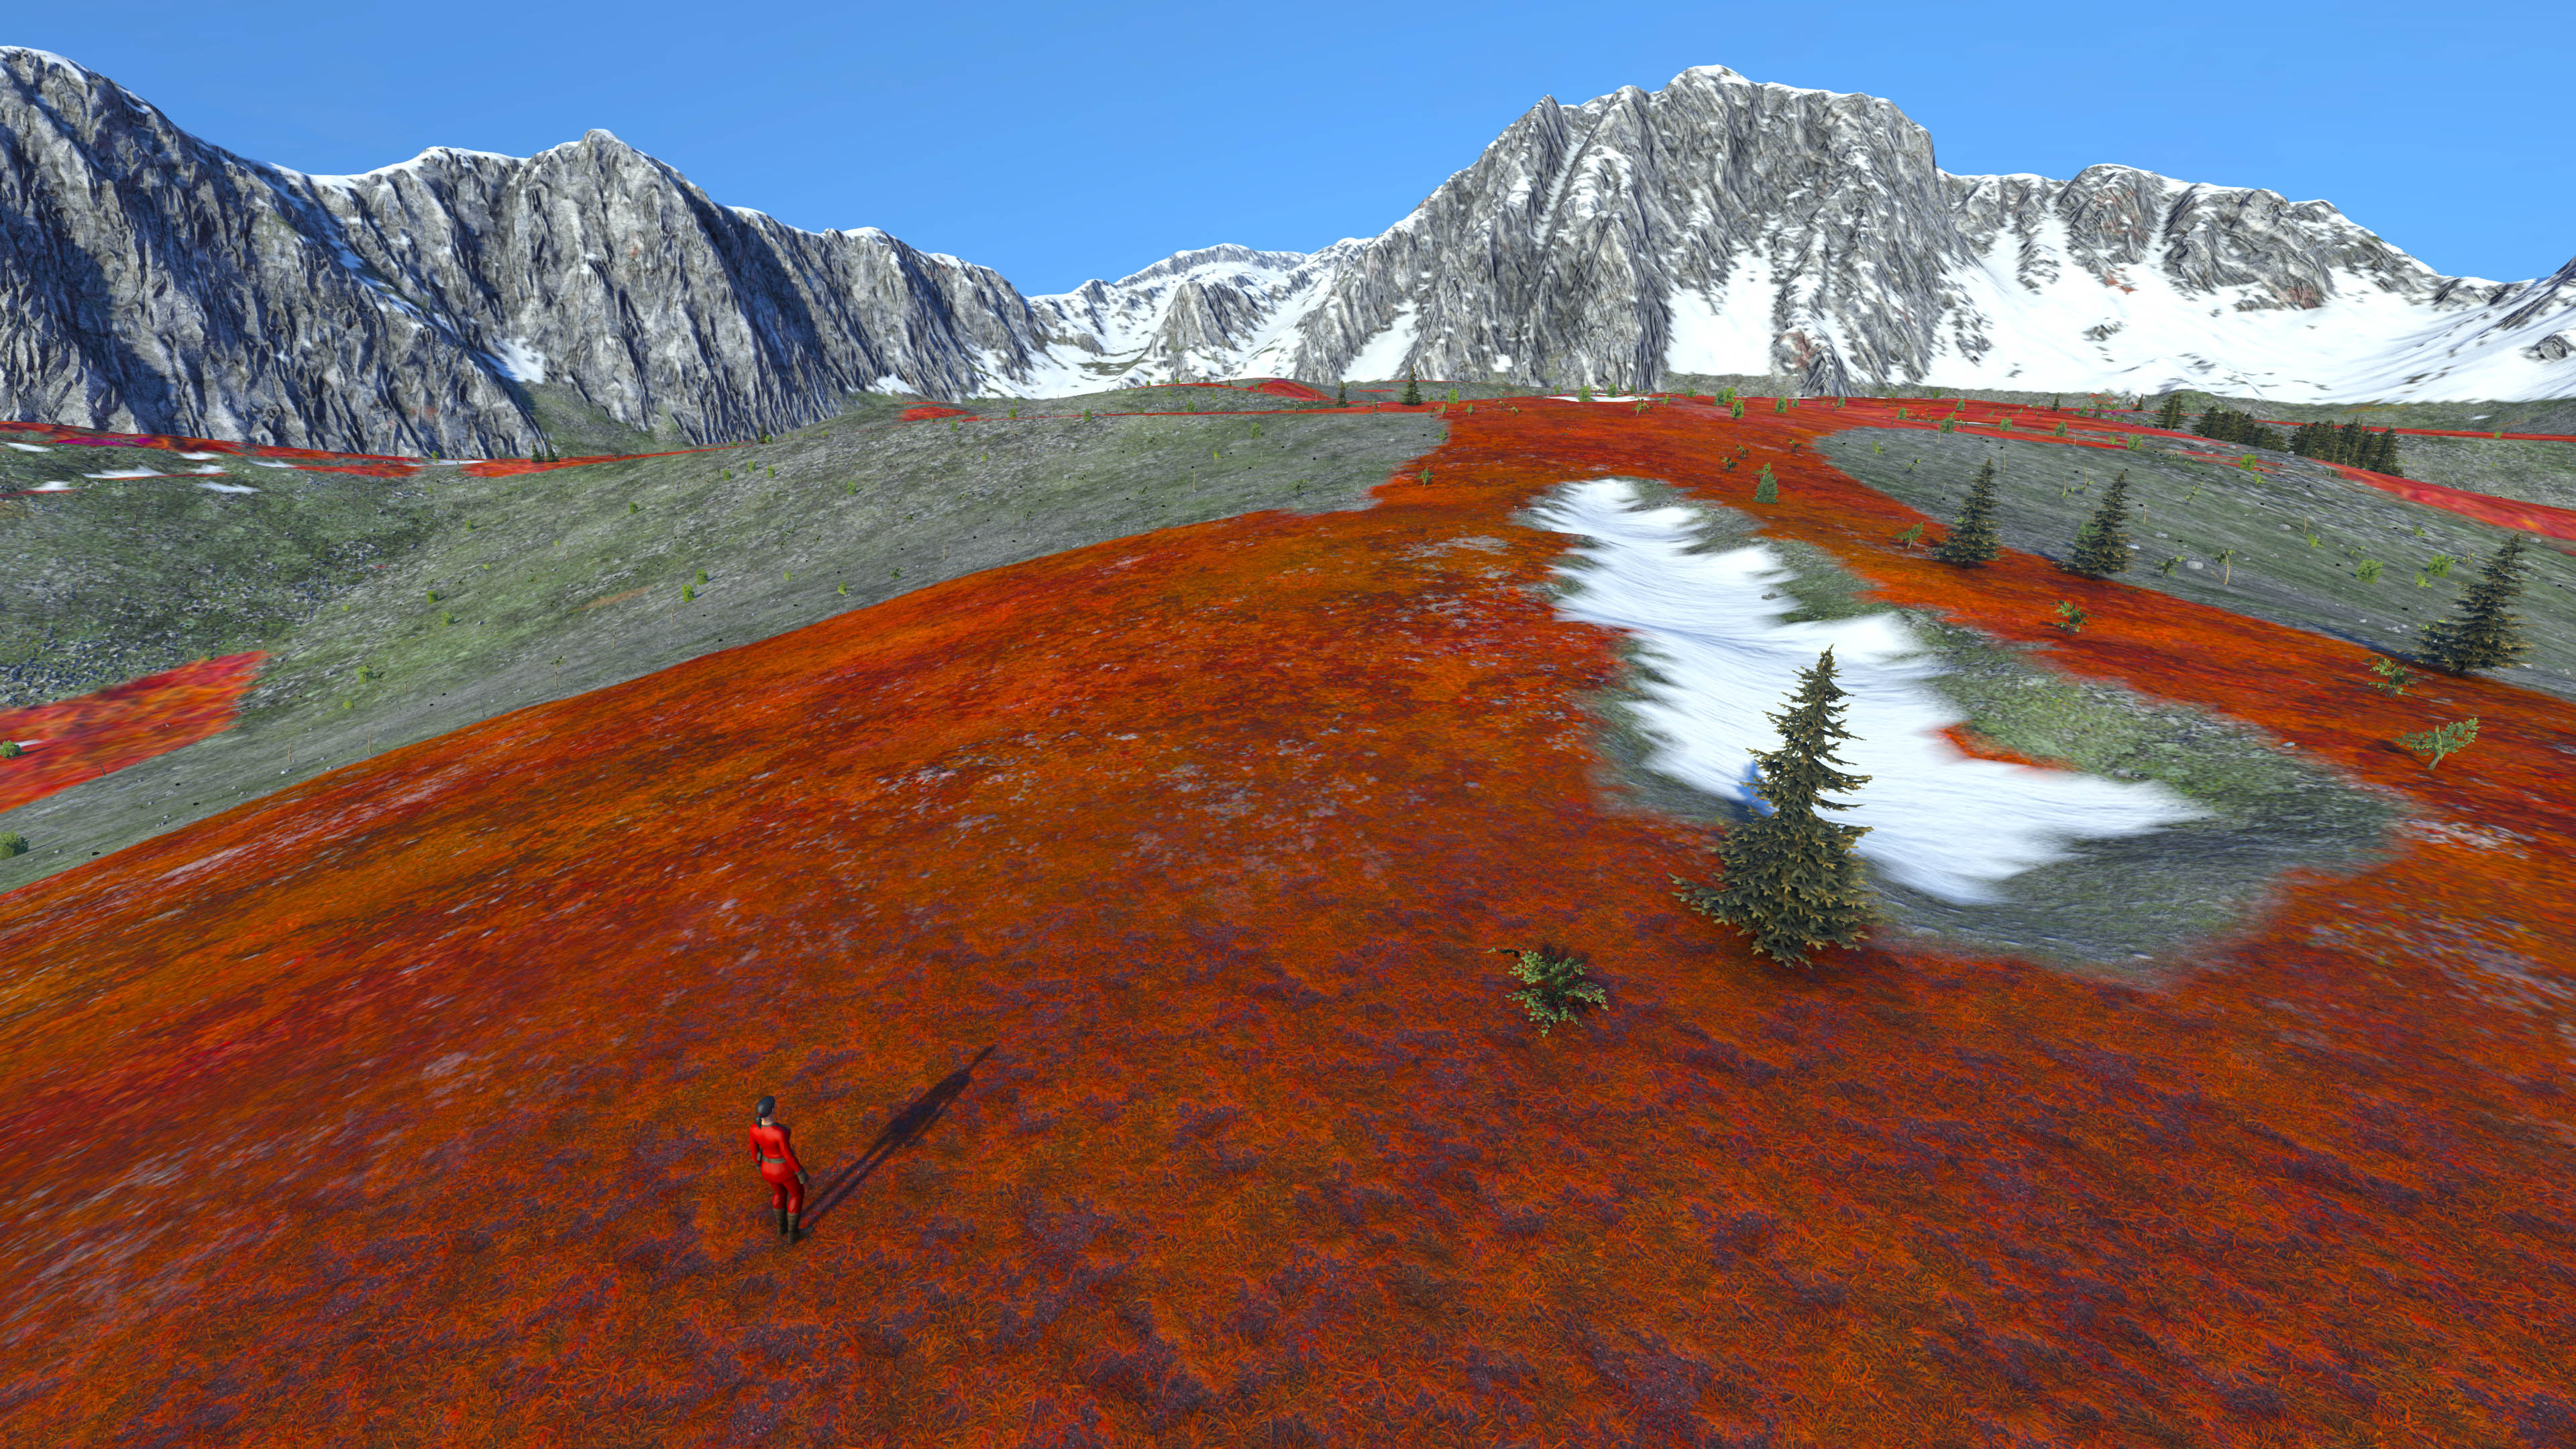
Also, the Voxel Materials debug window is convenient for interactive in-game adjustment of Far Textures’ Distance and Scale values. You can adjust the corresponding Far1 and Far2 Distance and Scale sliders, and you can set Far 3 RGB colors and see changes immediately, which is a lot better than guessing the correct numbers in the code. After you find the desired values for everything related to Far textures, you just copy those values to the definitions in the code. Very convenient, isn’t it?
Now about Distance and Scale definitions in the code. So, the following lines in the code:
<Far1Distance>30</Far1Distance>
<Far2Distance>500</Far2Distance>
<Far3Distance>5000</Far2Distance>
literally mean that the Far1 texture is seen at distances greater than 30 meters, the Far2 texture is seen on a distances greater than 500 meters, and finally the Far3 color is seen at distances greater than 5000 meters. It’s that simple. The following lines:
<Far1Scale>200</Far1Scale>
<Far2Scale>1000</Far2Scale>
define the scale (in meters) for the Far 1 and Far2 textures.
Understanding what Grass is made of (Grass Plates)
Below you can see all the grass textures our green grass consists of. It consists of 7 (seven) different grass plates (each with it’s own set of “cm” and “ng” files). Note that <Color></Color> tags are for “cm” files, and <Normal></Normal> tags are for “ng” files. Here they are:
And that’s how their channels look in Photoshop:
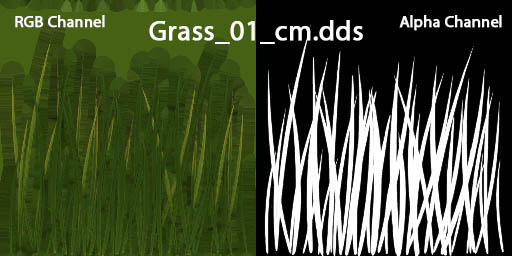
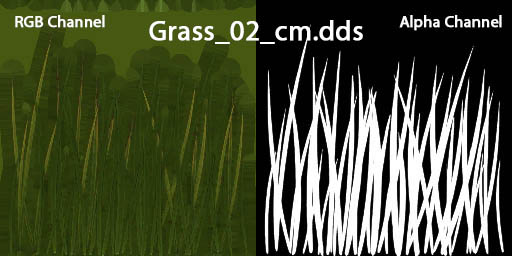
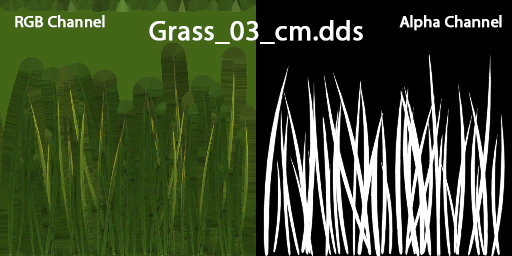
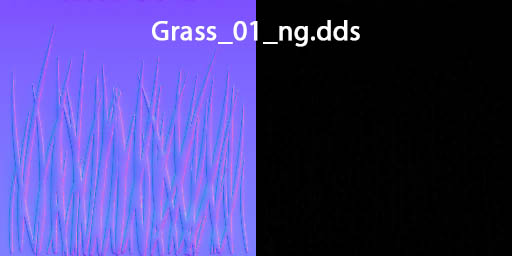
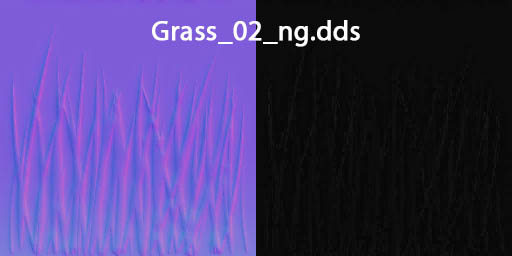
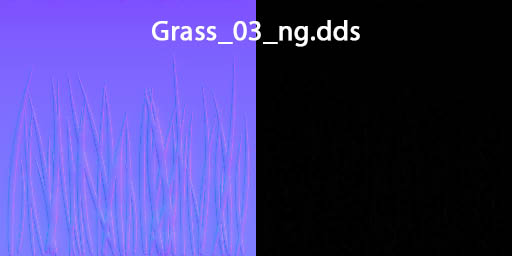
Why there are so many of them? More grass plates mean more variation in the overall feel and color of the grass, and thus it looks more real, which is exactly what we’re after (unless you really want to make an awful type of graphics intentionally of course!) If the whole field were made up of only one type of grass texture it would be way too repetitive, boring and too uniform of course. Now you can say, hey, but didn’t we use the Alpha channel for Metalness in all “cm” type files?! Don’t worry, your grass won’t be metallic. Yes, though the “CM” abbreviation stands for Color and Metalness in the above files, remember that for Grass Plates only (ONLY), we use Alpha channel NOT for Metalness but for Alpha Mask, to cut out th Grass’ silhouette. Pretty simple right? But for all “NG” (normal/metalness) type of files everything stays the same – you have RGB channels for Normals and Alpha channel for Glossiness.
Changing the Grass color
Now that we know how our Grass is made, let’s make a simple color change again - from Green to Blue. So open all 7 (seven) Grass Plate files (“Grass_01_cm.dds”, “Grass_02_cm.dds”.. etc) in Photoshop, and for each of the files, add a simple Hue/Saturation adjustment layer on top. Change the Hue/ Saturation values so it looks bluish enough (or any other color you like)
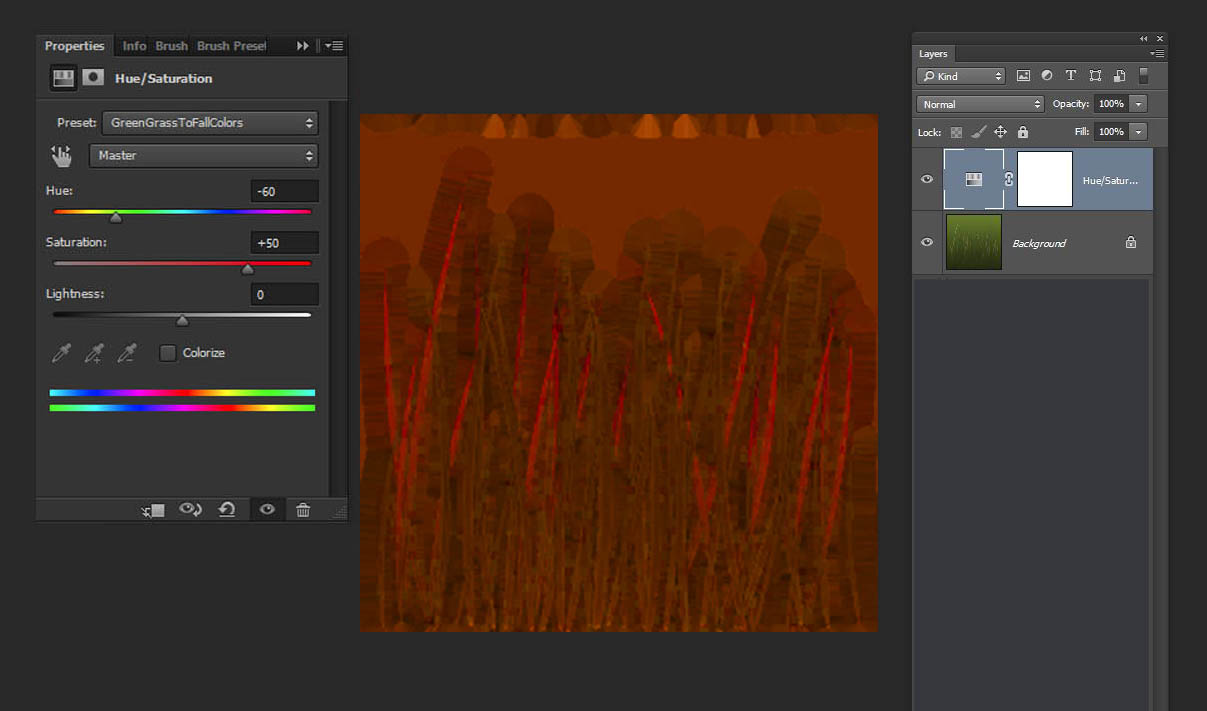
and then let’s re-save it as “GrassBlue_01_cm.dds” in the same folder (KeenSWH\Sandbox\Sources\SpaceEngineers\Content\Textures\Models\Environment\Grass). Please note that it’s different from the folder where you put your textures for the Voxel Surface materials. Repeat the same procedure for the rest of the "cm" textures (“GrassBlue_02_cm.dds” etc.) Then we go back into the code of VoxelMaterials.sbc and change the names of all 7 grass textures “Grass_01_cm.dds” etc. to “GrassBlue_01_cm.dds” which we’ve just created. You should end up with the following:
Restart the game, or just reload the save and Voila. You have this crazy blue-colored grass. I wouldn’t step on it barefoot, to be honest. You never know who may live in the blue grass. You never know :)
