Keen:Planet Modding - Full Guide: Difference between revisions
CptTwinkie (talk | contribs) |
No edit summary |
||
| Line 552: | Line 552: | ||
<Loop> Here you just need to lead the definition to your file. ARC/AMB/ is the default location, so do not change that. | <Loop> Here you just need to lead the definition to your file. ARC/AMB/ is the default location, so do not change that. | ||
But if you want, you can make another folder in AMB for your custom ambient sounds for better organisation. | But if you want, you can make another folder in AMB for your custom ambient sounds for better organisation. | ||
[[Category:Keen_Modding_Guides]] | [[Category:Keen_Modding_Guides]] | ||
Revision as of 14:47, 16 March 2017
Introduction
Hello fellow Medieval Engineers! I would like to present you with a guide that will help you understand how we created planets at Keen Software House and how to mod your own into the game. Feel free to use/alter company owned files for your Medieval Engineers mods.
So let's get to modding!
Recommended Software
- Microsoft Visual Studio - or Notepad++ (Link[notepad-plus-plus.org]) - for opening files with .sbc extension where we have definitions for every feature in the game.
- Adobe Photoshop - for editing material and heightmap textures
- World Machine Professional - for heightmap easier creation (much more realistic looking terrain, without manual work)
(Basic Edition is also available, but the max resolution output is limited to 512x512 pixels) http://www.world-machine.com
Advice
We would like to mention one thing before you get into modding planets: For your own sake we recommend you to load either PlanetTemplate or EarthLikeModExample and test/edit all the things there, so you get to know the system and how everything works.
After that you can create your own from scratch. This is entirely up to you.
General modding principles - how to make any mod
I will explain again basic principles of how mods are applied.
All of our vanilla source files are all saved in a folder called content in your *game folder. If no mods are assigned to a world that you are loading, game uses only files from this content folder but if there are mods, game loads also files from mod adding more content or potentially rewriting vanilla content based on content of the mod’s folder. Mod is nothing else but a folder with another files. Mod files are stored in mods folder on your computer , and if you are using them for the first time, they are downloaded from workshop first time you try to load/connect to a world with those mods. Mod folder: C:\Users\YOURUSERNAME\AppData\Roaming\MedievalEngineers\Mods
Opening mod and examining mods content
When you open Mods folder, you will see mods as files with .sbm extension. But they are really just folders and to examine them, all you have to do is rewrite the extension from .sbm to .rar and then you can open them with rar and examine content. Mods are not listed with their names, but with their steam id number. To find specific mod, you have to go to the mods workshop page
Examining other mods similar to your idea is a fast way to learn. Example:
*By default this is SteamLibrary\steamapps\common\MedievalEngineers\Content. You can also get there if you go to steam library(same place where you start the game), right-click Medieval Engineers, select properties, local files and finally click on “browse local files”.
Materials modding
In case you are thinking about making your own trees and voxel materials, we have some good news for you!
There are two separate guides that you can follow to make your own stuff.
General modding guide - get started
Voxel material modding
Planet Size
Planet size is defined in a scenarios.sbc. Every time you click on create new world in the game it uses scenario definition to create a new safe file. Although this scenario definition is not moddable, you can still use it to create a world and share the world itself on the workshop.
First go to where you have Medieval Engineers source files and find Data folder (SteamLibrary\steamapps\common\MedievalEngineers\Content\Data\Scenarios.sbx)
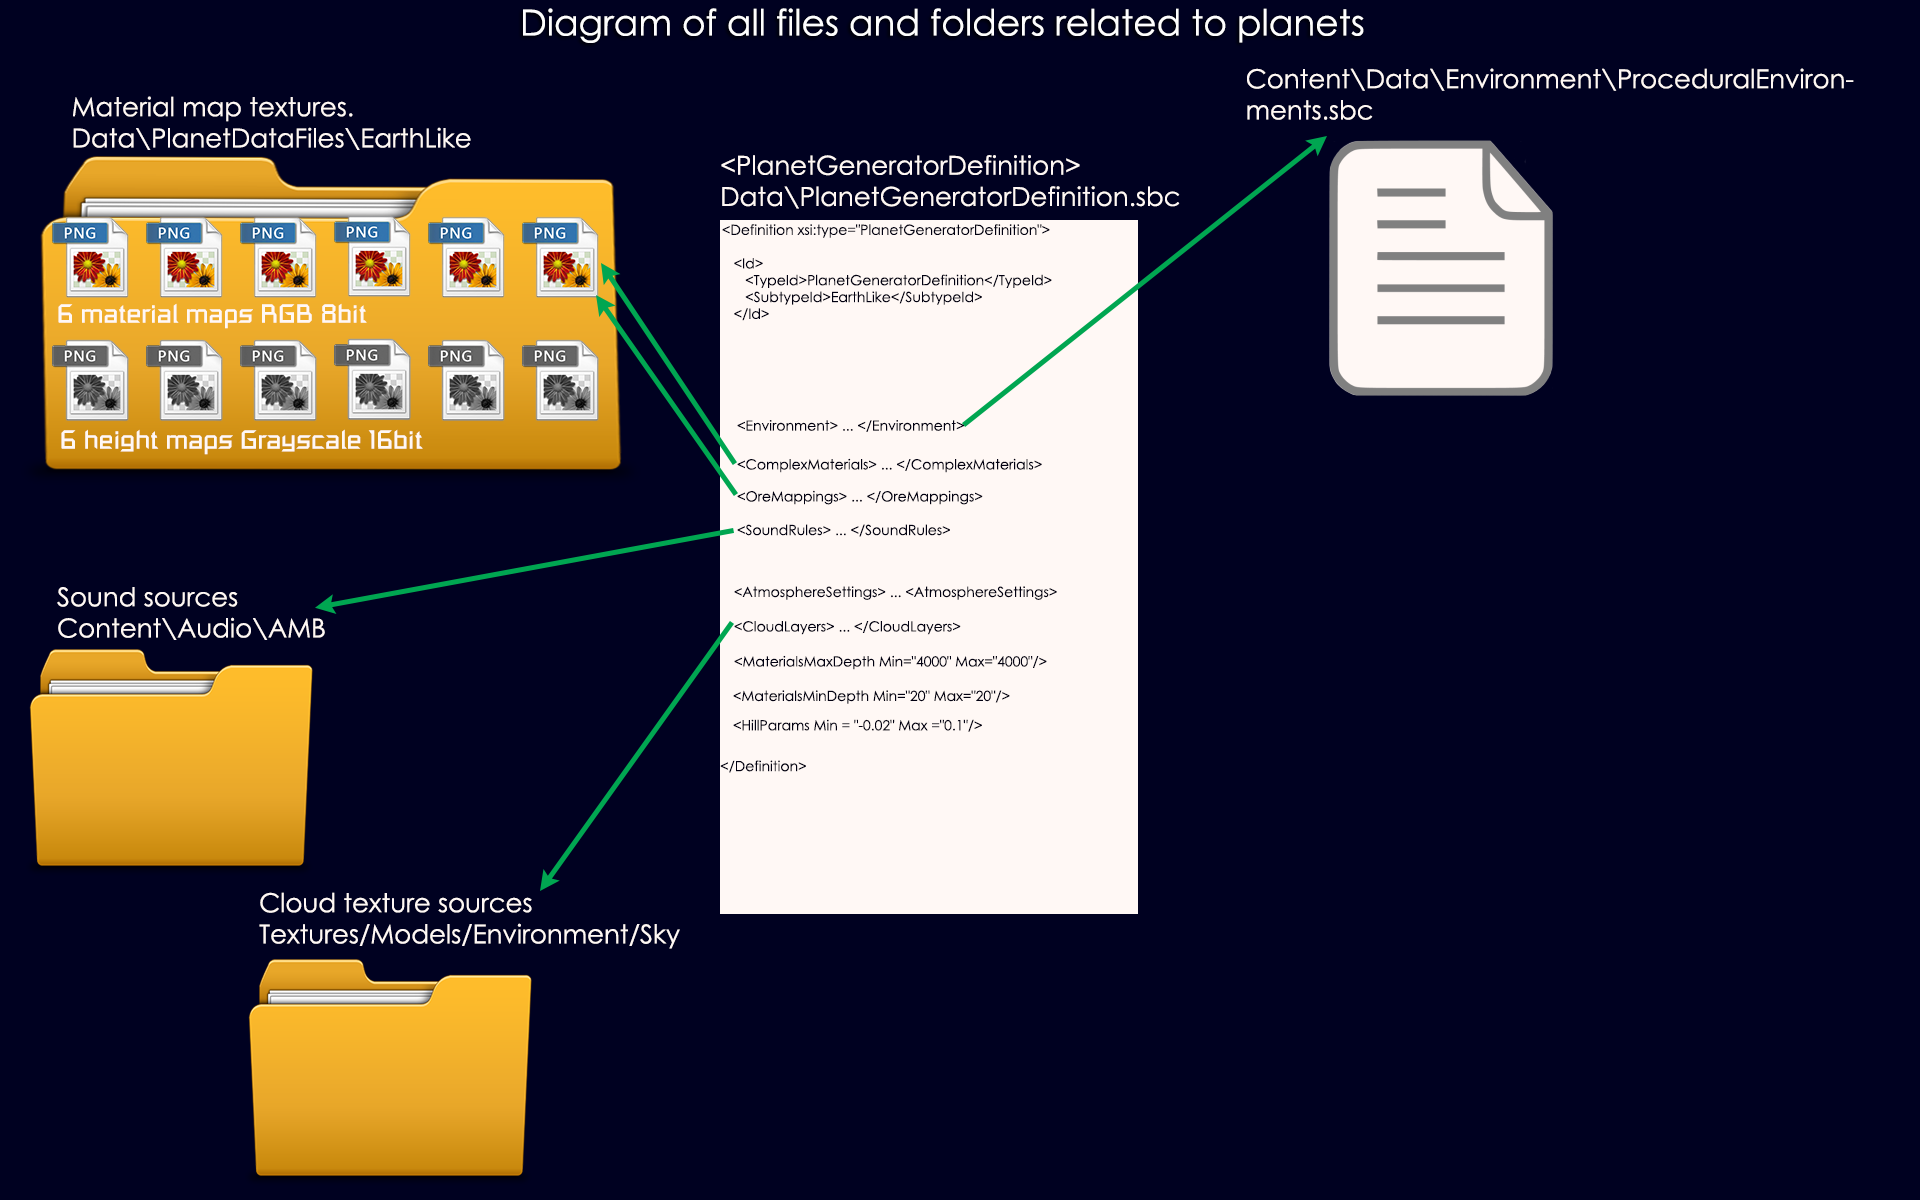
To summarize how planet modding in ME works, we can say this: We use 2 types of textures and then we define how the game should interpret those textures in definitions. One texture is heightmap that is used just for generating terrain shape, another one is used to place everything else on the planet (ores, trees and plants, bots).
Material Texture modding
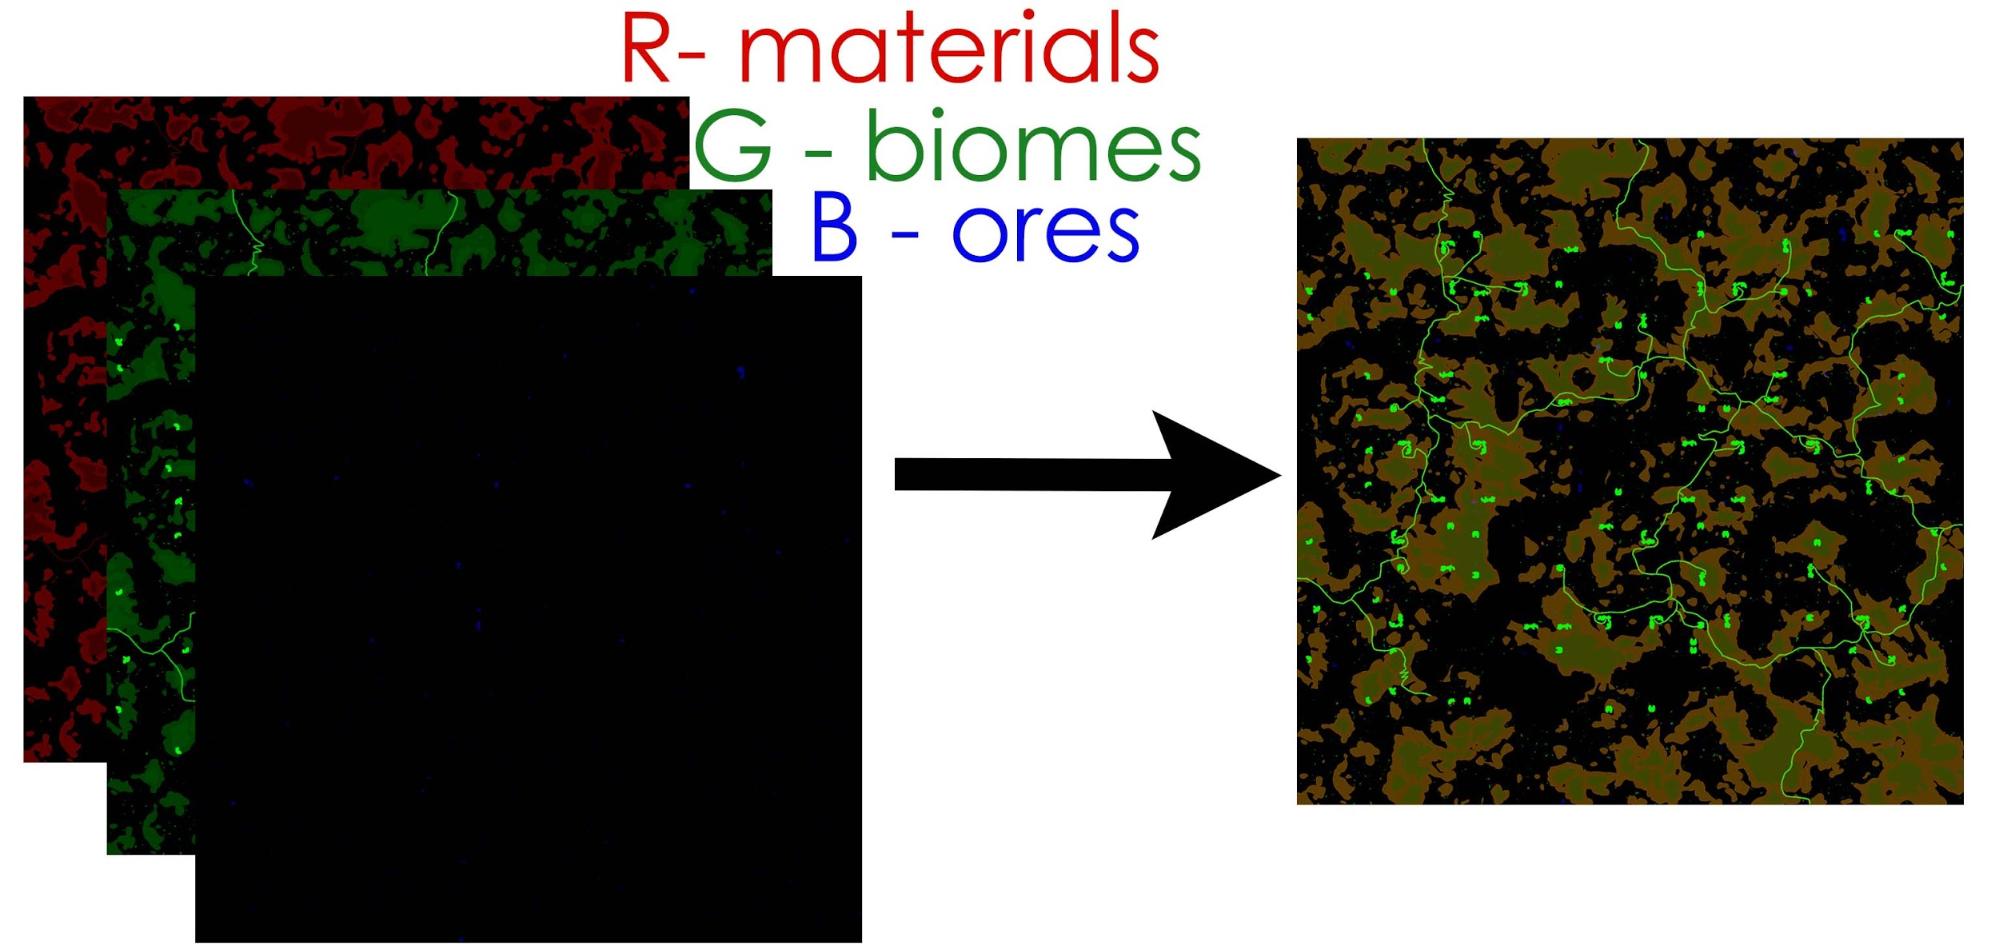
Material texture is used to store information about location of various planet surface features. These features are surface materials, biomes (trees, bots, plants,..etc) and where you can find ore. Each one of these uses one color channel. Surface materials use red channel. Biomes use green. Ores are in blue channel. We use 6 material textures (2048x2048) for each planet. You can find all our material textures here: Content\Data\PlanetDataFiles. Each planet has its own folder. The folder has to have the same name as the planet.
Illustration of how are the material textures connected to each other:
The process of material texture creation is really simple. You have two options:
Copy an existing map to your folder and overwrite the green channel and edit them to your liking
This is highly recommended to avoid errors!
Create a new: step by step in Photoshop
- Set both width and height to 2048 pixels
- (for smaller planets this can also be 1024 or less, but all textures need to have the same resolution! Even the heightmap)
- Set resolution - Pixels/Inch to 72.
- Set colour mode to RGB Colour - 8bit
- Now start painting with the pencil tool on each RGB Channel separately.
- Never on all three at once! (It will F. up everything - trust me).
Surface voxel material definitions modding - grass, sand, snow
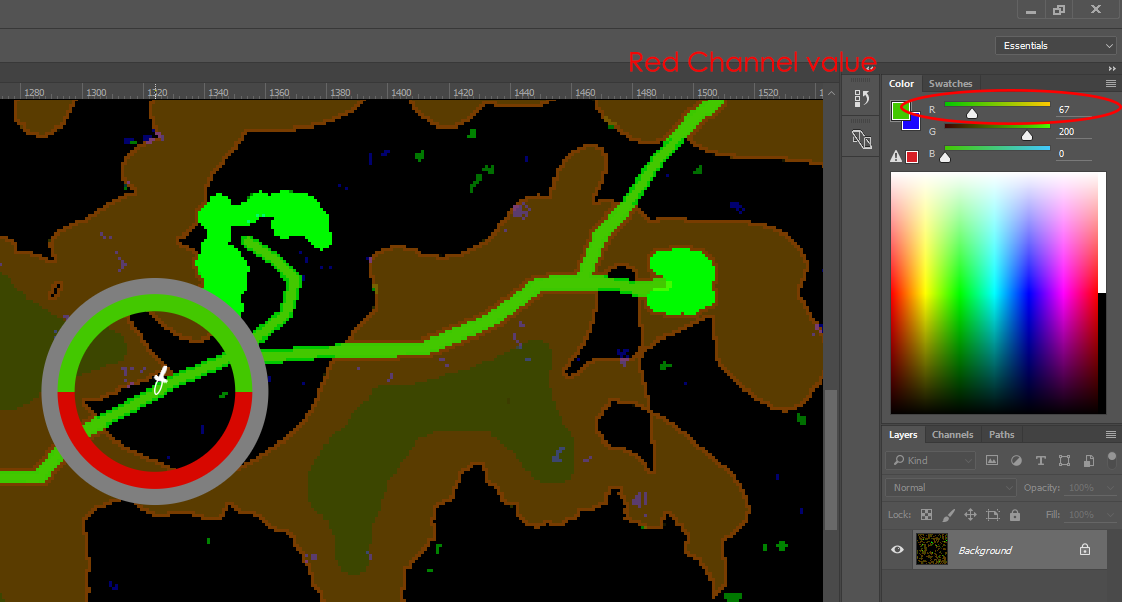
Surface “voxel materials” refers to what you know as grass, soil, stone.. We use red channel of the material texture to set where all the terrain appears. Then you need to write definitions in the Content\Data\PlanetGenerator.sbc to tell game which voxel should appear at specific red channel value. Example of the definition of road:
    <ComplexMaterials>
      <MaterialGroup Name="Road" Value="67">
        <Rule>
          <Layers>
            <Layer Material="Soil" Depth="2"/>
          </Layers>
          <Slope Min="0" Max="90"/>
        </Rule>
      </MaterialGroup>
    </ComplexMaterials>
Example of corresponding material texture with road:
Complex materials
Complex materials definition allows to paint the map with a set of “voxel coloring rules”. Meaning that one color value in red channel can color terrain with different voxels based on rules like slope, longitude or latitude and height. (So with our road example)
      <MaterialGroup Name="Forest_Grass" Value="120">
        <Rule>
          <Layers>
            <Layer Material="Woods_grass" Depth="1"/>
            <Layer Material="Soil" Depth="5"/>
            <Layer Material="Stone" Depth="100"/>
          </Layers>
          <Slope Min="0" Max="25"/>
          <Latitude Min="-180" Max="180"/>
          <Longitude Min="-180" Max="180"/>
        </Rule>
        <Rule>
          <Layers>
            <Layer Material="Grass" Depth="1"/>
            <Layer Material="Soil" Depth="5"/>
            <Layer Material="Stone" Depth="100"/>
          </Layers>
          <Slope Min="25" Max="45"/>
        </Rule>
        <Rule>
          <Layers>
            <Layer Material="Rocks_grass" Depth="2"/>
            <Layer Material="Stone" Depth="100"/>
          </Layers>
          <Slope Min="45" Max="55"/>
        </Rule>
      </MaterialGroup>
This definition says what voxels should be generated in spots, that are painted with red channel value of 120. The rules in this definition will lead to following: Flat lands (up to 20 degrees slope) will have Wood grass 1 m thick, soil will be right under the WoodGrass up to 5 m depth and there will be stone underneath the soil. In places with medium slope, there is Grass instead of WoodGrass. And in slopes from 45 to 55 there is rocks grass 2 m thick with stone right away under it. With this technology, we can make the color react on its own to terrain bumps or even position on planet. This saves lots of meticulous painting with heightmap.
<Layer Material="Woods_grass" Depth="1"/> Material refers to voxelmaterial definition. (You can find it in Content\Data\VoxelMaterials.sbc). Depth means how deep should the material go under ground. <Slope Min="0" Max="25"/> Slope of the terrain in degrees. <Latitude Min="-180" Max="180"/> Latitude in degrees. 0 degree is an equator. <Longitude Min="-180" Max="180"/> Longitude in degrees. 0 is in the middle of front planetary texture. (Fareon Kingdom)
Biomes definitions modding - trees, plants and bots
Biomes refers to everything that is spawned on top of the planet. We use green channel of the material texture to set where all the terrain features appear and definitions in the Content\Data\Environment\ProceduralEnvironments.sbc to tell game which environment item should appear at specific green channel value. Also you need to assign Environment to planet in the Content\Data\PlanetGenerator.sbc in case you are adding a brand new planet.
First make/modify environment:
Go to Content\Data\Environment\ProceduralEnvironments.sbc
Procedural World Environment definition
This definition defines where will the environmental items spawn and with which density. (note: bots are also considered environmental item). Best way to explain how procedural environment is working is to imagine that it puts spots on entire surface of a planet. And when you start defining trees, bots and bushes, the spots get “reserved” by these categories based on how many of those should appear in the world according to your mod. Spots are always different for each single planet. In order to mod the procedural environment, mod our “Earth Environment” definition. Or create your own but if you do, don’t forget to also mod PlanetGeneratorDefinition, so that planet has your new procedura environment assigned to it.
Definition elements explained point by point:
  <Definition xsi:type="MyObjectBuilder_ProceduralWorldEnvironment">
    <Id>
      <TypeId>MyObjectBuilder_ProceduralWorldEnvironment</TypeId>
      <SubtypeId>Earth Environment</SubtypeId>
    </Id>
This part of definition is called ID. It says what type of definition this is <TypeID> and unique name of that definition <SubtypeID>.
<MaxSyncLod>1</MaxSyncLod>
This line defines how far away from player are the environmental items updating. This is important feature for optimization.
<SectorSize>40</SectorSize>
This is size of the environmental sector. It is a different sector than the claimable areas by players. It sets size of one environmental sector.
<ItemsPerSqMeter>0.17</ItemsPerSqMeter>
The line sets overall maximum density of all environmental items. To return to analogy i used in the introduction, this number increases the amount of spots on the planet that are reserved for all environmental items.
<ScanningMethod>Random</ScanningMethod>
<ItemTypes Type="MyObjectBuilder_EnvironmentItemTypesDefinition" Subtype="Default"/>
This sets which types of environmental items are used in this procedural environment definition. This guide explains what are Environmental item types in the very next section.
   <ItemGroup Density=".017" Name="Bots" LodStart="1" LodEnd="1">
     <Mapping>
       <Material>Woods</Material>
       <Item Type="Bot" Subtype="Deer"/>
     </Mapping>
     <Mapping>
       <Biome>60</Biome>
       <Height Min="0" Max"1"/>
       <Latitude Min="-180" Max"180"/>
       <Longitude Min="-180" Max"180"/>
       <Slope Min="0" Max"1"/>
       <Item Type="Bot" Subtype="Deer" Density="0.9"/>
       <Item Type="Bot" Subtype="Barbarian" Density="0.1"/>
     </Mapping>
   </ItemGroup>
Item group is used to organize and better manage mappings. Mappings are definitions that actually add the environment items in the world. It is important to set Density correctly. Density (Density=".017") sets how many of the procedurally generated spots on the planet will be assigned to environmental items from this group. The name (Name="Bots") is only for naming purposes within definition and has no impact on the game. LodStart="1" and LodEnd="1" control how far from the player will the items appear. <Biome>60</Biome> This section means that Items within this mapping will only appear on spaces that are painted with green channel value 60 on the material map. <Material>Woods</Material> This means that the environmental items will only appear in the woods. <Height Min="0" Max"1"/> Sets in which altitude should these environmental items appear. If this parameter is missing, items spawn in full range (Min="0" Max"1") <Latitude Min="-180" Max"180"/> Sets at which latitude do the environment items spawn. If this parameter is missing, items spawn in full range (Min="-180" Max"180") <Longitude Min="-180" Max"180"/> Sets at which longitude the environment items spawn. If this parameter is missing, items spawn in full range (Min="-180" Max"180") <Slope Min="0" Max"90"/> Sets at which slopes the environment items spawn. If this parameter is missing, items spawn in full range (Min="0" Max"90")
<ItemGroup Density=".085" Name="Trees" LodStart="-1" LodEnd="1">...</ItemGroup>
LodStart="-1" means that the items will be visible all the time. Will not go into details about settings of this Item Group, since it more of the same.
   <ItemGroup Density=".36" Name="Small Items" LodStart="0" LodEnd="0">...</ItemGroup>
 </Definition>
Environment items
We learned how to assign environments to planets and how to mod environments themselves by changing densities and environment items. But we still don't know how to make the environment items themselves. Guides for those can be found on following links.
If you want to mod trees:
If you want to mod bushes and plants:
If you want to mod bots:
EnvironmentItemTypesDefinition
Here you define various types of items. Currently we have these types: Tree, Gatherable, Farmable, Static and Bot. Before you add any item, you must make sure it fits within these types of environment items or you created a new type for them.
 <Definition xsi:type="MyObjectBuilder_EnvironmentItemTypesDefinition">
   <Id Type="MyObjectBuilder_EnvironmentItemTypesDefinition" Subtype="Default"/>
   <Item Name="Tree">...</Item>
   <Item Name="Gatherable">...</Item>
   <Item Name="Farmable">... </Item>
   <Item Name="Static">...</Item>
   <Item Name="Bot">...</Item>
 </Definition>
EnvironmentItemTypes
   <Item Name="Tree">
     <ProxyActivationLod>0</ProxyActivationLod>
     <Provider Type="MyObjectBuilder_ProceduralEnvironmentModuleDefinition" Subtype="Growable"/>
     <Proxy Type="MyObjectBuilder_EnvironmentModuleProxyDefinition" Subtype="Gatherable" />
     <Proxy Type="MyObjectBuilder_EnvironmentModuleProxyDefinition" Subtype="Cuttable" />
   </Item>
Available proxy and providers: Proxy Subtype="Gatherable" This line adds ability to all environmental items of this type to use action “Gatherable”. Keep in mind that the tree itself has to be setup properly in order for this to work. Proxy Subtype="Cuttable" /> This line adds ability to all environmental items of this type to use action “Cuttable”. Keep in mind that the tree itself has to be setup properly in order for this to work. <ProxyActivationLod>0</ProxyActivationLod> This line says from which lod is the game logic attached to the environmental item. (when set on 0 only trees very close to you become “gatherable” and “cuttable”). This way we don’t use game logic on environmental items that couldn’t be used anyway and game is better optimized thanks to that. Provider Subtype="Growable” This line adds ability to all environmental items of this type to grow. Keep in mind that the tree itself has to be setup properly in order for this to work. Provider Subtype="Farmable” This line adds ability to all environmental items of this type to be farmable. Keep in mind that the tree itself has to be setup properly in order for this to work. Provider Subtype="Static” This line adds basically adds items that do nothing. They are just visual props. Like some of our fern bushes. Provider Subtype="BotSpawner” It is important that all environmental item types that will contain some bots have botspawner
Assign environment to a planet
Last thing is to assign your brand new procedural environment to a planet where it is supposed to appear. Go to Content\Data\PlanetGenerator.sbc and find definition of the planet you want your environment to be on. Then assign the environment to the planet by adding following line to the planet definition with name of your environment:
    <Environment>
      <TypeId>MyObjectBuilder_ProceduralWorldEnvironment</TypeId>
      <SubtypeId>NAMEOFYOURENVIRONMENTDEFINITION</SubtypeId>
    </Environment>
SutypeId refers to the name of the environment from: Content\Data\Environment\ProceduralEnvironments.sbc
Note: This is not necessary if you just modded existing vanilla environment and have not changed its SubtypeID
Ores definitions modding
Ores are placed using blue channel of the material texture to set where should ore deposits appear. When your ore deposits are painted on the material map, you need to define what ores will be there. Go to Content\Data\Environment\ProceduralEnvironments.sbc to tell game which ore should appear at specific blue channel value.
<OreMappings>
  <Ore Value="130" Type="IronOre_RichYield" Start="3" Depth="7" TargetColor="#b7340a" ColorInfluence="15 "/>
 <Ore Value="120" Type="IronOre_RegularYield" Start="3" Depth="7" TargetColor="#b75e0a" ColorInfluence="15" />
 <Ore Value="110" Type="IronOre_PoorYield" Start="2" Depth="5" TargetColor="#a76a41" ColorInfluence="15" />
</OreMappings>
The section you need to use is Ore Mappings.
<Ore Value="120" Type="IronOre_RegularYield" Start="3" Depth="7" TargetColor="#b75e0a" ColorInfluence="15" />
Value refers to blue channel value on material texture. Type refers to name of a voxel material from Content\Data\VoxelMaterials.sbc. Start is depth at which the ore deposit starts. Depth is how deep under ground it goes. TargetColor is color that will be used to color surface above the ore. ColorInfluence sets strenght of coloring.
Working with RGB
Ok, Steam won't let me share that link to a small RGB Photoshop tutorial with you, so just go to photoshopessentials.com and search for RGB and it's the first link.
This is a simple tutorial to explain you what we mean when we say Grayscale ID, which can also be called the RGB values (each channel only has one number per shade of that color ranging from 0 to 255).
Here I have loaded a Biome map texture front_mat texture which is used on the Vanilla EarthLike planet.
File:RGBChannels.jpgThese are the RGB channels as you can see them in Photoshop.
NOTE: Edit each RGB channel separately!
Always use the pencil tool to paint pixels.
The brush tool has a falloff that has different values and you will not have control over those!
You can see if the numbers are correct on the top right of the screen if you have your workspace set to Essentials.
Here you will enter the values you want to paint. Make sure you check them before saving, sometimes Photoshop can move the number +-1 (personal experience).
It doesn't matter if the numbers match, just as long as you have the correct value (ID) in the correct channel!
Height-maps modding - terrain shape, roads
As mentioned in 2. Required software, we used the program World Machine to create our heightmaps and then we did some minor tweaks by hand (like putting in lakes and desert areas)
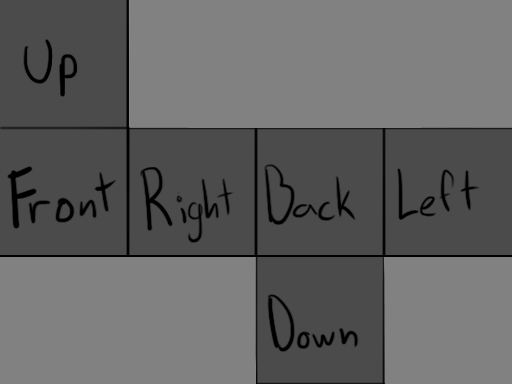
First, to explain how our planet heightmaps work: We have 6 textures that connect together (image below). Our standard resolution for a big 120km planet is 2048x2048. But you can use a lower one if you want to.
To create your own heightmap, the best action would be to find a heightmap here: C:\Program Files (x86)\Steam\steamapps\common\SpaceEngineers\Content\Data\PlanetDataFiles
Then you can open the texture and place yours/paint yours on a new layer, flatten the image and save it as a .PNG
There are other options for you also! You can visit[terrain.party] this site and download a heightmap from a real place on Earth. You can even set the size of the map (maximum is 60 km). And then you can edit it further in Photoshop. You can try painting it yourself in Photoshop (or any other similar software, like Gimp). You can also just try Googling for heightmaps and try which one suits you the best (keep in mind the resolution must be 512,1024, 2048!) However you get your heightmap, always keep in mind how each texture of the heightmap is connected, so the seams need to fit together. Bad texture connection is very visible in the game. Here is an image of how the textures are connected:
Roads
We created roads using World Machine tools. You can find guide how to do that in between World Machine tutorials.
Atmosphere
Here, you will find everything you ever wanted to know about Atmosphere Settings in Space Engineers but were afraid to ask, my dear friend. So without any further ado. Let’s start with the “Atmosphere” settings window which you access in-game by hitting F12 -> Render Button -> Atmosphere checkbox. The new Atmosphere settings window opens immediately on the right side of the screen, showing a bunch of tricky sliders.
File:Cloud Layers Definition.jpg
If your pants are still dry, and if by any chance you’re still reading this, let us assure you that everything is pretty simple and not so scary as it may seem when you first open it. So let’s start with the brief and really quick explanation of what every slider or group of sliders are meant for. Lastly, remember that to alter any setting in this Window you have to hold “Alt” on your keyboard.
Enable Atmosphere (checkbox) – Well, as Captain Obvious immediately states to us – it just enables or disables Atmosphere on a planet and nothing more.
Time of Day (slider) – Controls rotation of the Sun around a Planet. You’re given the Power to decide which time of day it is now. Cool isn’t it?
Pick Planet (Button) – In situations when you have more than one planet in your world, you may want to alter the settings of each planet’s atmosphere individually. So this button enables you to immediately pick the current atmosphere values of the planet you’re currently on. For example, fly to the Moon, press “Pick planet” button and you will get corresponding atmosphere values of that planet to play with. Fly back to Earth or any alien planet, and do the same to alter atmosphere settings of these planets. Yay!
Rayleigh Scattering R,G and B (sliders) – Group of three sliders which control the main, overall color of the Atmosphere. It’s that atmosphere color which is going to be seen from outer space and on the ground too! If you want to make your atmosphere alien green or purple – these are the correct set of sliders to play with. Each slider controls corresponding R,G or B (0-255) values. Pretty straightforward.
Mie Scattering R, G and B (sliders) – Group of three sliders to control the color of the Sun glow. It would be weird to have Green atmosphere and Red sun glow right? You would normally want to set it to yellow or something light green or so. But it’s your choice you can make any color you want. But please note that in order to have noticeable results you have to actually HAVE that glow around your sun. This setting is called “Mie Height” and it has to be set to a fairly high value otherwise it wouldn’t be too prominent. We will talk about this “Mie Height” setting in a minute. No worries.
The following three sliders are complementary and play well together. It means you have to find a good balance setting them which is quite easy:
Rayleigh Height Surface (slider) – Controls the thickness of the atmospheric layer when you’re on or near planet’s Surface. For example. You normally want atmosphere layer to be fairly thick to cover high points of the planet’s surface like mountains and high hills while you’re on the ground because you have actual high picks in your surface geometry which you have to cover. Otherwise you would see black space when you’re on the high mountain. But technically, when you’re leaving the planet’s atmosphere all of these high peaks and mountains are starting to slowly collapse vertically forming a smooth spherical shape of the planet, if they wouldn’t - we would have planets looking like a spiky balls with mountain peaks sticking out in all directions. That’s why when all the high peaks are collapsed to the ground to form a perfect sphere - we are left with abnormally thick and wrong looking atmospheric layer thickness when observed from the outer space. How to fix this?! That’s where “Rayleigh Height Space” slider comes into play, as it controls the thickness of the atmospheric layer seen from outer space.
Rayleigh Height Space (slider) – Controls the thickness of atmospheric layer when you observing the planet from outer space. Like it was said earlier, settings for atmosphere thickness when you’re on the Surface and when you’re in an outer Space can’t be same and normally you want to make it much thinner when it is seen from outer space like it’s in real world. Refer to the following Pic to get better understanding.
Rayleigh Transition (slider) – Ok, so now that we have set the width of the planetary atmosphere for both - when we’re on the Surface and when we’re observing it from outer space, it is time to decide at which distance to switch between two, right? So that’s exactly what this slider does – sets the exact value at which distance that transition must happen. You can play around with this value to find the best setting, just remember that the main goal is to have this transition as smooth as possible, fortunately it’s super easy to achieve. Just make sure that while you’re on the ground and standing on a highest point you still see some atmosphere color (like Blue color in earthlike planets) ,and just about when you start to see the whole planet on your way to the outer space, switch it to the thinner (Rayleigh Height Space) version.
Mie Height (slider) – Controls the size of the outer glow effect of the Sun. Like it was said earlier, when you’re setting your color of the Glow effect via “Mie Scattering RGB” sliders, this particular setting (Mie Height) must be set to a fairly high value otherwise you won’t see it as there won’t be any glow. Look, you can’t change the color of a non-existing thing, soldier. Dismissed!
Sun size (slider) – Controls the size of the Sun.. What else did you expect from it?!
Sea Floor modifier (slider) – Defines the lowest (starting) edge of the atmosphere. Sometimes it is needed to set how low (or how high) actual atmospheric layer starts. It depends on your planet’s relief, your lowest and highest peaks. Adjust individually for each planet. You’ll “feel” the right value immediately.
Atmosphere Top Modifier (slider) – Defines the highest (ending) edge of the atmosphere. Sometimes it is needed to set how low (or how high) actual atmospheric layer stops. It depends on your planet’s relief. Adjust individually for each planet. You’ll “feel” the right value immediately. But normally you want this value to be set pretty high.
Intensity (slider) – Actually it should be called “Fog Intensity” as it’s exactly what it’s responsible for but I hope it will be changed by some coder guys eventually J. Controls the amount or intensity of the fog while you’re on or near the planet’s surface (doesn’t do anything when you’re in outer space).
Fog Intensity (slider) – And this, should be actually called “Fog Distance”. It controls the distance fog actually covers. The higher this value – more objects in front of view are covered with fog. (doesn’t do anything when you’re in outer space).
Restore (Button) – Ok, just in case you screw everything up, you always have a chance to revert all the changes you’ve made by clicking this Restore button, soldier! Very convenient isn’t it?!
Atmosphere 2/2
Ok, now that we got acquainted with all Atmosphere settings and know how they work, it is time for us to actually change a few settings to alter the look of our Atmosphere! Now the fun part begins. Let’s say that we want to change the color of Earthlike planet’s atmosphere from its natural Blue color to the Green one, so it looks more “alienish”. Please note, that all atmosphere settings are stored in “PlanetGeneratorDefinitions.sbc” file and they are NOT replaced even when you change these values in game and make a save. If you want to change those values you have to change them directly in the code of the “PlanetGeneratorDefinitions.sbc” file only! The system reads those atmosphere values from this file every time you’re loading your worlds.
But how for God’s sake would you know which values are correct and really desirable to put them in the code? This is really simple. You just adjust your atmosphere settings to your liking right in the game, and when you’re done and happy with it, you just copy those values into the code (you can screen grab the in-game view with Atmosphere Settings window or just write them down manually, not a big deal) But to paste those values in the code, you have to know WHERE to paste it, right? You don’t just randomly paste numbers into the code, do you? You may hurt yourself!
So please open “PlanetGeneratorDefinitions.sbc” file in any decent text editor and find the following line:
<SubtypeId>EarthLike</SubtypeId>
It’s a name or identifier of a planet, and since it’s named Earthlike, we know for sure that below are the definitions related to Earthlike planet. Cool! Now just scroll down to the part where you will see a commented (inactive) line of code which goes like:
Or alternatively, just Ctrl+F to find the following line. You must see something similar to this:
File:Atmosphere definition.jpg
So here as you can see everything is pretty self-explanatory. Except a few lines that are just named differently in the code. If you want your atmosphere to “remember” the settings you have made you have to enter those values here to the corresponding lines. The following schematic pic shows dependencies between the code lines and the slider names in Atmosphere Settings window quite clearly: (Click to enlarge)
File:In-game Atmosphere Debug Input.jpg
Now let’s just change the blue color of the atmosphere to orange. As you remember, group of three RGB sliders named “Rayleigh Scattering” are responsible for changing the main color of the Atmosphere. So why wait?
Spectacular right? Now, let’s change the sun glow color “Mie Scattering RGB” to an orange tint too. It could stay the same yellow of course but let’s change it so you could have an idea. Remember to press “Alt” on your keyboard while you’re dragging those sliders.
File:Another Red Atmosphere.jpg
Ok, now it’s more orange but we have to increase the glow effect a bit to see it more prominently. And as we remember, the glow size control is “Mie Height” slider. Crank it up from 30 to 50.
Good, the glow effect became more prominent. Looking nice isn’t it? Of course, you can continue adjusting it and come up with really crazy results, but if you’re ok with what we already have, then just write down all the values that you currently have in your Atmosphere Settings window on the right or screenshot them and paste into any image editor for your reference. And back in the code editor, just enter those values into corresponding tags in the code and save it:
File:CloseUp Atmosphere definition.jpg
That’s it! From now on, every time you load up your world with Earthlike planet in it, or spawn Earthlike planet, the atmosphere on it will be exactly the way you adjusted it via Atmosphere Settings! The God himself must have been using something like this we suppose..
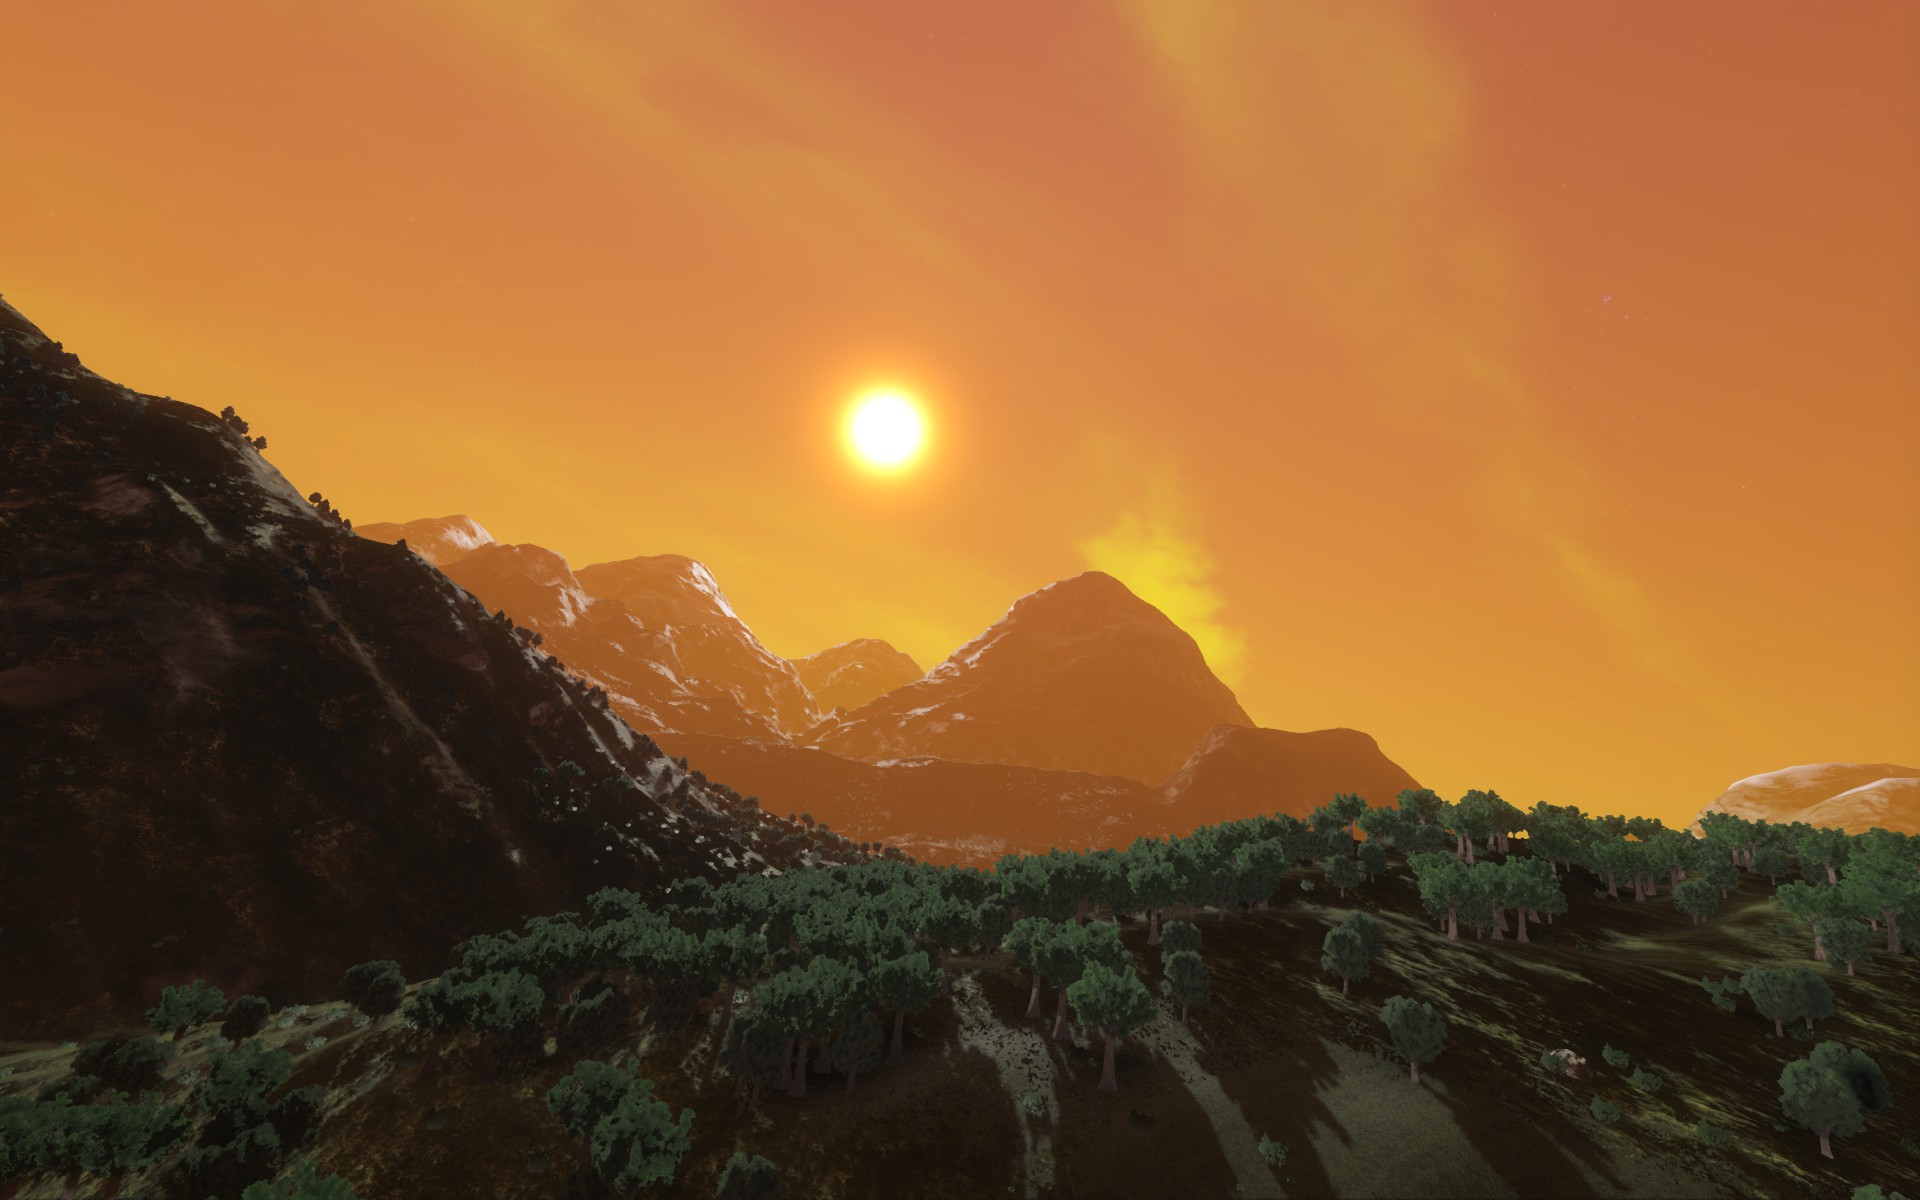
File:Mars-like Atmosphere Final.jpg
Clouds
The first thing that should (probably) come in to your mind when you finally learn how to tweak Atmosphere settings, is probably how to change the look of the Clouds! Because, normally, when you change the color of the atmosphere you would like the clouds color to be relatively close to the Atmosphere color. In our Atmosphere guide (if you read it) we were sharing some knowledge about changing the look of the Atmosphere. We made it orange which is kind of cool all on its own, but what really draws our attention and not in a very good way – is the color of the clouds. As you can see they’re white which is looking wrong isn’t it? In an orange atmosphere environment you would expect orange or yellow clouds right? So that’s what we’ll be doing in a minute – changing the look of our cloud layer and getting to know their under-the-hoods.
Like with Atmosphere settings, the Clouds setting are stored in the same “PlanetGeneratorDefinitions.sbc” file located in KeenSWH\Sandbox\Sources\SpaceEngineers\Content\Data and are individual for each planet. Usually we base our code lines so the Cloud definitions come right after Atmosphere definitions which makes it very convenient to search for. Just open your “PlanetGeneratorDefinitions.sbc” file in any decent advanced text editor and search for this commented (inactive) line of code:
Note: you can download the DDS files from here[mirror.keenswh.com]
File:Cloud Layers Definition.jpg
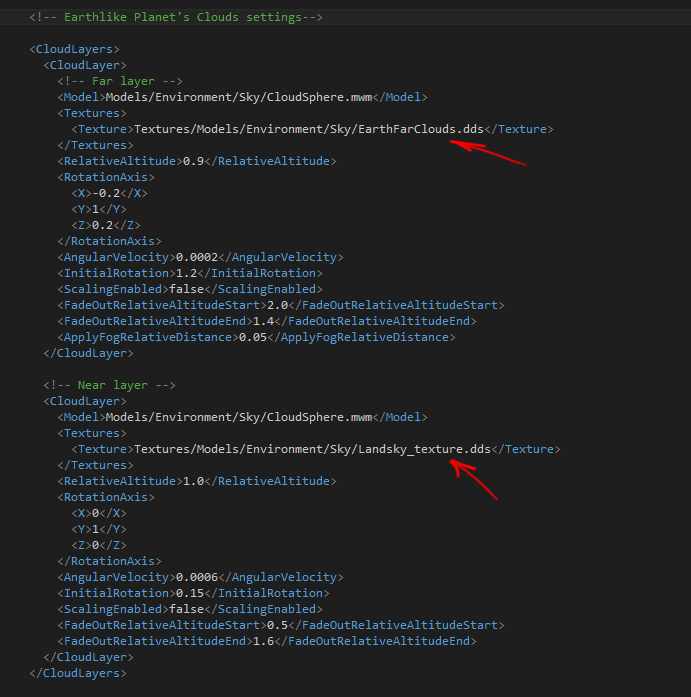
That’s where all the cloud settings for particular planet are stored. The following picture is a brief breakdown of cloud definitions:
Basically, the structure of placing clouds on any planet is as follows:
<CloudLayers>
   <CloudLayer>
   Blah Blah Blah Beautiful Clouds Blah Blah Blah
   </CloudLayer>
</CloudLayers>
So, as you can see everything is super easy. Simply put, <CloudLayers> tags are meant for global separation of Cloud definitions from other code definitions and are here just to define where the code for the clouds start, while <CloudLayer> tags (again, don’t mistake with CloudLayers) are the actual cloud layers and each pair of these tags (<CloudLayer>…</CloudLayer>) define the look and behavior of each cloud layer. As Captain Obvious states - The more <CloudLayer> pairs you have.. umm - the more cloud layers you will have!
For example. You can have more than one Cloud layer, to simulate even more complex cloud patterns than you initially had in your texture file! And that’s when <InitialRotation> and <RotationAxis> tags come into play. You can assign values to these tags for each Cloud layer individually thus having the cloud spheres to be initially rotated and spinning on different angles creating more interesting and natural cloud patterns. So you basically just stack them this way:
<CloudLayers>
   <CloudLayer>LAYERPROPERTIES</CloudLayer>

   <CloudLayer>LAYERPROPERTIES</CloudLayer>

   <CloudLayer>LAYERPROPERTIES</CloudLayer>
</CloudLayers>
That’s it! Now you have three Cloud Layers! And of course you can do it for the Far and the Near cloud layers as well.
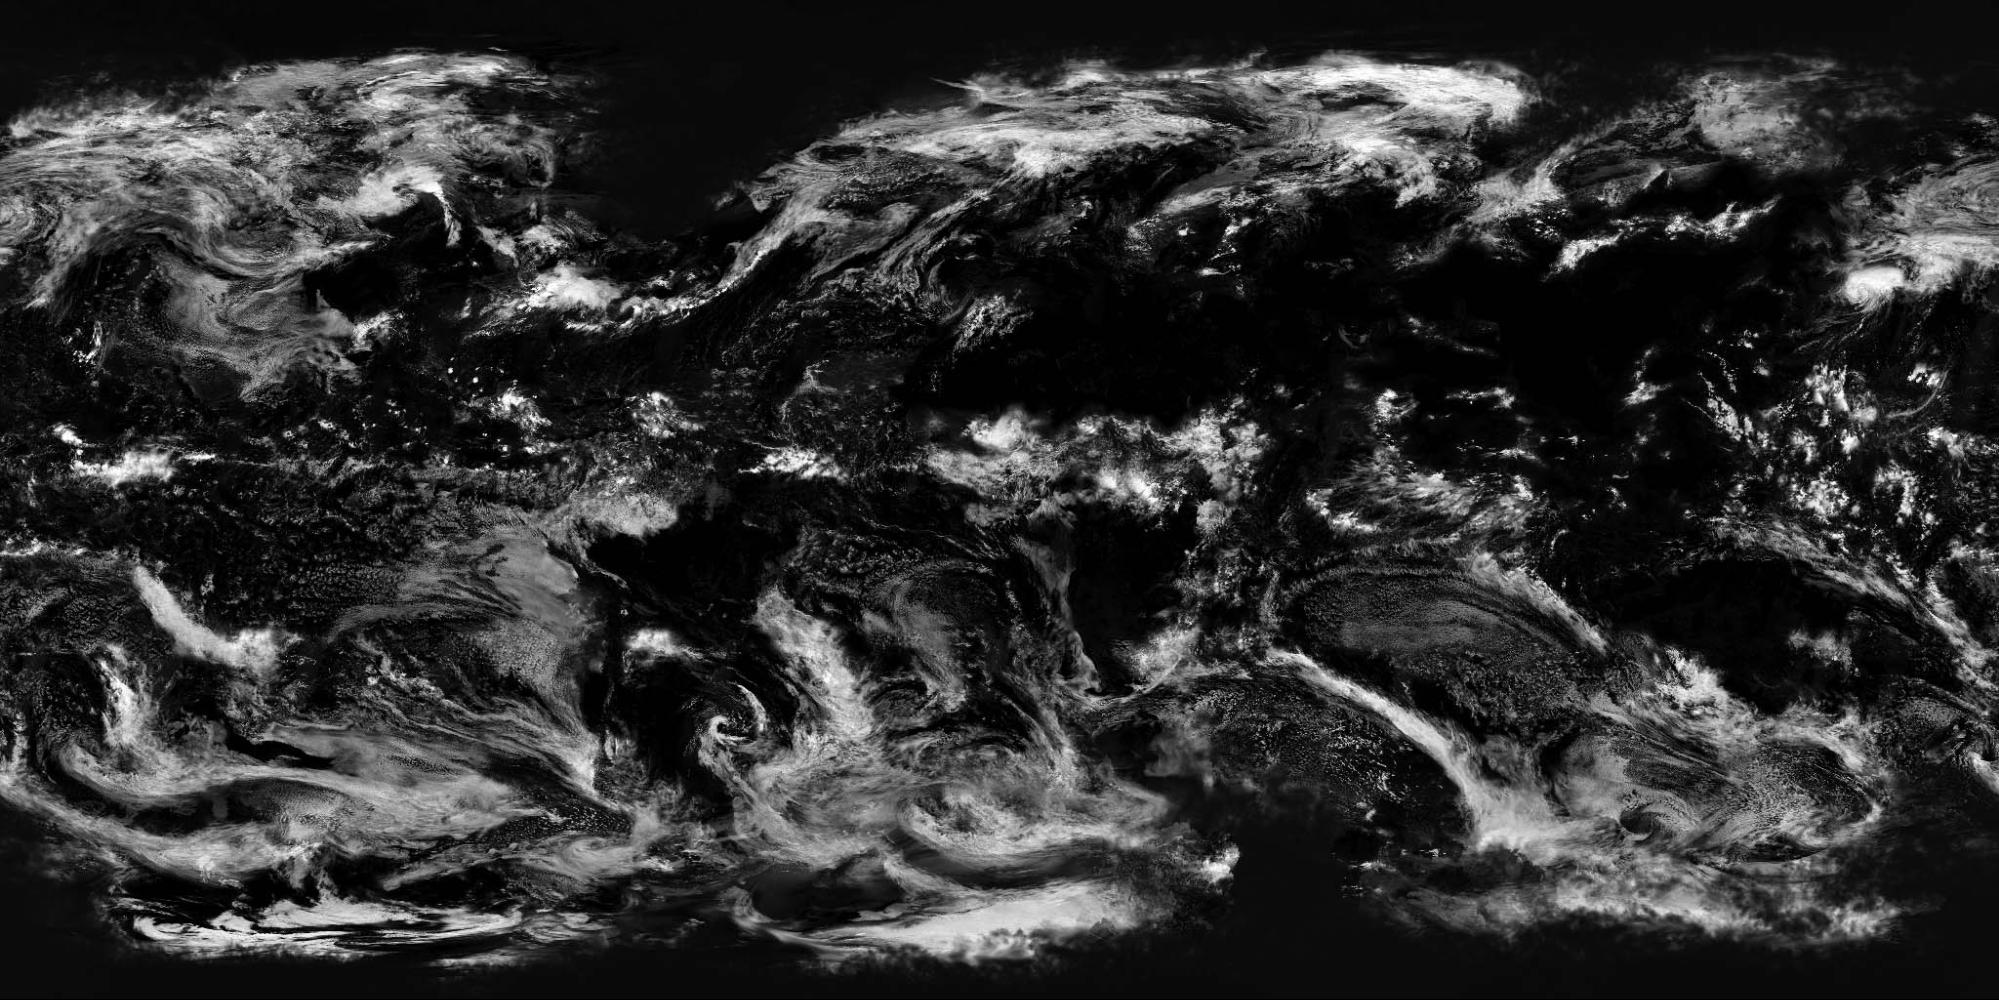
Your main cloud color texture must be 4096x2048px RGB file saved in DDS format without alpha as “CloudName_cm.dds file” and it must contain only the color information of your clouds. For Alphamask file please create a separate file of the same 4096x2048px dimensions containing only Alpha mask, make it a greyscale file, save as DDS luminance format and name it “CloudName_Alphamask.dds”. Back in the code, in <texture> tags you just write “Cloudname.dds”, no worries - the engine will identify required “cm” and “alphamask” files itself, just make sure both files are in the correct folder. (KeenSWH\Sandbox\Sources\SpaceEngineers\Content\Textures\Models\Environment\Sky).
As you know, clouds that are seen from the outer space and the clouds that you see through your window don’t look the same because of the huge differences in scales in both cases. That’s why we have two types of clouds on each planet. First one (commented as “Far layer” in the code) – the clouds that you see from the outer space. They usually look like NASA satellite orbital photo shots.
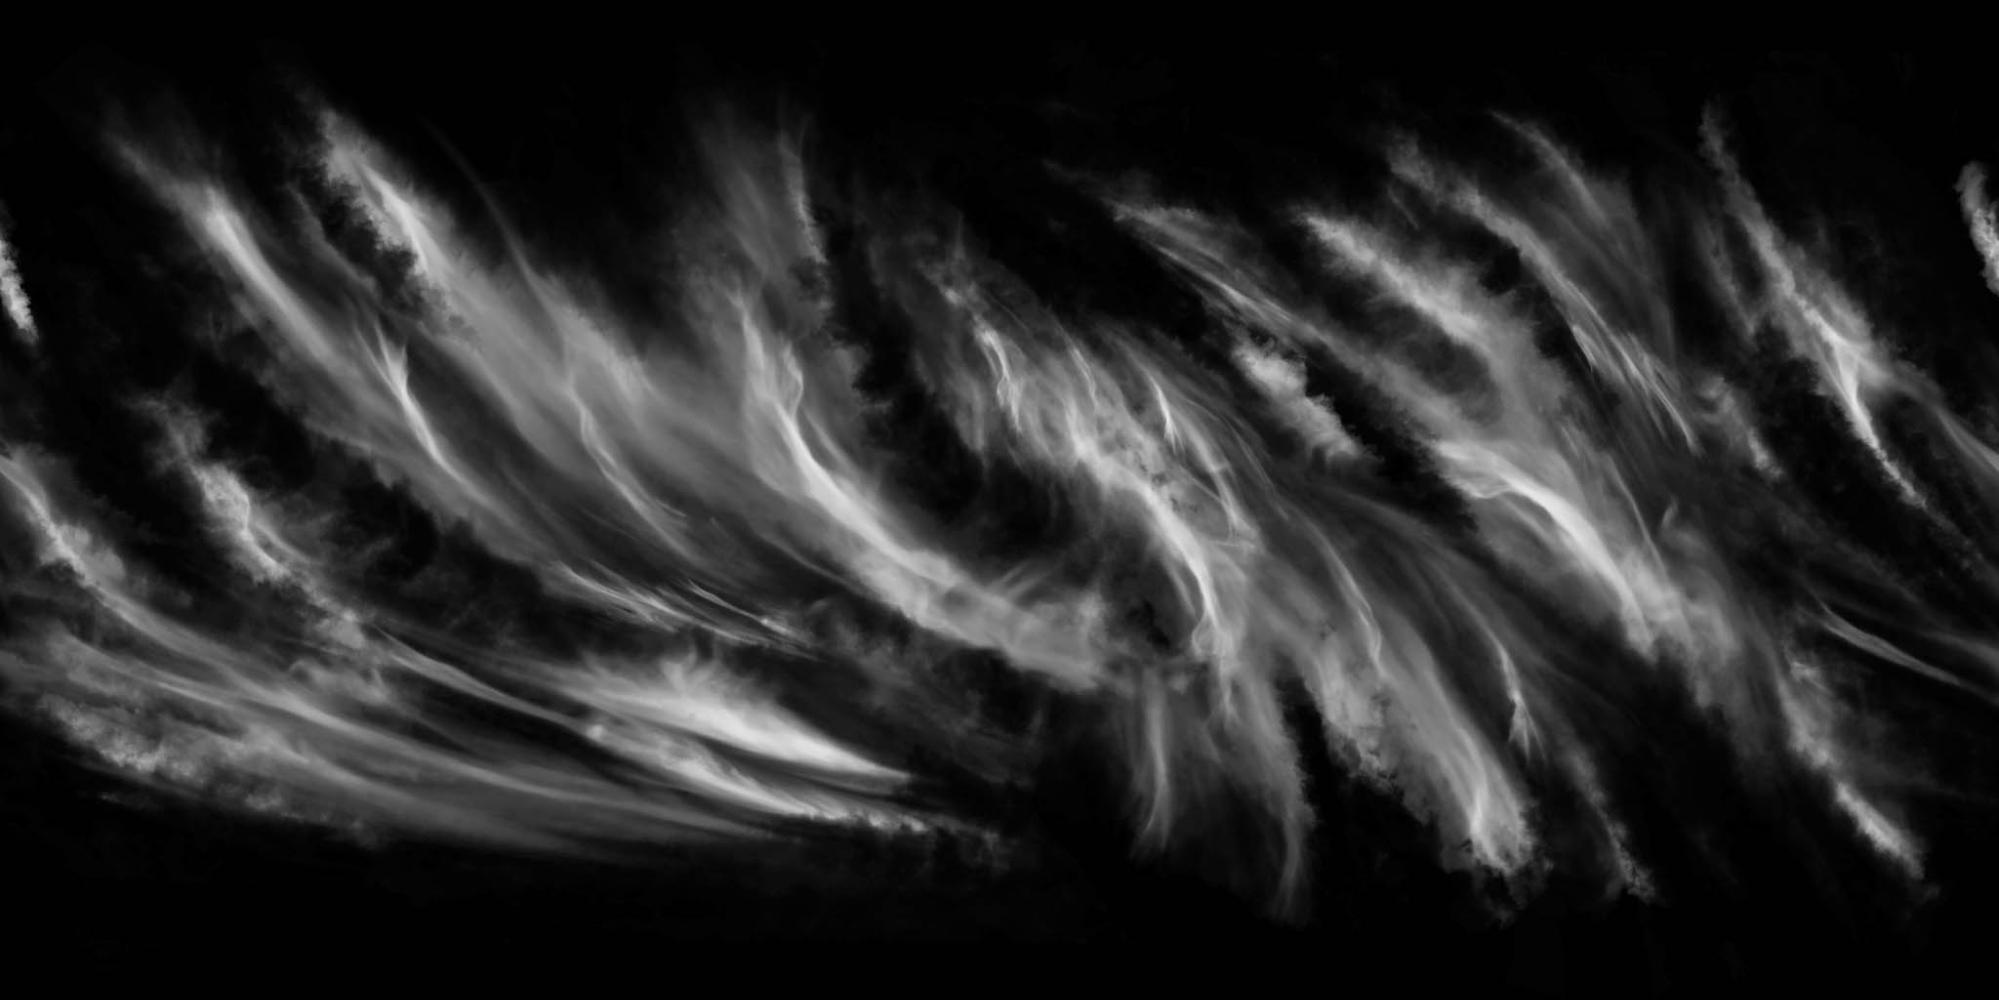
And the Second one (commented as “Near layer” in the code) – the clouds that are seen when you’re on the ground or close to it. These should look like a significantly zoomed version of the first ones - more detailed, wispy and more individual. Like the ones you used to see in the sky every day. Refer to the picture.
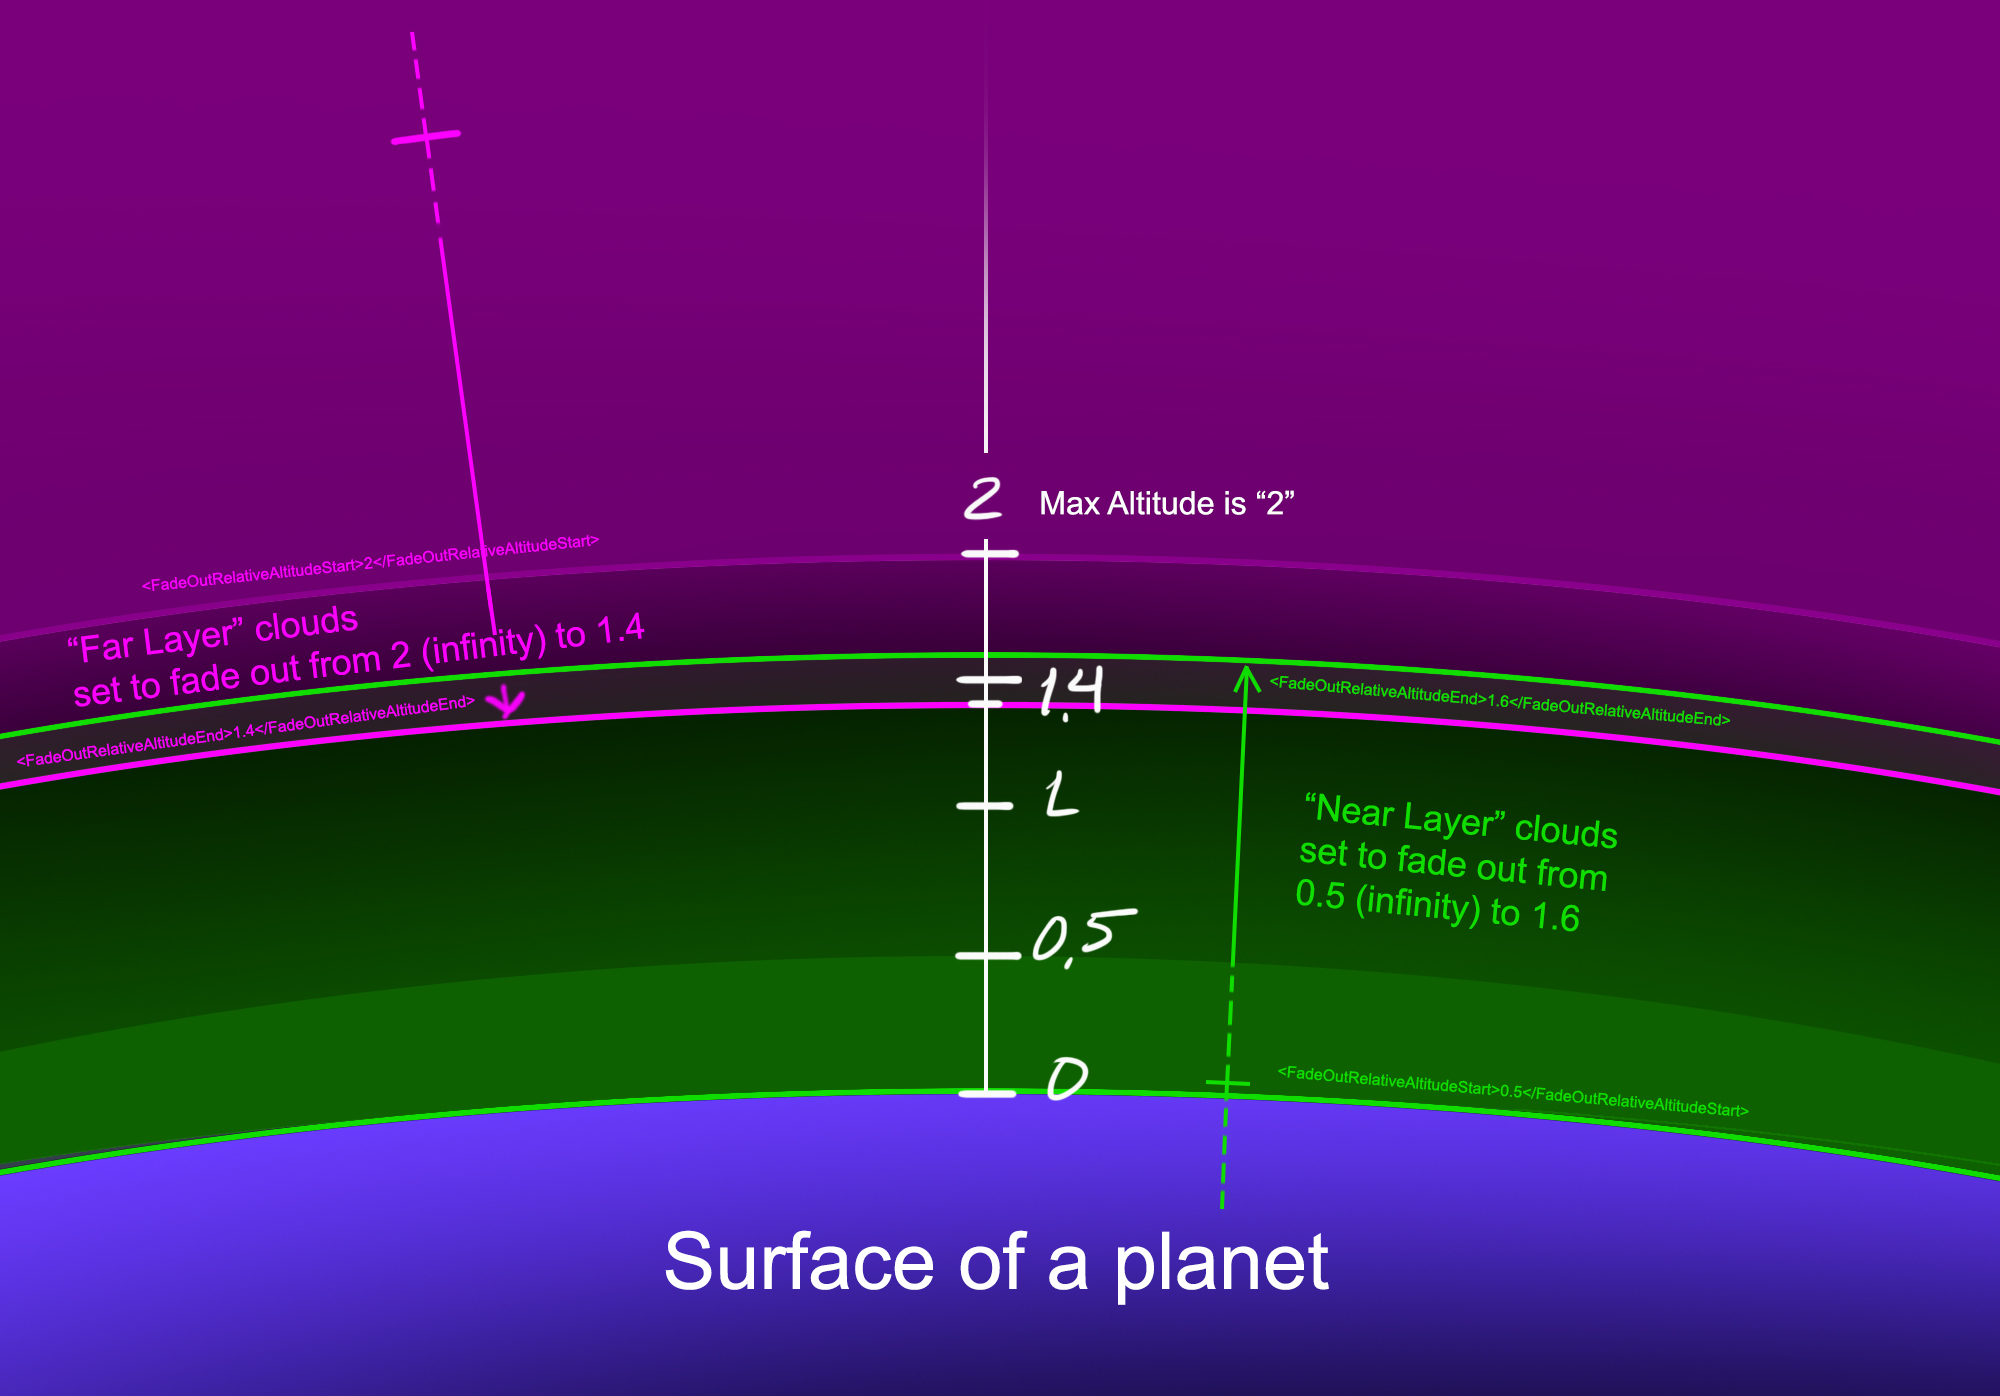
Now, how to actually separate these two types of cloud layers and to make them come in layers – one after the other. This is very simple too. The maximum overall Altitude (height) of our atmosphere layer is 2. So we have to set up our cloud layers in a tricky way, so that when we’re in outer space - we would see the “Far layer” clouds ONLY, and as we’re getting lower (approaching the ground), on a particular altitude (height) smoothly switch to the “Near layer” clouds and have the “Far layer” clouds hidden. Sounds crazy but it will become clear if you look at the following pic:
As you can see things are really self-explanatory here too. By setting the Start and End values in <FadeOutRelativeAltitude..> you basically create a vector, the starting point of which is infinity which means anything below this start point will be constant value, thus – making it possible to set the Far layer to be seen from outer space (values greater than 2), and preventing Near cloud layer from being seen - because it is set to fade out on 1.6. And vice versa – when you’re on the ground, you won’t see Far layer clouds layer because it faded out on much higher distance of 1.4. Not so hard right? Of course you can alter and tweak those values to your liking depending on the planets height maps/relief to get the desired transition between Far and Near cloud layers.
So now that we’re empowered with this knowledge, the only thing we’re left to do is to actually change the color of the clouds from white to yellow color so our clouds look more natural in an orange Atmosphere environment. As we remember, our clouds are consisting of two texture files – a file containing color information (usually just a plain color) and a file with an alpha mask only. We already know that the “Far layer” clouds (the ones seen from space) use “EarthFarClouds_cm.dds” texture file and the “Near layer” clouds use “Landsky_texture_cm.dds”. How we know that? It’s written in <texture> </texture> definitions, remember?
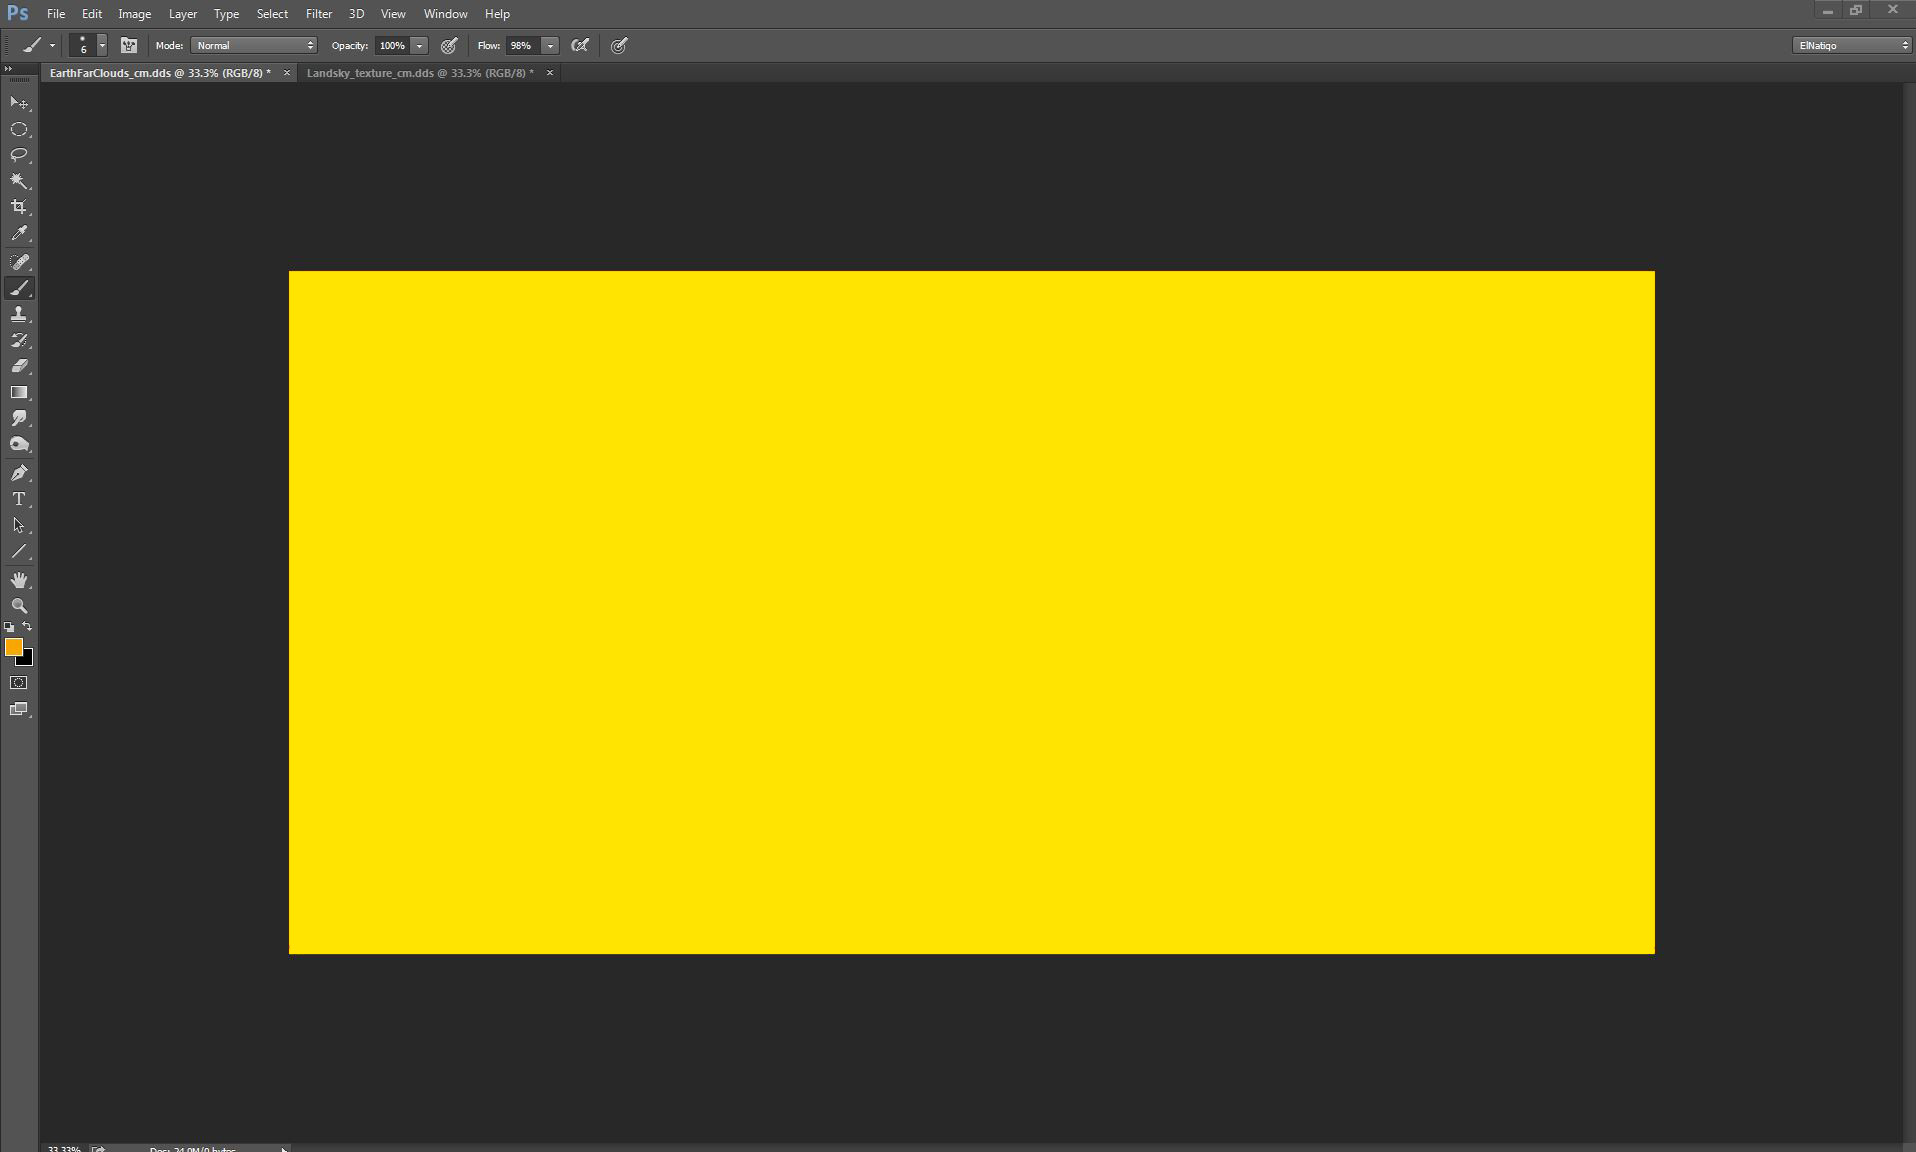
Great! So now just open “EarthFarClouds_cm.dds” and the “Landsky_texture_cm.dds” and fill both files with plain yellow color and save them!
Start the game and spawn an Earthlike planet and voila! You got perfect yellow clouds!
Planet ambient sounds modding - day/night biome sounds
Sound rules are in the Content\Data\PlanetGeneratorDefinitions.sbc file. Here you can set different sounds based on player’s location or daytime on the planet.
         <SoundRule>
            <Height Min="0" Max="0.5"/>
            <Latitude Min="55" Max="80"/>
            <SunAngleFromZenith Min="0" Max="180"/>
            <EnvironmentSound>AmbIcelandDay</EnvironmentSound>
          </SoundRule>
Height stands for where you want the sound to play at the height of the heightmap (0-7200m). It is always +12% of the planet's diameter. 0 is from the the lowest start of the surface to 1.0 which is 100% of the surface (maximum height). Latitude means angle from the equator. Therefore 0 to 20 will mean that this sound will mostly play in the desert area, 20-50 is mostly the green forest area, and so on. SunAngleFromZenith NEEDS MORE INFO!!! EnvironmentSound this is the name of the sound you want to use.
You can find all available sounds in Audio.sbc (location shown below) Here you will also put your own ambient sound with your own custom name.
How to implement custom ambient sound
All Ambient sounds are stored here:
C:\Program Files (x86)\Steam\steamapps\common\SpaceEngineers\Content\Audio\ARC\AMB\
If you want your own sounds, they should be a loop sound, and on average should not be bigger than +-5 MB. The supported format is: .xwm but .wav can also work, even though its file size is usually a lot bigger (not recommended).
Once your audio is done, implement it here in this file:
C:\Program Files (x86)\Steam\steamapps\common\SpaceEngineers\Content\Data\Audio.sbc
    <Sound>
      <Id>
        <TypeId>MyObjectBuilder_AudioDefinition</TypeId>
        <SubtypeId>AmbAlienForestDay</SubtypeId>
      </Id>
      <Category>AMB</Category>
      <MaxDistance>100</MaxDistance>
      <Volume>0.2</Volume>
      <Loopable>true</Loopable>
      <Waves>
        <Wave Type="D2">
          <Loop>ARC\AMB\AmbAlienForestDayLoop2d.xwm</Loop>
        </Wave>
      </Waves>
      </Sound>
Here edit only what is highlighted, otherwise I cannot guarantee that it will work properly! <SubtypeId> This is how you will name your AMB sound, keeping in mind upper and lower case letters. Do not use _ or other special characters! <Volume> This is self explanatory I hope. <Loop> Here you just need to lead the definition to your file. ARC/AMB/ is the default location, so do not change that. But if you want, you can make another folder in AMB for your custom ambient sounds for better organisation.
