Keen:Remote Client
 OFFICIAL CONTENT OFFICIAL CONTENT |
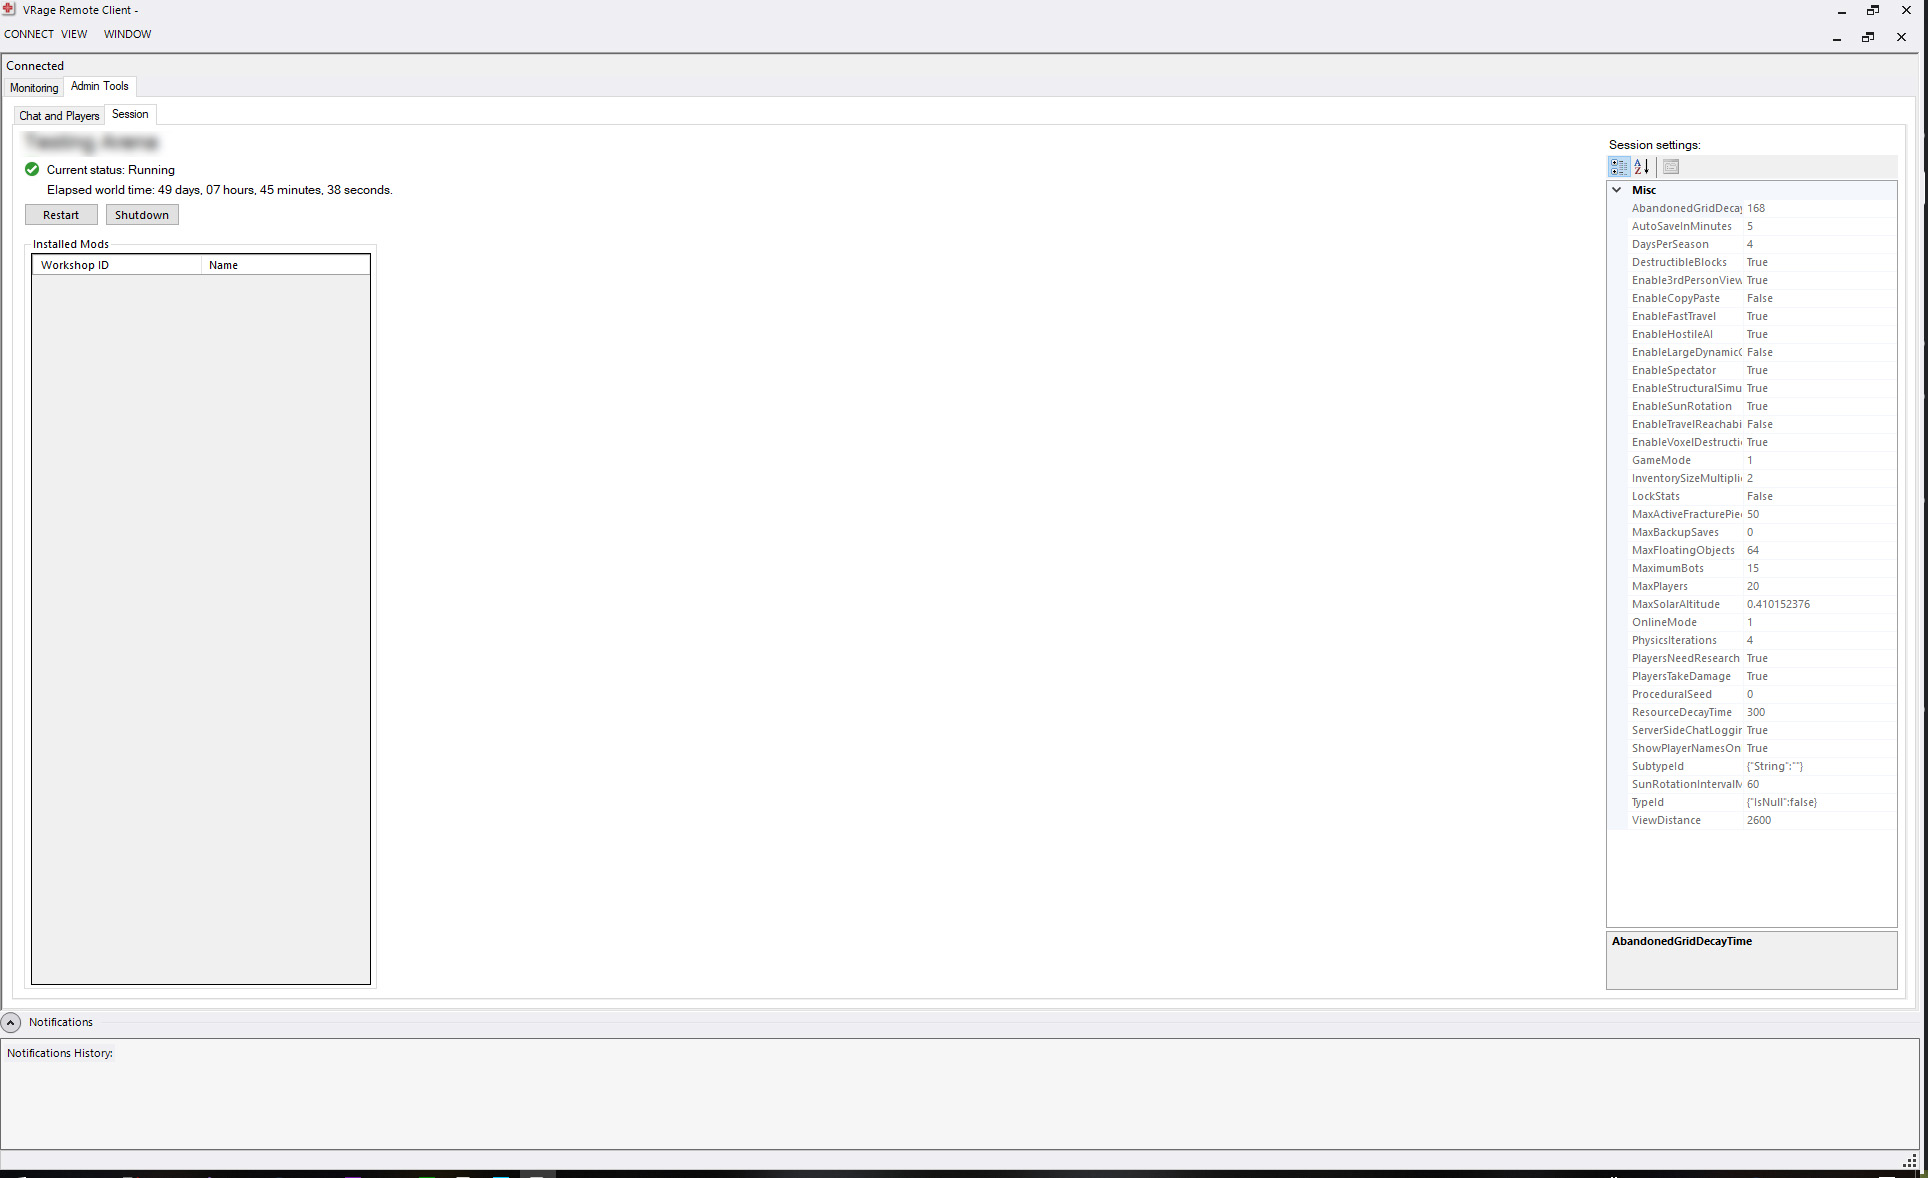
The remote client is a server manager for Keen Software House games that allows admins to monitor and manage all of their dedicated servers remotely. It includes features like monitoring performance, session settings management, player management, faction management, chat, message of the day, the ability to restart servers, and the ability to trigger a game save at any time. This is made possible by a web API that is built into the dedicated server.
| Version: | 0.6.4 |
Client Installing
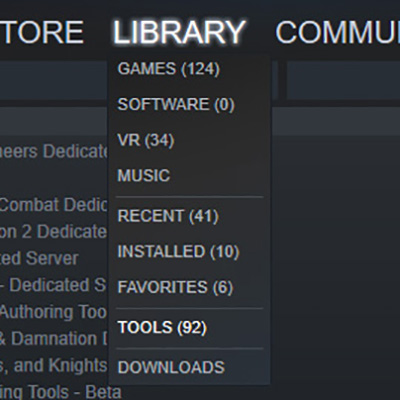
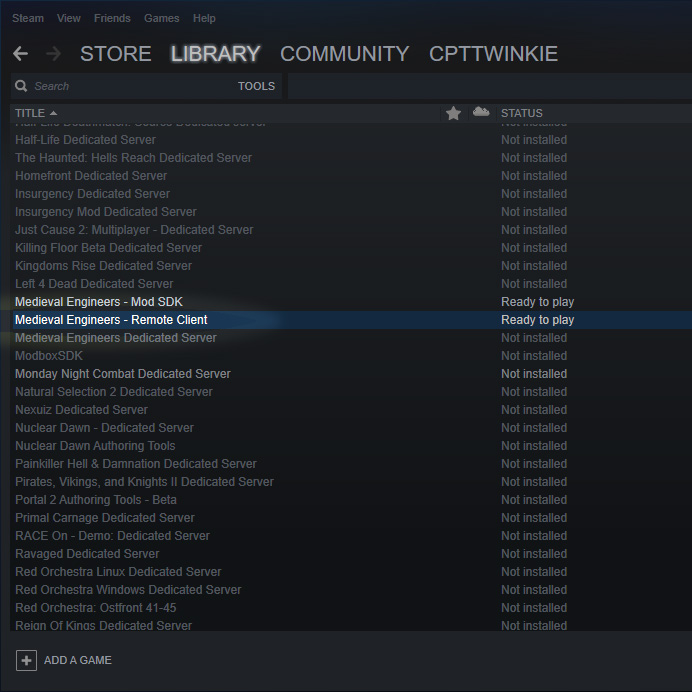
The remote client can be installed and run from Steam tools library or using SteamCMD with appID 919670.
To install from Steam:
- Click Tools from the Library menu (See Steam Tools picture)
- Install Medieval Engineers - Remote Client from the list (See Select from the list picture)
There have been many questions about where the Remote Client should be installed. The answer is it should be installed wherever you want to monitor your server(s) from. Install it anywhere.
- You do not NEED to install it where your dedicated server(s) is installed. The remote client connects to your existing medieval engineers dedicated server(s).
- You CAN install it where your dedicated server(s) are installed if you wish to use it as a way to monitor activity. It can be an easy way to check multiple instances for activity.
Server Configuring
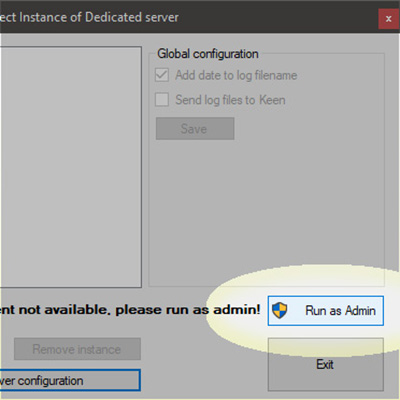
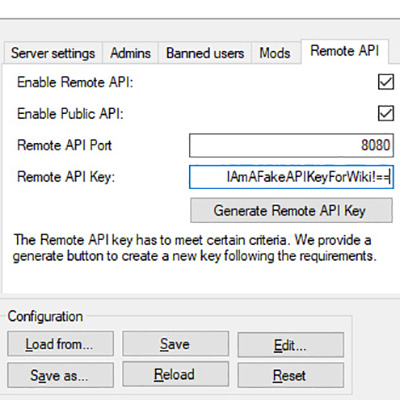
Before you can connect a Remote Client to your dedicated server(s) you will need to configure the remote API settings and open ports. It is important to note that you must run the dedicated server as an administrator in order for the API to function*.
Click the Remote API tab to configure the API
- Enable Remote API
- Enables or disables the entire remote API.
- Enable Public API
- Enables read-only API access for users who don't have the API key.
- Remote API Port
- The port to use for remote access. This must be unique for each instance that shares the same IP address. 8080 is the default but, because it is an http port, the odds that it is already in use are high. Try increasing to 8081, 8082, etc. if it doesn't work after everything is configured.
- Remote API Key
- This is the password to access the admin controls through the remote API. It must follow a very strict secure format.
- Generate Remote API Key
- This fills the Remote API Key text box with a randomly generated key.
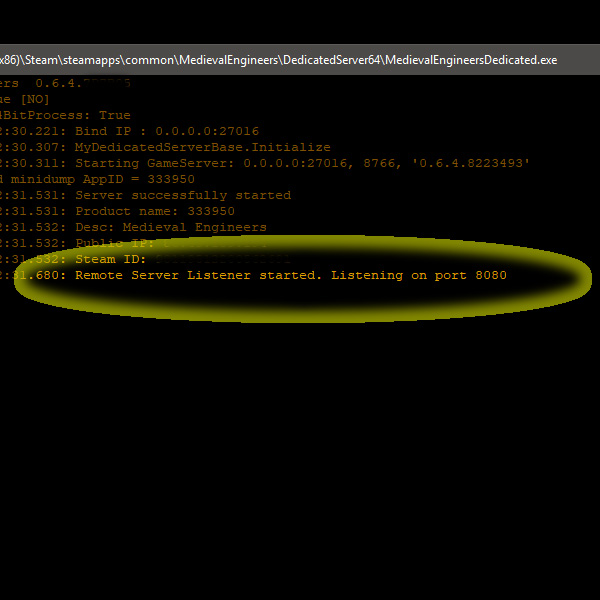
When the server starts you should see "Remote Server Listener started. Listening on port ____" (See It Works!!! picture)
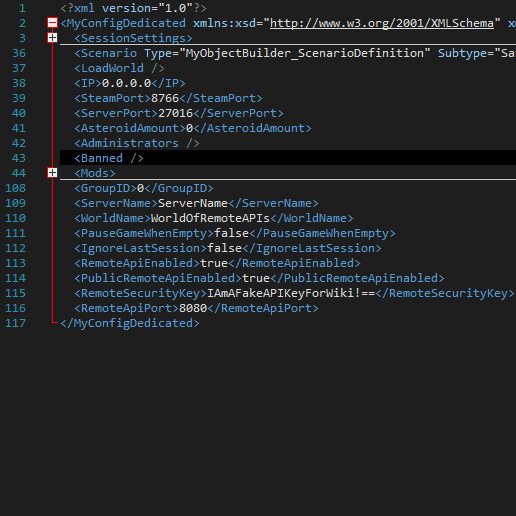
The remote API can alternately be configured using the MedievalEngineers-Dedicated.cfg file. (See CFG File picture)
You can test LOCAL access with a web browser using a URL formatted as follows http://localhost:PORT/vrageremote/v1/server/ping. You should receive a "Data" response with a "Result" : "Pong".
*If you are unable to run your server as an admin because it is on a rented server host then you should contact your server host's technical support to enable use of this feature. The server has to be run with administrator priviledges and the required ports need to be opened as explained below.
Port Opening
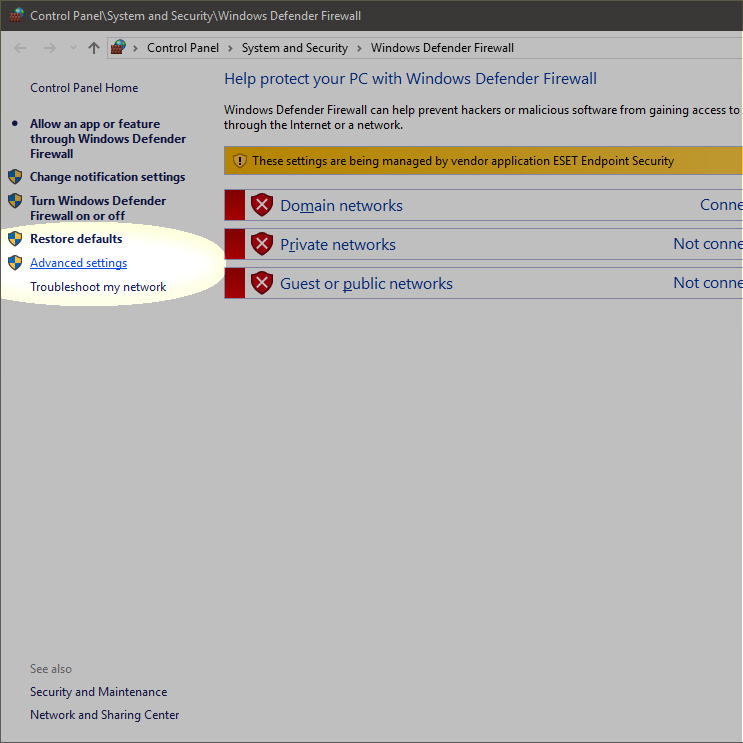
In order to use the remote API over the internet, the port you selected must be accessible. This means that all firewalls on the server and the router must allow traffic to pass through them on this port. This means standard port forwarding for routers. The port will also need to be opened in Windows' firewall. That process is described below.
1. Open Windows Defender Firewall
2. Click Advanced Settings on the left side
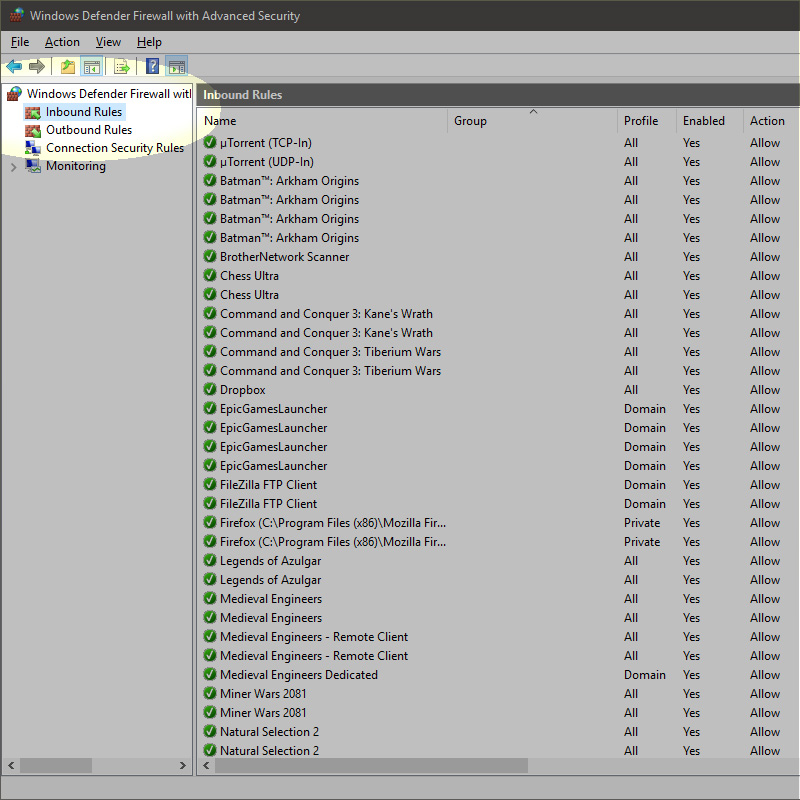
3. In the advanced settings panel, click Inbound Rules on the left side
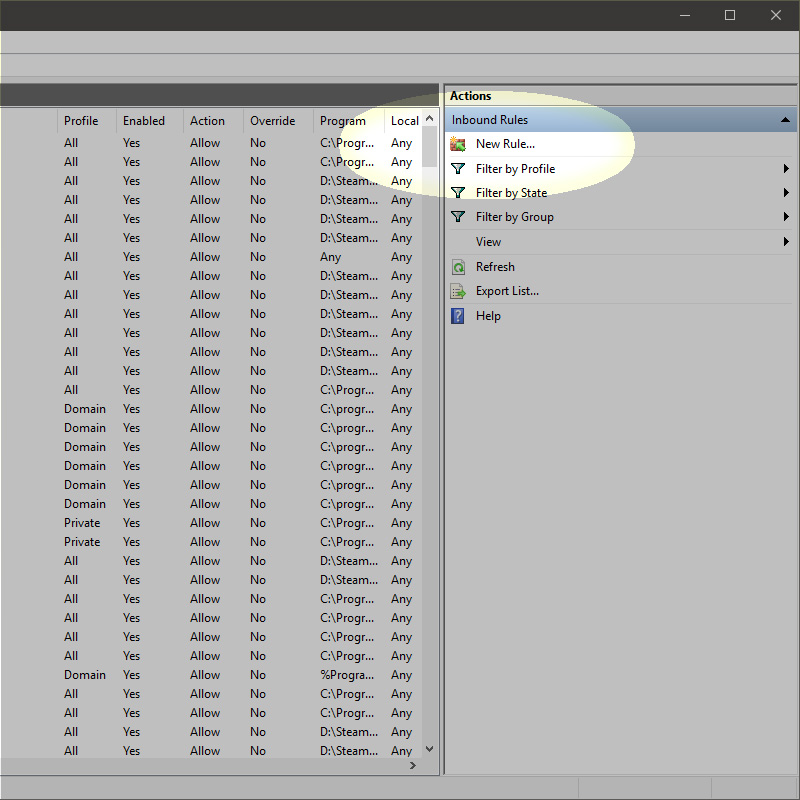
4. Once you have the inbound rules loaded, click New Rule... on the right side
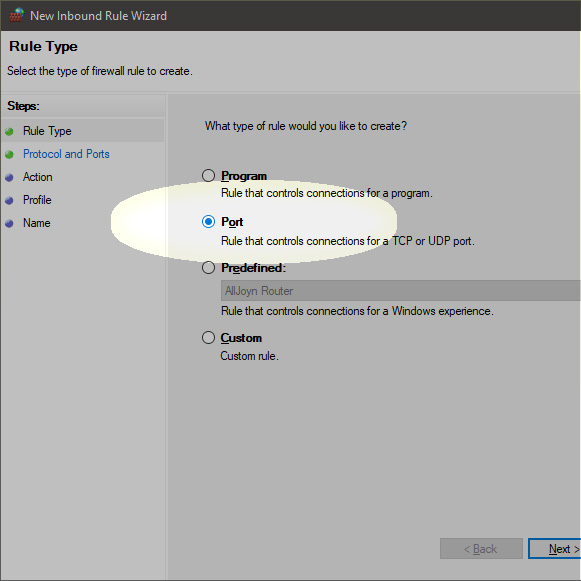
5. On the first wizard page select Port Rule
- Port rule is not the most secure option. If you wish to limit your rule specifically to the dedicated server program you are free to do so.
- For simplicity, this guide will only show you how to open a port, skipping advanced options.
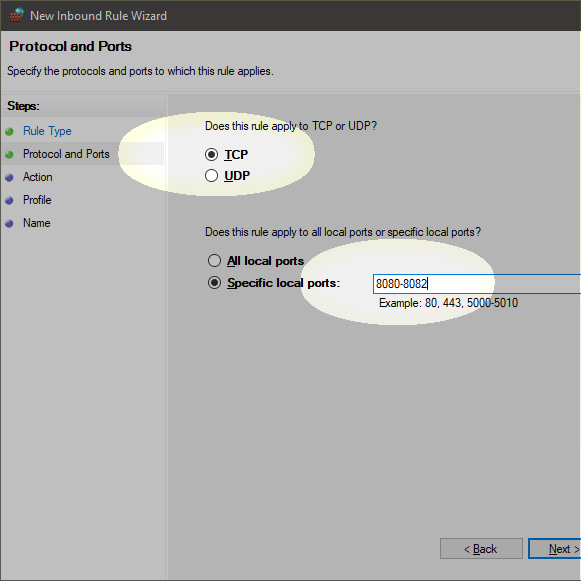
6. The remote API uses TCP. Select 'Specific local ports and add your port number to the text box
- You can enter multiple ports here seperated by commas or a range of contiguous ports with a dash in-between. A common configuration for three servers would use ports 8080, 8081, and 8082. Those ports could be entered as 8080-8082.
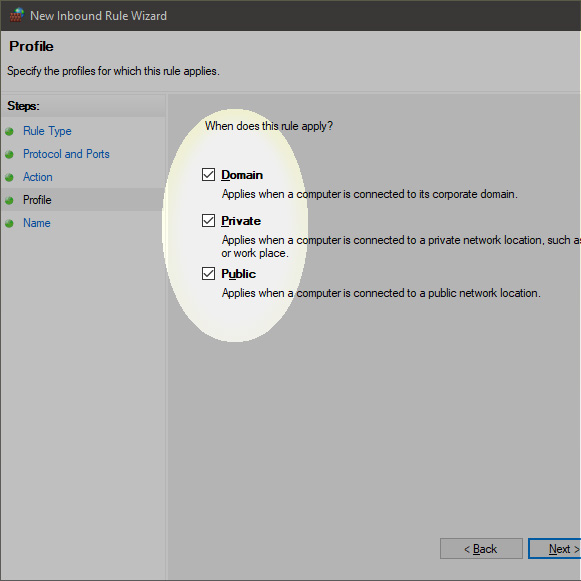
7. Enable all network types
- It is more secure to choose only the type of network that you use but determining network types is beyond the scope of this guide.
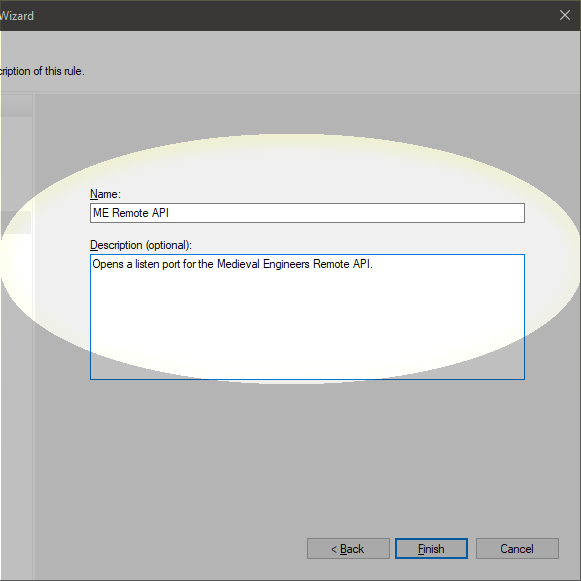
8. Give your rule a name and description
- A tip for naming rules is to include the port(s). This makes it easier to identify them from the list. However, extra care must be given to update the name when the ports are altered.
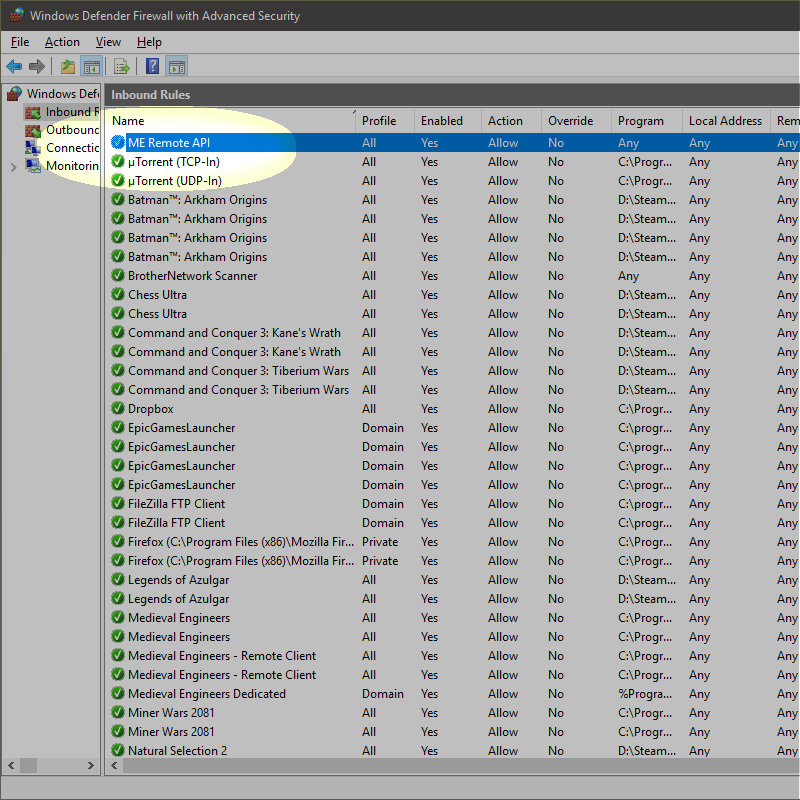
9. Your rule should appear in the Inbound Rules list with the name you gave it
- Check that the rule is Enabled (Yes) and its Action is allowed (Allow)
You can test INTERNET access with a web browser using a URL formatted as follows http://IPADDRESS:PORT/vrageremote/v1/server/ping. You should receive a "Data" response with a "Result" : "Pong".
Client Connecting
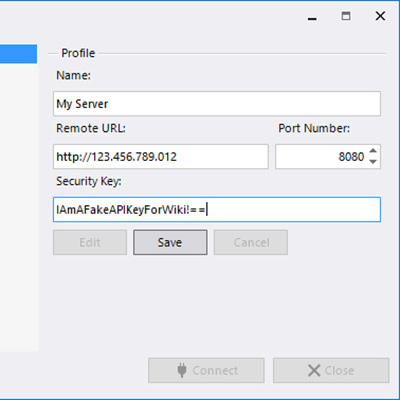
Add the information from your server settings that were configured in Server Configuring
The Remote URL should be in the form http://ipaddress where ipaddress is the IP address of the server you wish to connect to.
Client Operating
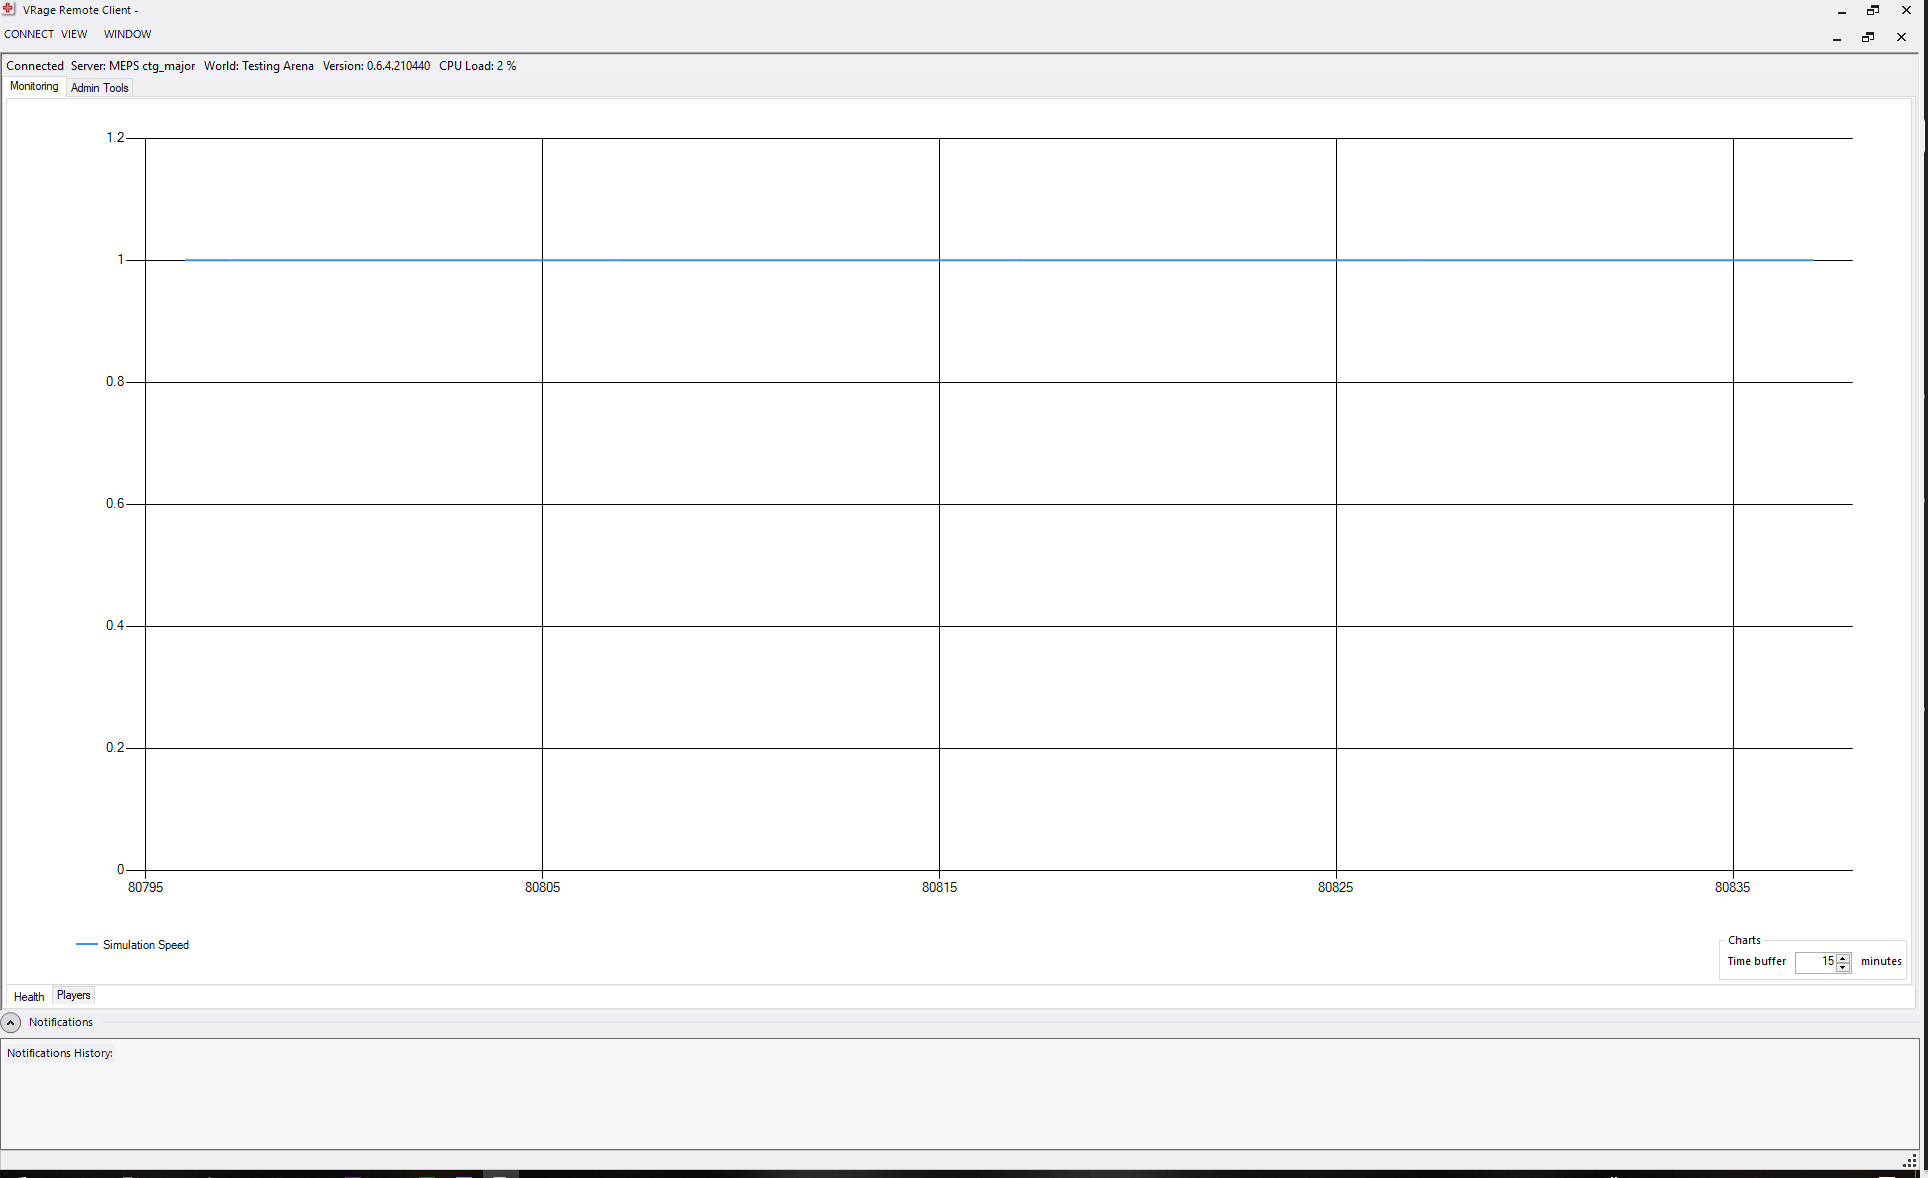
The client is rather simple so far but it provides the basic data needed to see if a server is performing well. It also can manage players, send chat messages, and restart or shutdown the server. All charts have a time buffer setting. This controls how much of the history is preserved and displayed on the chart.
Monitoring: "Health" and "Players"
The Health tab is used to monitor simulation speed. A value of 1 indicates optimum performance. Anything below 0.8 will be noticeable as slow performance.
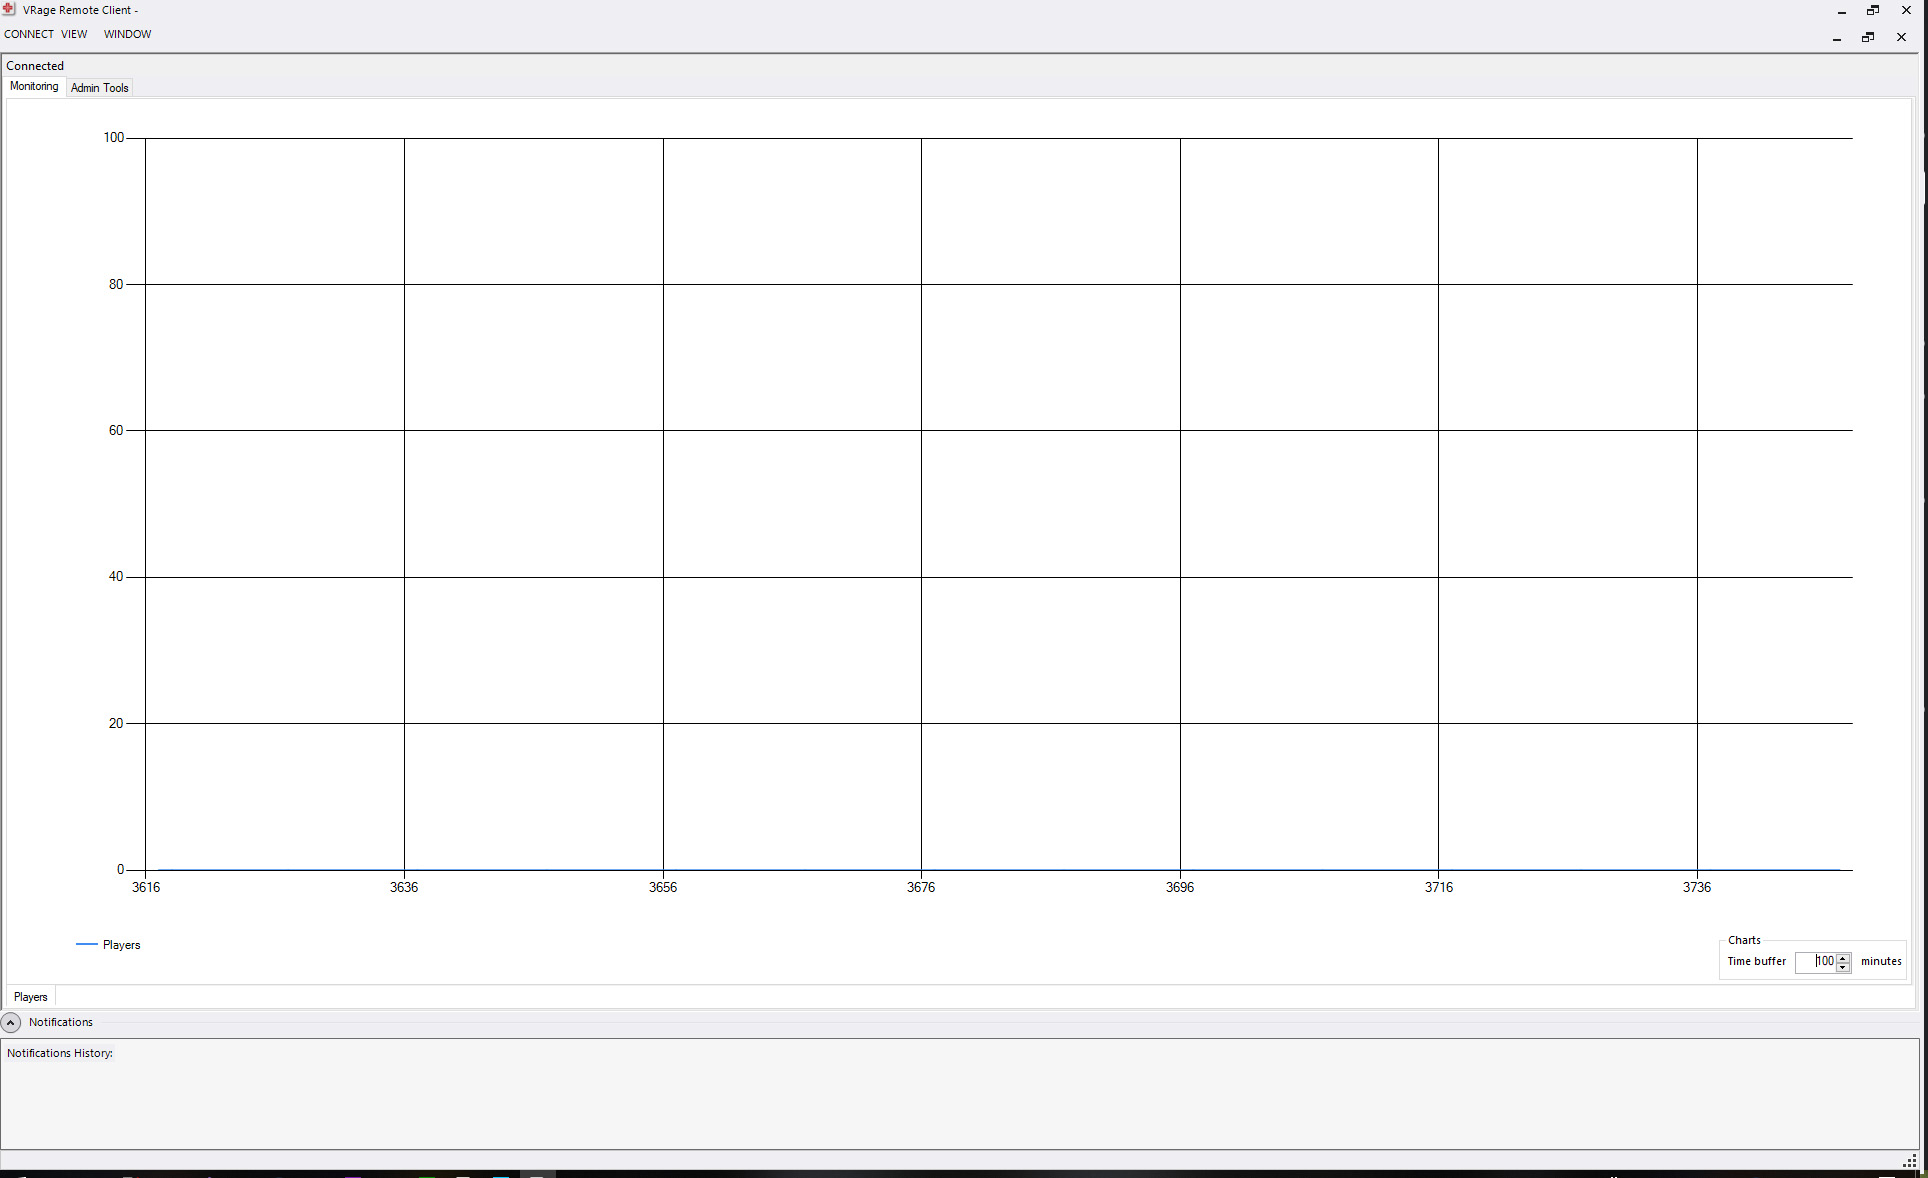
The Players tab is used to monitor the number of connected players. This can be useful simply as statistical data but also in the case when maintenance has been announced and the admin wishes to wait for all players to leave the server before performing the maintenance.
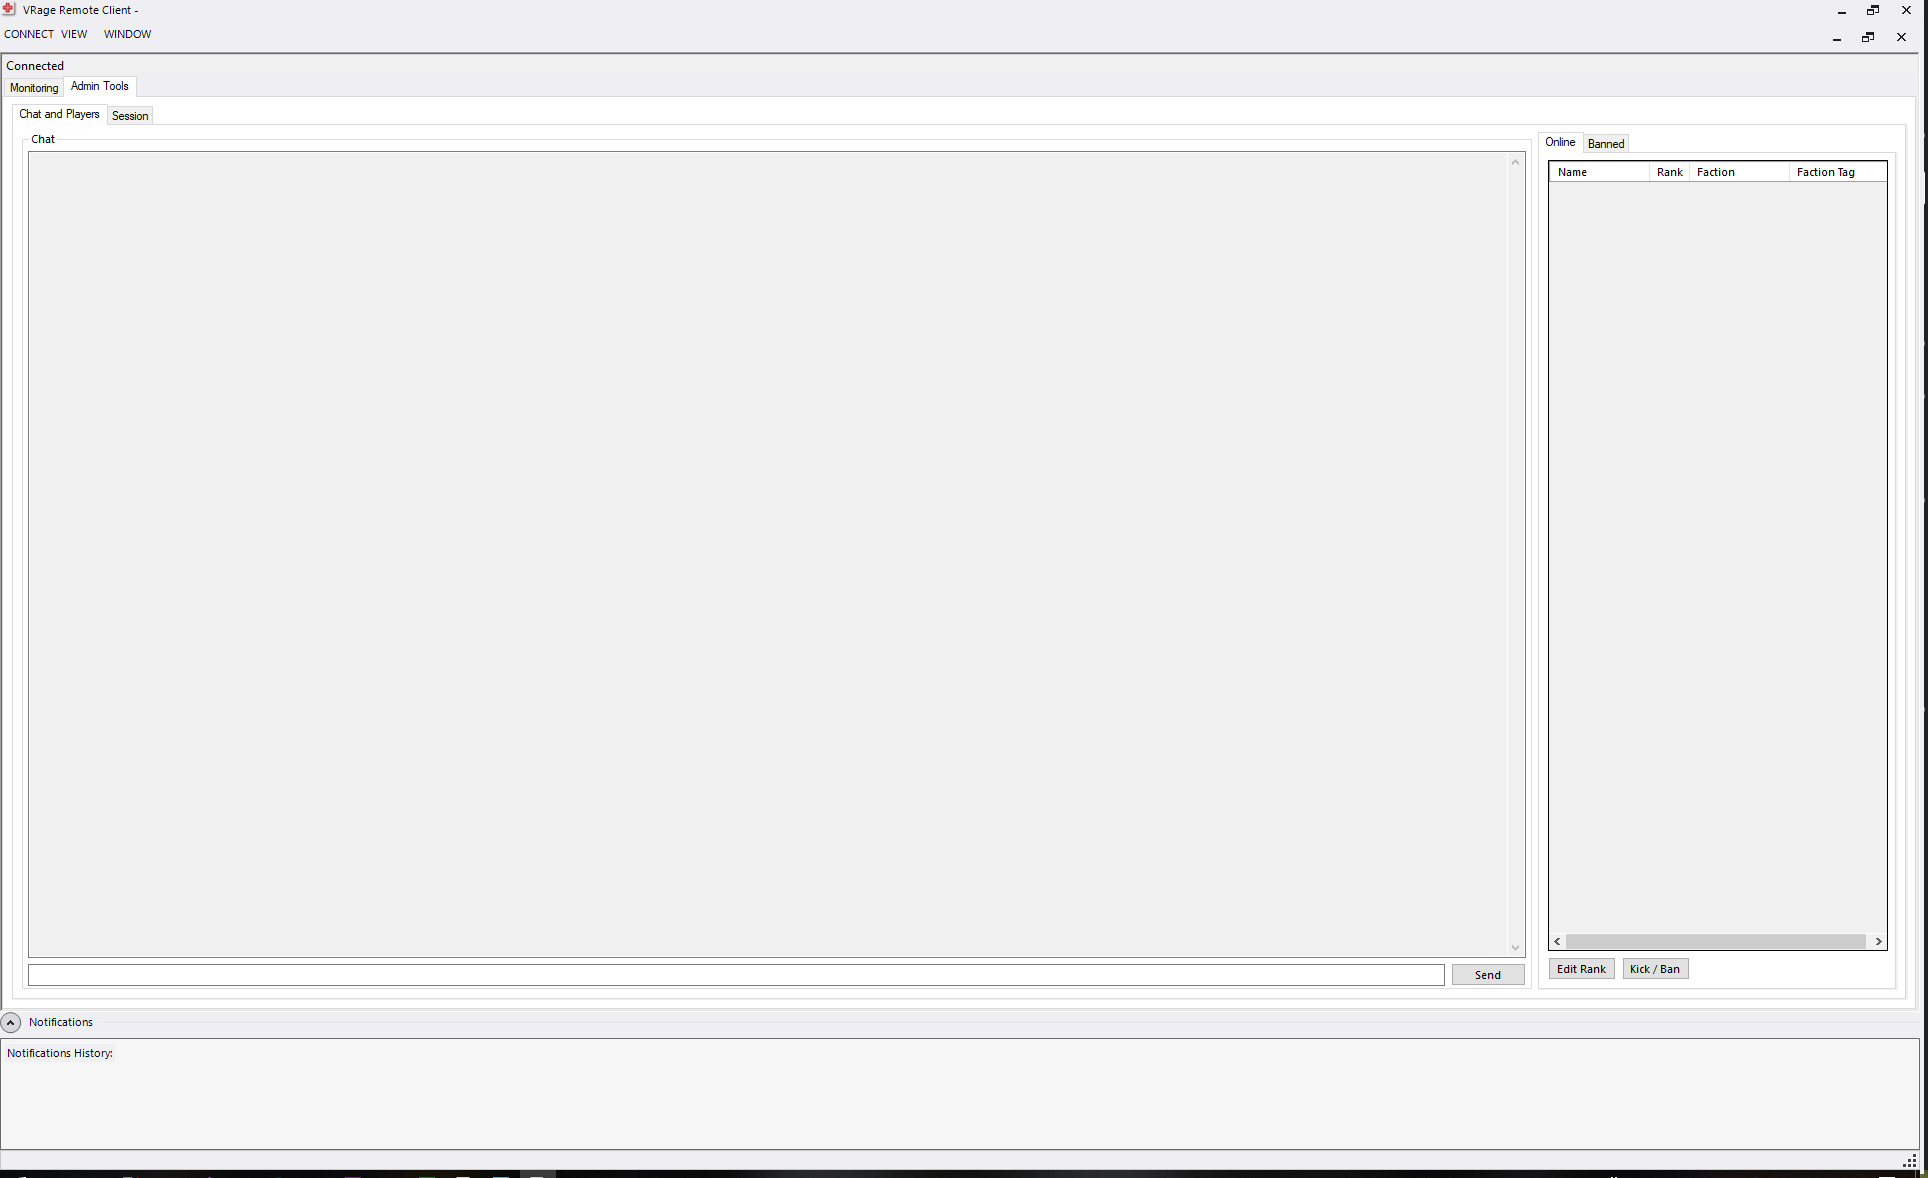
Admin Tools: "Chat and Players" and "Session"
The Chat and Players tab shows global chat messages from the game in progress. Messages can be sent that will show in the game as coming from the system administrator. Also shown are the players in the game. From the players "Online" list you can edit players ranks, kick players, and ban players. From the "Banned" list you can unban players who were previously banned.

The Session tab shows a list of mods used in the world, Session settings (world settings), and has buttons to trigger a restart or shutdown of the server.
Client Notifying
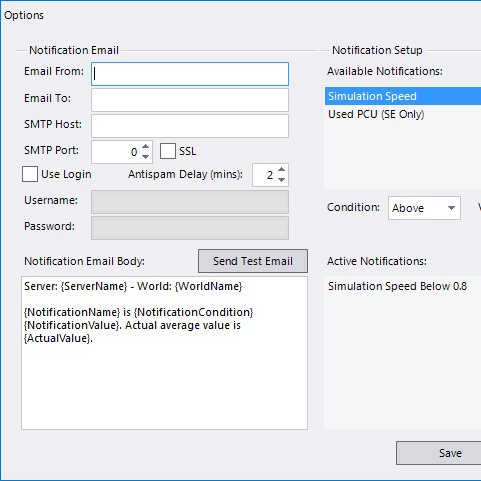
The notification options can be accessed by clicking Options in the View menu.
You can add an email account to send notifications with on the left side of the forum. Currently, the Remote Client is limited to SMTP mailbox management. Check with your mail provider to see if your mail host supports SMTP and to find host address information.
The content of notification emails can be configured in the Notification Email Body text box.
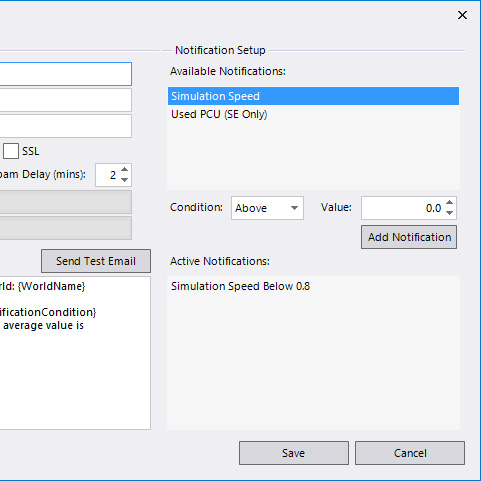
Notifications can be configured on the right side of the screen. Currently, only low simulation speed and PCU usage monitors are available. Since Medieval Engineers doesn't use PCU (See PCU Limits in Marek's Blog), that only leaves low sim speed at this time.
It makes the most sense to trigger the notification when the sim speed drops below a particular value. Click Add Notification after configuring the settings to create the notification.
The Remote Client must remain open to monitor servers and send notifications.