Blueprints: Difference between revisions
CptTwinkie (talk | contribs) mNo edit summary |
CptTwinkie (talk | contribs) mNo edit summary |
||
| (9 intermediate revisions by the same user not shown) | |||
| Line 1: | Line 1: | ||
{{ | {{SEO|image_url=http://www.medievalengineerswiki.com/images/8/8b/Blueprints1.png|description=Within Medieval Engineers, it is possible to create blueprints of player's creations. Blueprints allow the player to save a copy of any creation so that it can be pasted into the world as needed.}} | ||
{{ | {{BigThumb|Blueprints1.png}} | ||
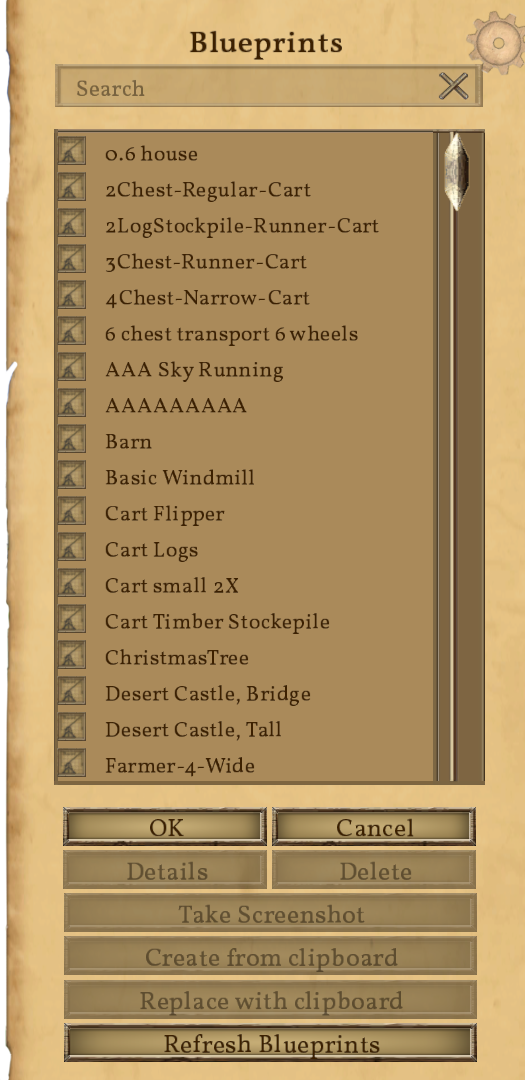
Within Medieval Engineers, it is possible to create blueprints of player's creations. Blueprints allow the player to save a copy of any creation so that it can be pasted into the world as needed. Blueprints are saved to the player's hard drive but can be published to the [https://steamcommunity.com/app/333950/workshop/ Steam Workshop] for others to enjoy. Blueprints are a creative mode only feature at this time. | |||
There are certain [[Blueprint Controls]] used when working with blueprints or just generally cutting, copying, or pasting creations in Medieval Engineers. Blueprints are only available in creative mode or with [[Medieval Master]] tools enabled. | |||
{{Version <!-- Do not change the version until the entire page is up-to-date --> | {{Version <!-- Do not change the version until the entire page is up-to-date --> | ||
|release=0 | |release=0|major=6|minor=3|suppress=true}} | ||
| | ==Creation== | ||
}} | There are two ways to create blueprints. The first is to use copy or cut to get a copy of your creation on the clipboard. Then the blueprints screen can be opened by pressing {{Key|f10}}. Click "Create from clipboard" to make a new blueprint. Blueprints created in this way will not have a screenshot. | ||
The second method is to use the shortcut {{Key|control}}+{{Key|b}}. This will instantly create a blueprint and screenshot of what the character is aiming at and it will open the details screen so the blueprint can be named. | |||
==Usage== | |||
Selecting a blueprint from the list and clicking "Ok" will add it to the clipboard. Alternately, {{Key|lmb}}{{Key|lmb}} can be used on a blueprint in the list to add it to your clipboard. When the blueprints screen closes paste mode should be automatically activated. If it is not, press {{Key|control}}+{{Key|v}} to activate paste mode. | |||
See [[Blueprint Controls]] and [[Building Controls]] for more information about rotating and placing items. One often missed control is Building Mode ({{Key|o}} by default) that switches between static(stationary) and dynamic(active/loose) building types within the environment. | |||
Press "Cancel" or {{Key|escape}} to leave the screen without selecting a blueprint. | |||
{{ClearLine}} | |||
==Editing and Managing Blueprints== | |||
{{BigThumb|Blueprints2.png|Blueprints Details Screen}} | |||
{{BigThumb|Blueprints3.png|Renaming Blueprints}} | |||
There are a couple of options to update blueprints and their screenshots. There are also a few options for renaming and deleting blueprints in your collection. | |||
===Updating Blueprints=== | |||
How to update a blueprint: | |||
*Copy or cut a creation from the world | |||
*Open the blueprints screen | |||
*Select the blueprint you would like to update | |||
*click "Replace with clipboard" | |||
This will replace the blueprint with the contents of the clipboard. This does not update the screenshot. | |||
This change will not be reflected on published blueprints until they are published again. | |||
===Updating Screenshots=== | |||
How to update a blueprint's screenshot: | |||
*Aim the character to set up the screenshot | |||
*Open the blueprints screen | |||
*Select the blueprint you would like to update with a new screenshot | |||
*click "Take screenshot" | |||
This will replace the blueprint's screenshot with a new one created from your point of view. This does not change the blueprint, only the screenshot associated with it. | |||
This change will not be reflected on published blueprints until they are published again. | |||
===Renaming=== | |||
How to rename a blueprint: | |||
*Open the blueprints screen | |||
*Selected the blueprint that you would like to rename | |||
*Click "Details" to open the details screen | |||
*Click "Rename" to open the rename dialog box | |||
*Change the name and click "Ok" | |||
This will update the blueprint's name. | |||
This change will not be reflected on published blueprints until they are published again. | |||
===Deleting=== | |||
How to delete a blueprint: | |||
*Open the blueprints screen | |||
*Select the blueprint that you would like to delete | |||
*Click "Delete" | |||
*Click "Yes" on the confirmation | |||
This will delete the selected blueprint. | |||
This change will not be reflected on published blueprints. | |||
{{ClearLine}} | |||
==Workshop Integration== | |||
Blueprints are integrated with the [https://steamcommunity.com/workshop/browse/?appid=333950&requiredtags%5B%5D=Blueprint Steam Workshop] so that players can share (publish) blueprints and use subscribed blueprints in their own worlds. | |||
===List Content=== | |||
The blueprints list shows local blueprints using this icon [[File:BluePrintFolderIcon.png|20px|frameless]] followed by workshop blueprints that you are subscribed to using this icon [[File:ModSteamIcon.png|20px|frameless]]. When you use a workshop blueprint is will be downloaded and added to your local blueprints. | |||
===Workshop Details=== | |||
When you open the details screen of a workshop blueprint you may see description information about the blueprint. This information is downloaded from the Steam Workshop. | |||
To see additional details on the workshop click "Open Workshop". | |||
===Publishing=== | |||
When you open the details screen of a local blueprint you will see a "Publish" button. Clicking this will publish your mod to the Steam Workshop. Once the mod is published the workshop page will open where you can add a description, additional screenshots, and revision text. | |||
Two file changes take place at this time as well. The first is in the .bp file (the blueprint) where the workshop id number is added at the end of the file. This links the file to the workshop item so that future publishing will update the item on the workshop instead of creating a new item. Also, a file named metadata.mod is created in the local mod folder. See [[Keen:Mod Metadata]] for information on how to use this file. | |||
[[Category:Non-HUD Screens]] | |||
Latest revision as of 17:36, 15 August 2018

Within Medieval Engineers, it is possible to create blueprints of player's creations. Blueprints allow the player to save a copy of any creation so that it can be pasted into the world as needed. Blueprints are saved to the player's hard drive but can be published to the Steam Workshop for others to enjoy. Blueprints are a creative mode only feature at this time.
There are certain Blueprint Controls used when working with blueprints or just generally cutting, copying, or pasting creations in Medieval Engineers. Blueprints are only available in creative mode or with Medieval Master tools enabled.
| Version: | 0.6.3 |
Creation
There are two ways to create blueprints. The first is to use copy or cut to get a copy of your creation on the clipboard. Then the blueprints screen can be opened by pressing ![]() . Click "Create from clipboard" to make a new blueprint. Blueprints created in this way will not have a screenshot.
. Click "Create from clipboard" to make a new blueprint. Blueprints created in this way will not have a screenshot.
The second method is to use the shortcut ![]() +
+![]() . This will instantly create a blueprint and screenshot of what the character is aiming at and it will open the details screen so the blueprint can be named.
. This will instantly create a blueprint and screenshot of what the character is aiming at and it will open the details screen so the blueprint can be named.
Usage
Selecting a blueprint from the list and clicking "Ok" will add it to the clipboard. Alternately, ![]()
![]() can be used on a blueprint in the list to add it to your clipboard. When the blueprints screen closes paste mode should be automatically activated. If it is not, press
can be used on a blueprint in the list to add it to your clipboard. When the blueprints screen closes paste mode should be automatically activated. If it is not, press ![]() +
+![]() to activate paste mode.
to activate paste mode.
See Blueprint Controls and Building Controls for more information about rotating and placing items. One often missed control is Building Mode (![]() by default) that switches between static(stationary) and dynamic(active/loose) building types within the environment.
by default) that switches between static(stationary) and dynamic(active/loose) building types within the environment.
Press "Cancel" or ![]() to leave the screen without selecting a blueprint.
to leave the screen without selecting a blueprint.
Editing and Managing Blueprints


There are a couple of options to update blueprints and their screenshots. There are also a few options for renaming and deleting blueprints in your collection.
Updating Blueprints
How to update a blueprint:
- Copy or cut a creation from the world
- Open the blueprints screen
- Select the blueprint you would like to update
- click "Replace with clipboard"
This will replace the blueprint with the contents of the clipboard. This does not update the screenshot.
This change will not be reflected on published blueprints until they are published again.
Updating Screenshots
How to update a blueprint's screenshot:
- Aim the character to set up the screenshot
- Open the blueprints screen
- Select the blueprint you would like to update with a new screenshot
- click "Take screenshot"
This will replace the blueprint's screenshot with a new one created from your point of view. This does not change the blueprint, only the screenshot associated with it.
This change will not be reflected on published blueprints until they are published again.
Renaming
How to rename a blueprint:
- Open the blueprints screen
- Selected the blueprint that you would like to rename
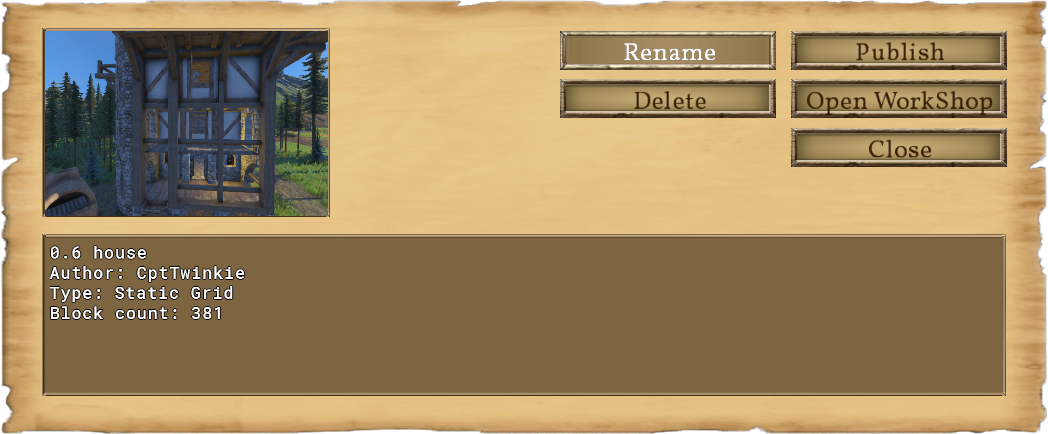
- Click "Details" to open the details screen
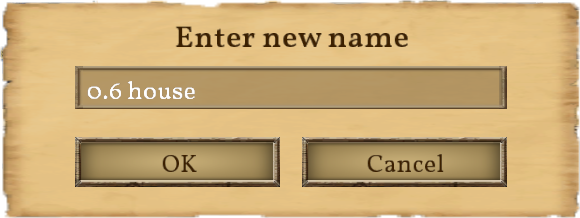
- Click "Rename" to open the rename dialog box
- Change the name and click "Ok"
This will update the blueprint's name.
This change will not be reflected on published blueprints until they are published again.
Deleting
How to delete a blueprint:
- Open the blueprints screen
- Select the blueprint that you would like to delete
- Click "Delete"
- Click "Yes" on the confirmation
This will delete the selected blueprint.
This change will not be reflected on published blueprints.
Workshop Integration
Blueprints are integrated with the Steam Workshop so that players can share (publish) blueprints and use subscribed blueprints in their own worlds.
List Content
The blueprints list shows local blueprints using this icon ![]() followed by workshop blueprints that you are subscribed to using this icon
followed by workshop blueprints that you are subscribed to using this icon ![]() . When you use a workshop blueprint is will be downloaded and added to your local blueprints.
. When you use a workshop blueprint is will be downloaded and added to your local blueprints.
Workshop Details
When you open the details screen of a workshop blueprint you may see description information about the blueprint. This information is downloaded from the Steam Workshop.
To see additional details on the workshop click "Open Workshop".
Publishing
When you open the details screen of a local blueprint you will see a "Publish" button. Clicking this will publish your mod to the Steam Workshop. Once the mod is published the workshop page will open where you can add a description, additional screenshots, and revision text.
Two file changes take place at this time as well. The first is in the .bp file (the blueprint) where the workshop id number is added at the end of the file. This links the file to the workshop item so that future publishing will update the item on the workshop instead of creating a new item. Also, a file named metadata.mod is created in the local mod folder. See Keen:Mod Metadata for information on how to use this file.