Toolbar: Difference between revisions
CptTwinkie (talk | contribs) mNo edit summary |
CptTwinkie (talk | contribs) mNo edit summary |
||
| (19 intermediate revisions by the same user not shown) | |||
| Line 1: | Line 1: | ||
{{ | {{SEO|image_url=http://www.medievalengineerswiki.com/images/1/1d/Toolbar4.png|description=The toolbar has multiple uses but exists mostly as a visual representation of shortcuts to items that can be equipped, activated, or otherwise selected in some way.}} | ||
<!-- This page is transcluded into other pages. Changing it will affect the contents of other pages. Check "What links here" for usage before making changes. --> | |||
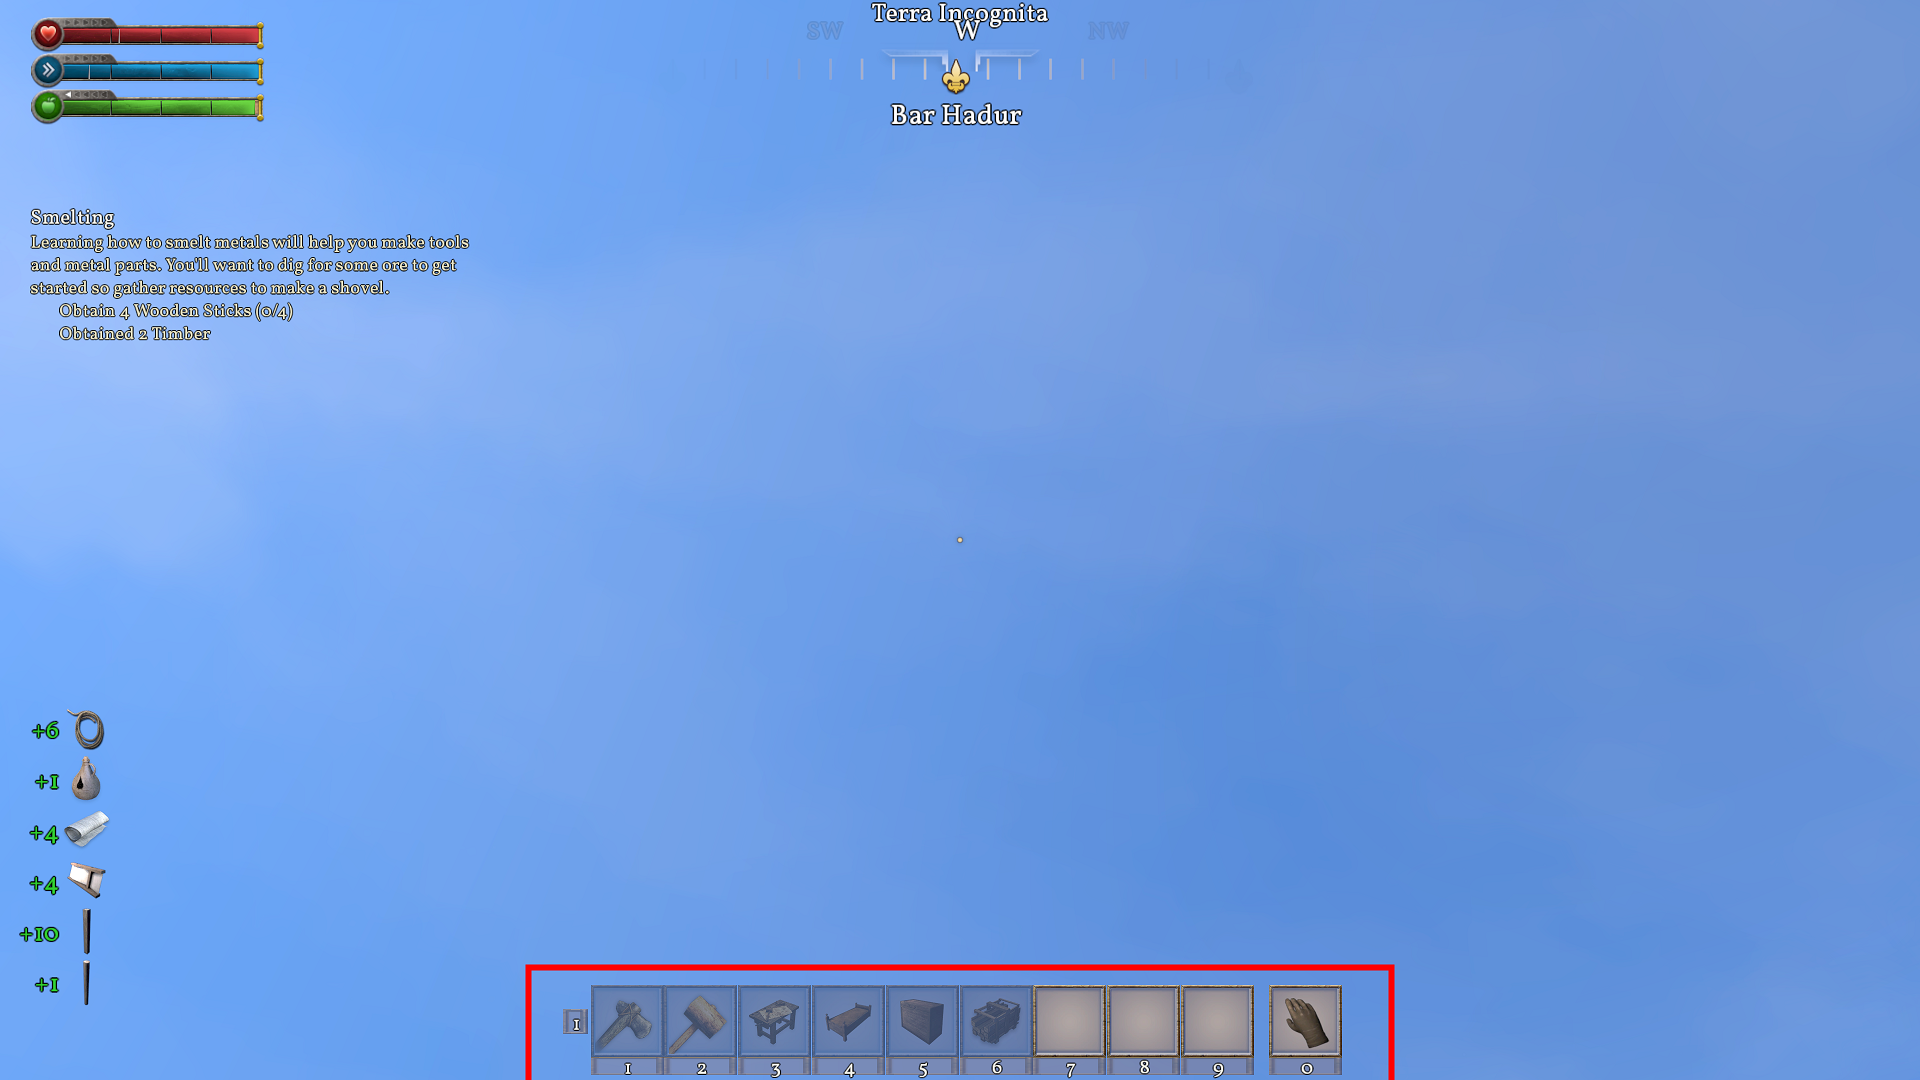
{{Thumbnail|Toolbar1.png|Toolbar Location on HUD}} | {{Thumbnail|Toolbar1.png|Toolbar Location on HUD}} | ||
{{Justify|The toolbar has multiple uses but exists mostly as a visual representation of shortcuts to items that can be equipped, activated, or otherwise selected in some way. It is meant to be easily configurable and to display information in an easy to understand format. Each toolbar has 9 items slots and a 10th slot that represents empty hands. The empty-hands slot can be activated by pressing {{Key|0}} or {{Key|backquote}} (by default) at any time to generally unequip any toolbar item. Doing so equips the default manipulation tool and rope manipulation tool.}} | |||
{{ | |||
<noinclude>{{Version <!-- Do not change the version until the entire page is up-to-date --> | |||
|release=0|major=6|minor=3}}</noinclude> | |||
===Adding and Removing Items=== | ===Adding and Removing Items=== | ||
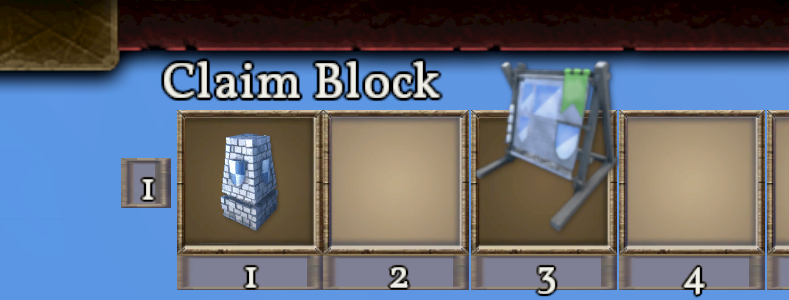
{{BigThumb|Toolbar4.png|Item Being Dragged to the Toolbar}} | {{BigThumb|Toolbar4.png|Item Being Dragged to the Toolbar}} | ||
{{Justify|Items can be added, removed, and organized on the toolbar in a few ways. These include ''drag and drop'', ''double-click'', and ''right-click''. | |||
Drag and drop ({{Key|lmb}}) is the most intuitive. Although it is not the fastest method it works in all cases. Players simply interact with the Toolbar, [[General Search]], and [[Inventory and Crafting|inventory]] by using the mouse to drag icons to the toolbar and drop them onto a slot. Items can be rearranged on the toolbar using the same technique. | |||
Double-clicking ({{Key|lmb}}{{Key|lmb}}) on items will also add them to the toolbar. This interaction is a little less intuitive as the items are added to the first free slot on the current toolbar. If no free slot is available, the first selected slot is used. If no slot is selected then slot 1 is used. This method is inconsistent in inventories, where double-clicking results in an attempt to transfer the inventory item to another inventory. | |||
The final option is right-clicking ({{Key|rmb}}) on items to add them to the toolbar. This is the fastest method but is subject to a different caveat in its behavior. Right-clicking a consumable item will result in an attempt to consume or activate it rather than adding it to the toolbar. However, inventory items can be added by right-clicking, unlike double-clicking. Right-clicking adds items in the same order that double-clicking does. | |||
Items can be removed from the toolbar by double-clicking or right-clicking. These both have the same behavior, giving right-clicking the speed advantage.}} | |||
{{ClearLine}} | {{ClearLine}} | ||
===Equipping | |||
===Equipping and Consuming=== | |||
{{BigThumb|Toolbar2.png|Toolbar with Slot 3 Activated}} | {{BigThumb|Toolbar2.png|Toolbar with Slot 3 Activated}} | ||
{{Justify|Many toolbar items can be equipped. This includes all blocks, tools, and weapons in the game. Equip items by adding them to the toolbar and pressing the number ({{Key|1}}—{{Key|9}}) that corresponds to the toolbar slot. When you equip an item it is highlighted with a dark brown color and appears in front of the character in some way. If the item is an inventory item, such as a small block or treasure map, it will become semi-transparent when the last one is removed from your inventory. This indicates that you no longer have the item available to equip. | |||
Some items are consumable. This includes all foods and drinks which are eaten, bandages which are applied, and schematics which are read to unlock research. This works the same as equipping except the item is consumed rather than being equipped. If the last item is consumed from your inventory, the slot will become semi-transparent indicating that there is nothing left to consume.}} | |||
{{ClearLine}} | |||
===Equipping Multiple Items=== | |||
{{Justify|Equipped items have hand assignments of left, right, or both. A right-hand item and a left-hand item can be equipped at the same time. This functionality is provisional at this time and the only left-hand item in the game is the [[Torch]]. This is new functionality and it has some inconsistencies at this time. Most notably, the last item equipped handles control input. So equipping a block and then a torch will direct input to the torch which does nothing but burn. Equipping in the opposite order will direct input to the block allowing you to place the block while enjoying the light from the torch. Items are unequipped one at a time in reverse of the order that they were equipped. e.g. if you equip a torch and then a block, you will unequip the block first and then the torch after that.}} | |||
{{ClearLine}} | {{ClearLine}} | ||
===Multiple Toolbars=== | ===Multiple Toolbars=== | ||
{{Thumbnail|Toolbar3.png|Toolbar Number (Multiple Toolbars)}} | {{Thumbnail|Toolbar3.png|Toolbar Number (Multiple Toolbars)}} | ||
{{Justify|There are multiple toolbars available for use. Nine toolbars with nine slots each allowing for a generous number of slots. Toolbars are swapped sequentially using {{Key|period}} (by default) to display the next toolbar and {{Key|comma}} (by default) to display the previous toolbar. The current toolbar number is displayed on the left side of the toolbar.}} | |||
[[Category:HUD]] | {{ClearLine}} <!-- Don't add any extra lines at the end | ||
--><noinclude>[[Category:HUD]]</noinclude> | |||
Latest revision as of 13:49, 11 June 2018

| Version: | 0.6.3 |
Adding and Removing Items

Drag and drop (![]() ) is the most intuitive. Although it is not the fastest method it works in all cases. Players simply interact with the Toolbar, General Search, and inventory by using the mouse to drag icons to the toolbar and drop them onto a slot. Items can be rearranged on the toolbar using the same technique.
) is the most intuitive. Although it is not the fastest method it works in all cases. Players simply interact with the Toolbar, General Search, and inventory by using the mouse to drag icons to the toolbar and drop them onto a slot. Items can be rearranged on the toolbar using the same technique.
Double-clicking (![]()
![]() ) on items will also add them to the toolbar. This interaction is a little less intuitive as the items are added to the first free slot on the current toolbar. If no free slot is available, the first selected slot is used. If no slot is selected then slot 1 is used. This method is inconsistent in inventories, where double-clicking results in an attempt to transfer the inventory item to another inventory.
) on items will also add them to the toolbar. This interaction is a little less intuitive as the items are added to the first free slot on the current toolbar. If no free slot is available, the first selected slot is used. If no slot is selected then slot 1 is used. This method is inconsistent in inventories, where double-clicking results in an attempt to transfer the inventory item to another inventory.
The final option is right-clicking (![]() ) on items to add them to the toolbar. This is the fastest method but is subject to a different caveat in its behavior. Right-clicking a consumable item will result in an attempt to consume or activate it rather than adding it to the toolbar. However, inventory items can be added by right-clicking, unlike double-clicking. Right-clicking adds items in the same order that double-clicking does.
) on items to add them to the toolbar. This is the fastest method but is subject to a different caveat in its behavior. Right-clicking a consumable item will result in an attempt to consume or activate it rather than adding it to the toolbar. However, inventory items can be added by right-clicking, unlike double-clicking. Right-clicking adds items in the same order that double-clicking does.
Equipping and Consuming

Equipping Multiple Items
Multiple Toolbars
